Upgradation of Data from NAV 2016 to NAV 2017 in Microsoft Dynamics NAV
Introduction:
To upgrade the database to NAV 2017, following steps must be completed.
- Convert the Database
- Upgrade the Application code
- Upgrade the Data
This blog describes the steps to Upgrade the Data.
Pre-requisites:
- A FOB file that contains the upgraded application code and upgrade toolkit.
- All application objects in the old database have been built.
- The database schema has been synchronized in the old application.
- All application objects are unlocked.
- All Microsoft Dynamics NAV Server instance records have been cleared from the dbo.Server Instance table in the old database in SQL Server.
- Updated permission sets permissions XML files.
- Windows Poweshell
- Sql Server Management Service(SSMS)
Steps:
The first seven steps are completed in the ‘Converting the database from NAV 2016 to NAV 2017’.
- SQL Backup
- Upload 2017 Licence
- Delete all objects from the old version database i.e NAV 2016
- Uninstall NAV 2016 and install NAV 2017
- Convert the NAV 2016 Database
- Connect to the server instance
- Run the Schema synchronization
- Importing the application objects:
- Import the all merged file (.fob) created in the upgrade of the application code.
- The system will prompt to open worksheet
- Click on Replace All then click on OK.
- Now import the upgrade code. This upgrade code is located in the NAV DVD in the Upgrade Toolkit folder NAV DVD > UpgradeToolkit >Data conversion Tool
- Import the Upgrade9001000.FOB file for upgrade from NAV 2016 to NAV 2017.
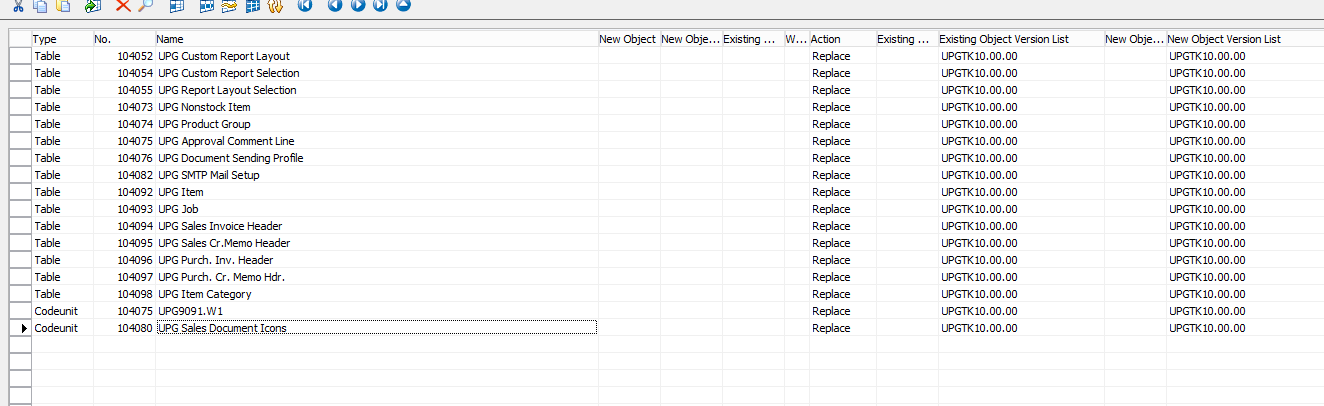
- Here 17 objects are imported.
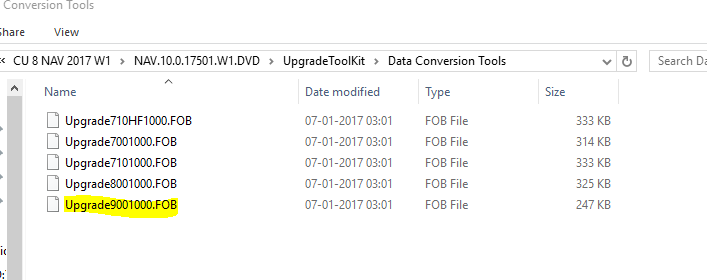
UpgradeToolkit 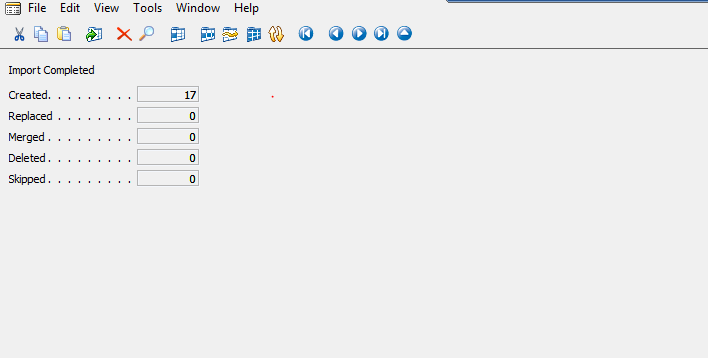
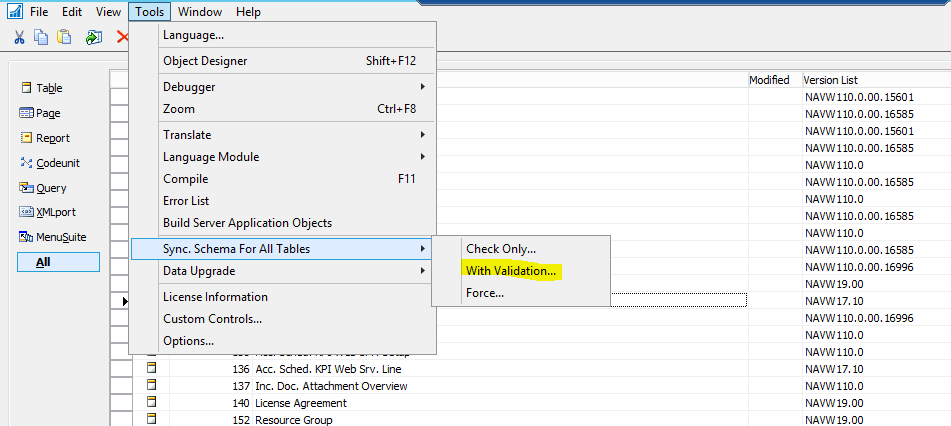
- Run the Schema Synchronization:
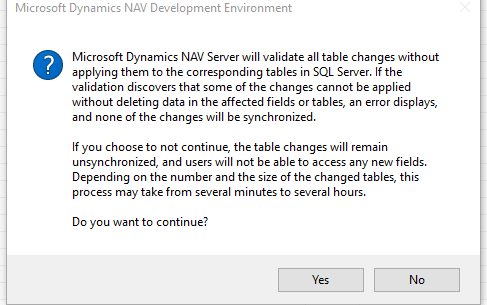
- Open the Microsoft Dynamics NAV 2017 Development Environment, navigate to Tools menu then click on Sync. Schema For All Tables > With Validation.
- This will pop up a dialogue box, click on Yes.
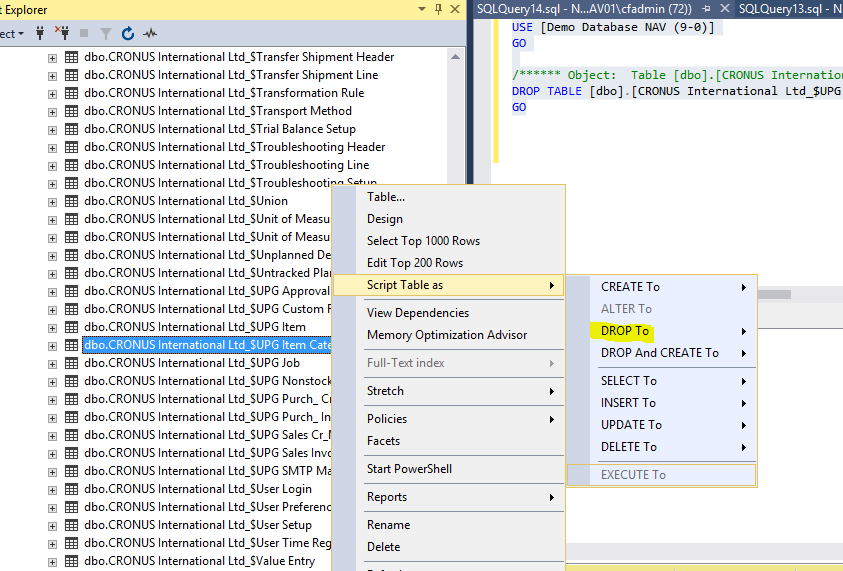
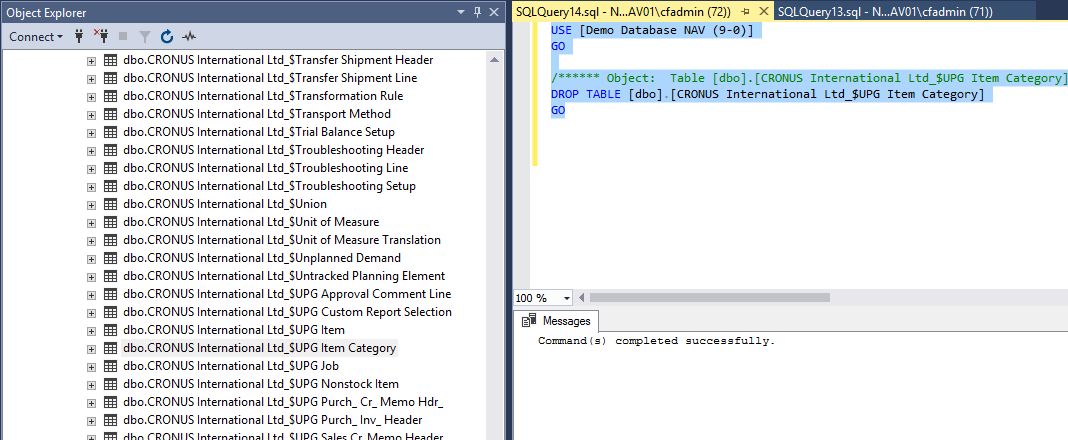
If Sync.Schema with validation pops up an errors like below ‘There is already an object named ‘CRONUS International Ltd.-$UPG Item Category’ in the database follow the below steps:

- Launch SSMS(SQL Server Management Studio), expand the Database converted
- Select the table and run the query to drop it
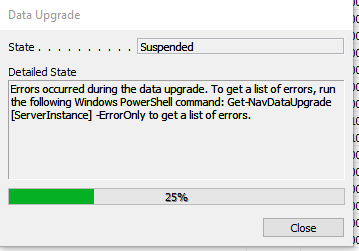
- Run the Data Upgrade Process
- Open the NAV 2017 Development Environment as Administrator.
- Navigate to Tools tab > Data Upgrade > Start.
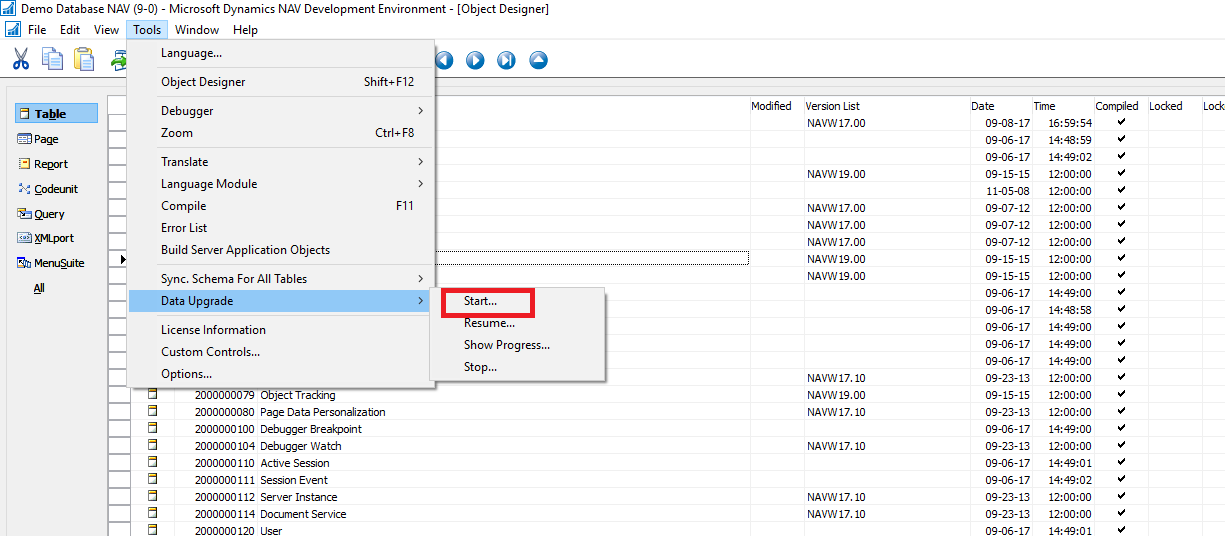
This will pop up a dialogue box, click on yes.
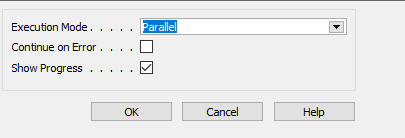
- Select the Execution mode as parallel, enable show progress and click on OK.
- To view the error, Open Windows Powershell as Administrator, enter the below command
If there are any errors you may get an error dialogue box.
Get-NAVDataUpgrade serverinstancename -Erroronly
Get-NAVDataUpgrade Upgrade -Erroronly
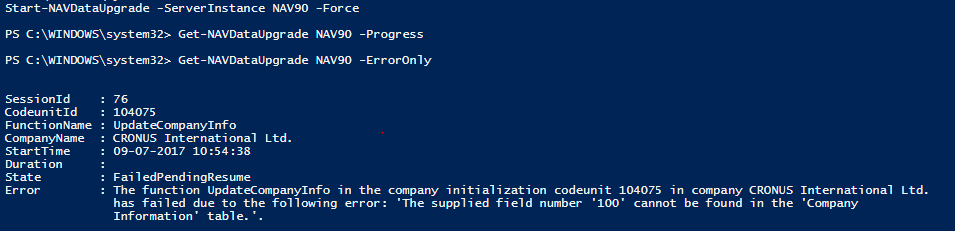
The above error is shown in the Codeunit 104075,compile the codeunit.
- The codeunit will pop up errors which needs to be fixed. Once the error is fixed compile all objects then run the Data upgrade process step no 10
- This process will continue until all the errors are fixed.
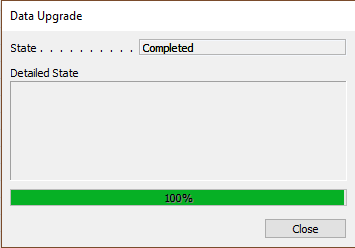
The data upgrade process is completed without any errors.
- Delete the upgraded objects
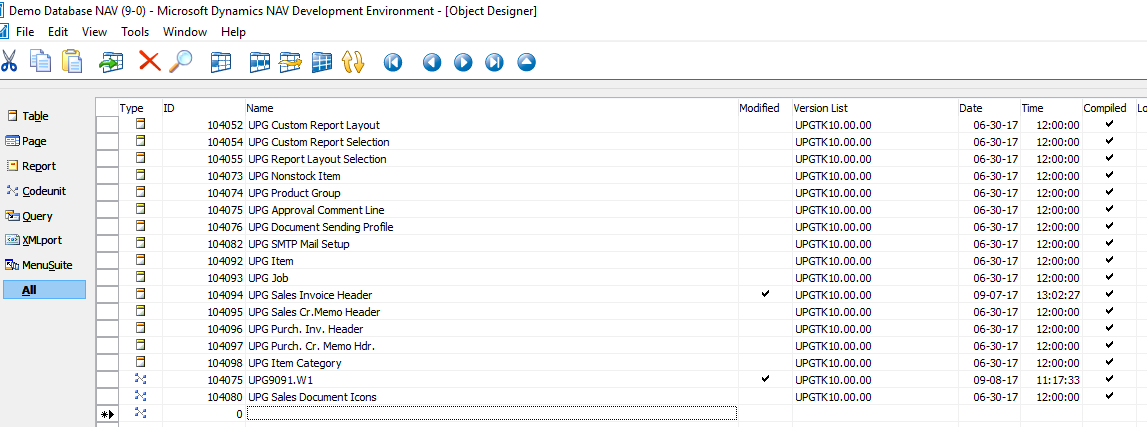
- After the upgrade is completed, delete the upgraded objects imported from the Upgrade Toolkit.
- Filter the upgrade objects by their version list.
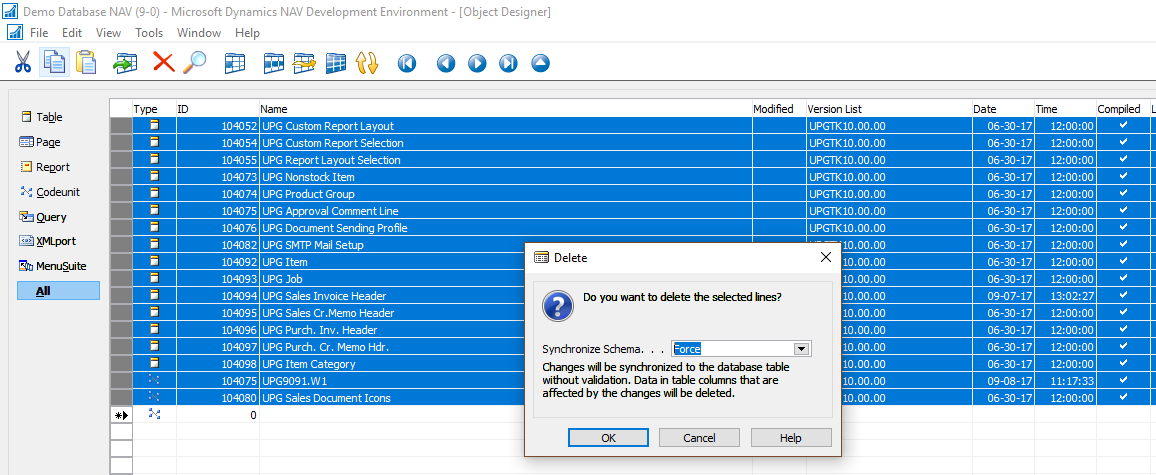
- Select all the upgrade objects and click on Delete
- Set the Synchronization schema to Force and click on OK
- After Deletion, compile all objects.
- Import upgraded permission set and permissions.
- Open the NAV 2017 Development Environment, open the NAV 2017 database ‘Demo Database (10-0).
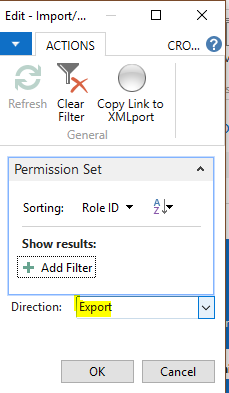
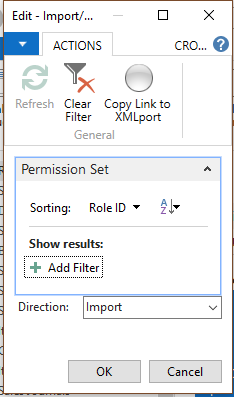
- Navigate to XMLport 9171 Import/Export Permission Sets and click on Run
- Choose Export option and click on OK and save the file.
- Repeat the same procedure for XMLport 9172 Import/Export Permissions
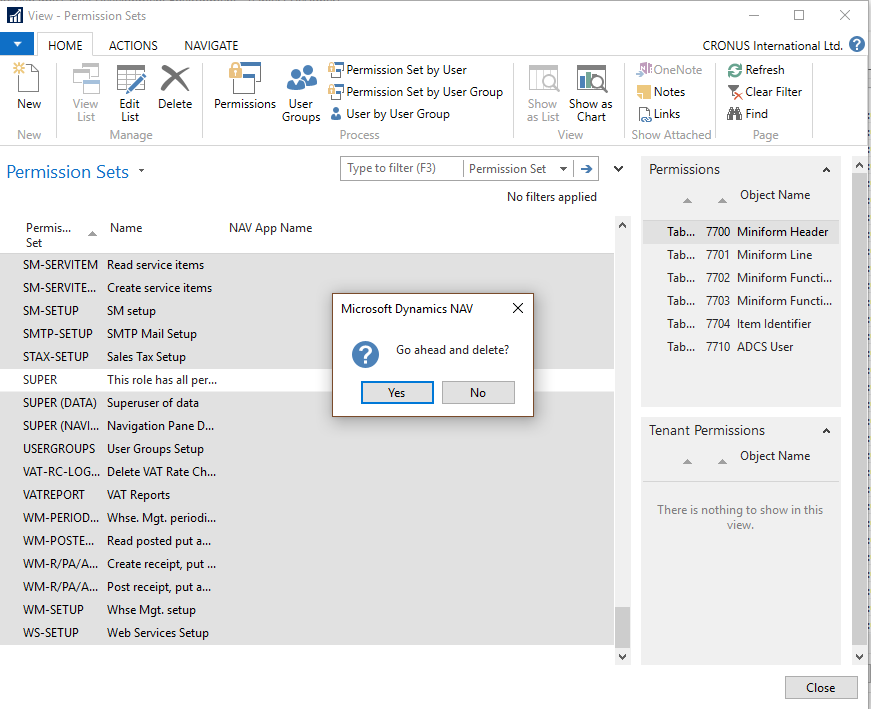
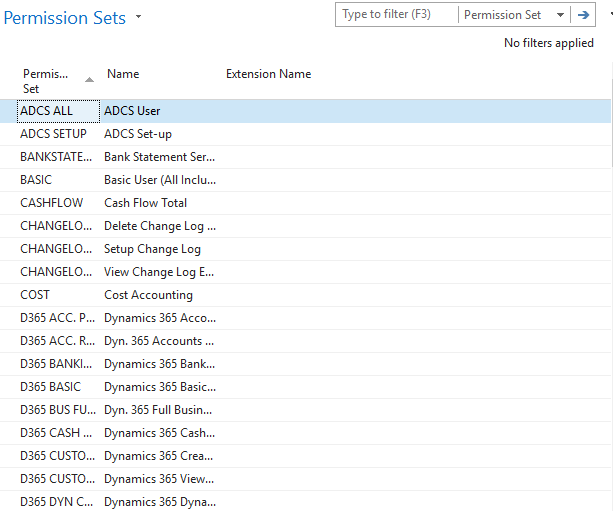
- Now open the Upgraded database in NAV 2017, navigate to page 9802 Permission Sets and click on Run.
- Delete all permission sets except Super permission.
- Run XMLport 9171 to import permission sets, select the Import option then OK
- Select the permission sets exported then click on OK.
- Run the Page 9802 Permission Sets, all the permission set are imported.
- Repeat the same for XMLport 9172, import the permissions.

- Set the language of the upgraded database.
Navigate to Tools select the language required then on OK.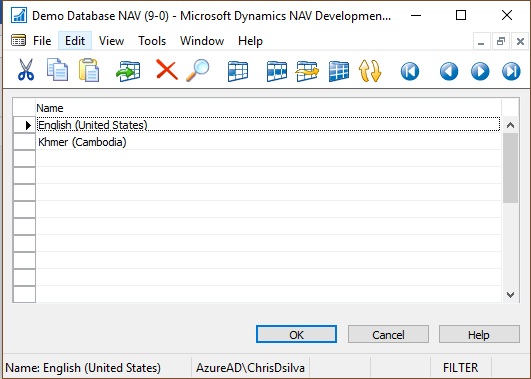
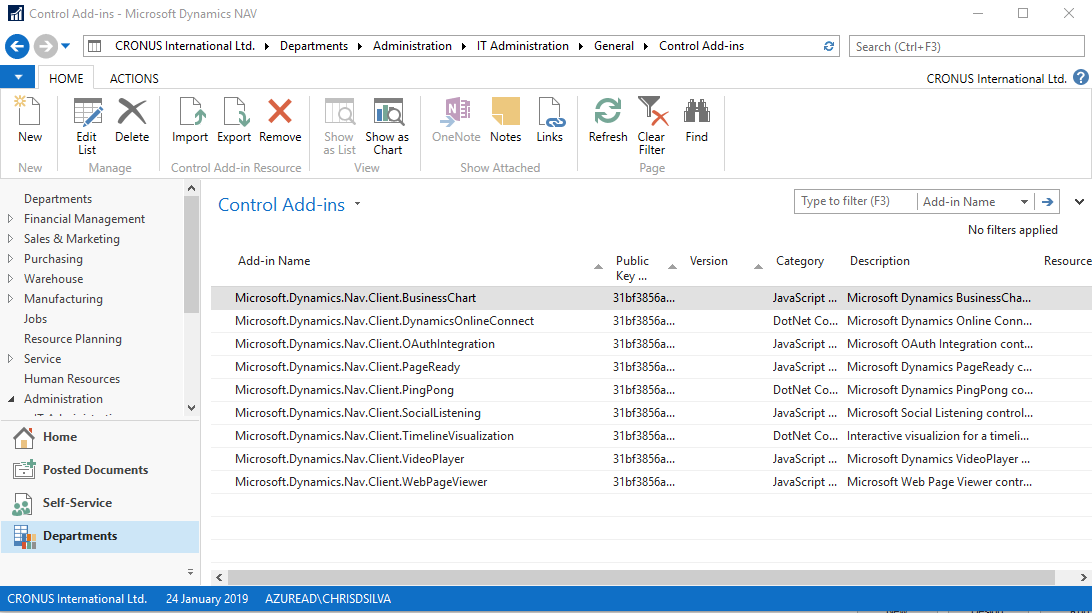
- Add Control Add-ins
Browse in the search bar to Control Add-ins to verify the below control Add-ins are present.- Dynamics.Nav.Client.BussinessChart
- Dynamics.Nav.Client.PageReady
- Dynamics.Nav.Client.PingPong
- Dynamics.Nav.Client.VideoPlayer
- Dynamics.Nav.Client.SocialListener
- Import Payment Service and Data Encryption Key (optional).
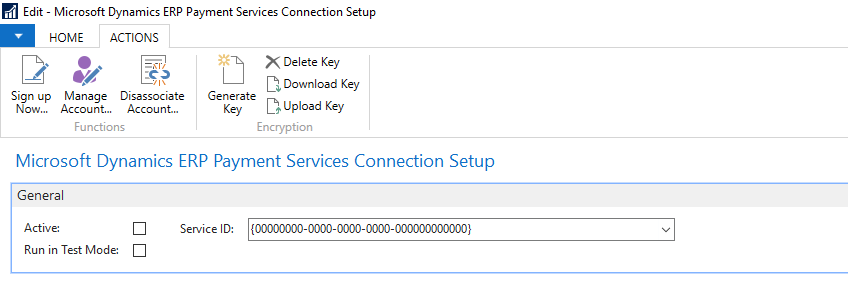
If we have used payment service in our old database then we need to re-set up payment service in NAV 2017 by importing the key.- Browse to Payment service Connection set up in the search bar
- Click on Upload Key to upload the encrypted key. This key was downloaded in the previous version using the Download key.
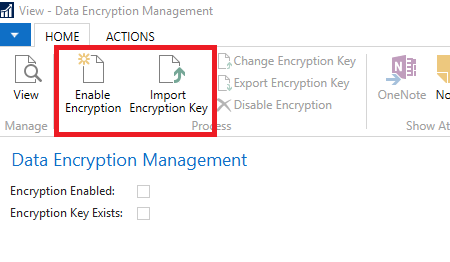
- To import key for Data Encryption Management, browse to Data Encryption Management in the search bar.
- Click on Enable Encryption to enable the encryption and import the key using Import Encryption Key. Before importing the key needs to be exported from NAV 2016.
Conclusion :
After the Upgradation of the Data, the upgradation of NAV 2016 to NAV 2017 is successfully completed.
