User based Personalized Workspace from UI in D365 Operations
Introduction:
In D365 Finance and Operations, there are various modules and each contains many forms. Users working in Operations uses forms from different modules and sometimes it becomes difficult to navigate or remember the path of all forms. It is also time consuming. A good solution for this is creating a Personalized Workspace and adding all the required items in it. Everyone know this can be done from code using forms. Another simple way is to create a Workspace directly from UI and it will be only available to the user who created it. In this blog, I will show you how to create workspace specific to users from UI.
Steps:
- Create Workspace
- Rename Workspace
- Add elements to workspace
Create Workspace:
- Go to D365 Operations Default Dashboard page.
- Right click anywhere on the Dashboard -> Select Personalize
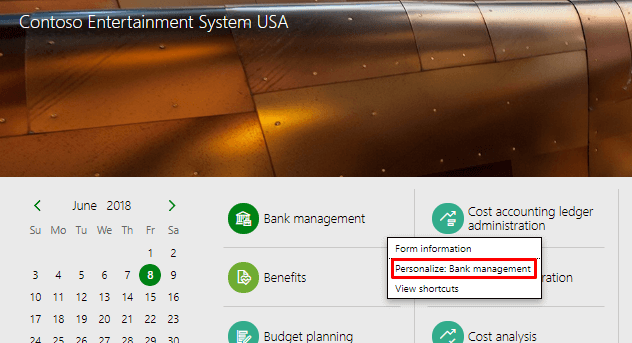
- In the Dialog Select an option ‘Add a workspace’. This will add a new Workspace at the end of page
Rename Workspace:
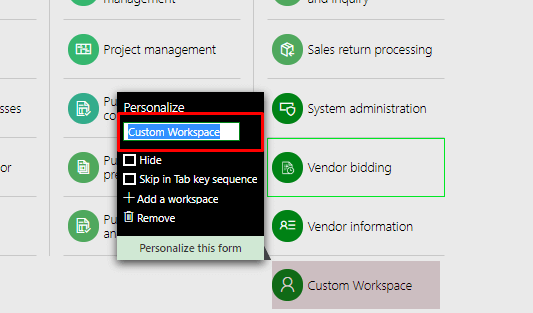
- Right Click the Workspace -> Click Personalize: My Workspace 1

- Enter a Name in the textbox
Add elements to workspace:
- Go to form you frequently use to add on Workspace. In this case I will add All customers to my workspace.
- Accounts Receivable -> Customers -> All Customers
- In Action Pane, go to Options Tab -> Personalize, select Add to Workspace.
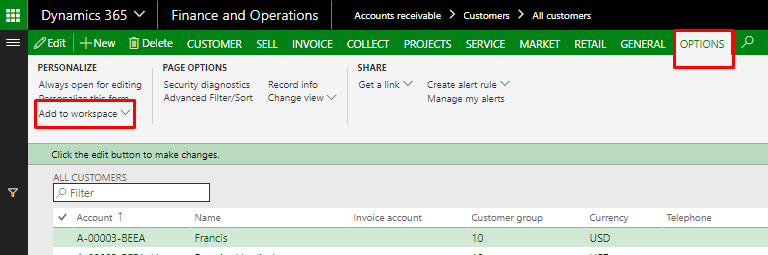
- In Workspace dropdown, add name of newly created workspace.

- In Presentation dropdown, select the format in which you want to display the form
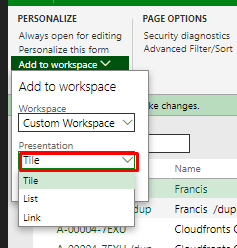
- Tiles- It is a summary view.
- List- It is a Tabbed format. It can be horizontal or vertical.
- Link- It will simply display a link taking you to the form.
Conclusion:
This is how we can create a personalized workspace which will be limited to respective user. We can also personalize the workspace using controls residing in personalize option.I will provide more details on this in my next blog.
