CRM Online Migration using SSIS
In this Blog we will walk-through the migration of Data from Microsoft Dynamics CRM (Source) to Microsoft Dynamics CRM (Target) 2015 using SSIS. We would be using SSIS Integration Toolkit for Microsoft Dynamic CRM by Kingsway Soft.
We would be referring SSIS Integration Toolkit for Microsoft Dynamics CRM by Kingsway Soft as Kingsway-SSIS Toolkit. This toolkit provides 4 major components for Integration and migration of Data.
- Microsoft Dynamics CRM Connection Manager
- Microsoft Dynamics CRM Source Component
- Microsoft Dynamics CRM Destination Component
- Microsoft Dynamics CRM OptionSet Mapping Component
Pre-Requites:
This Toolkit is supported on below versions of Microsoft Dynamics CRM and Microsoft SQL server.
.NET Framework 3.5 SP1
Microsoft Dynamics CRM
Microsoft Dynamics CRM Online
Microsoft Dynamics CRM Server 2015
Microsoft Dynamics CRM Server 2013
Microsoft Dynamics CRM Server 2011
Microsoft Dynamics CRM Server 4.0
Microsoft Dynamics CRM Server 3.0
SQL Server
Microsoft SQL Server 2014 (since v5.0)
Microsoft SQL Server 2012
Microsoft SQL Server 2008 R2
Microsoft SQL Server 2008
Microsoft SQL Server 2005
Other Tools that provide the same integration as Kingsway Soft are as below:
Cozyroc.com
PragmaticWorks.com
- https://pragmaticworks.com/Products/Task%20Factory/Features/DynamicsCRMSource
- https://pragmaticworks.com/Products/Task%20Factory/Features/DynamicsCRMDestination
Work Flow:
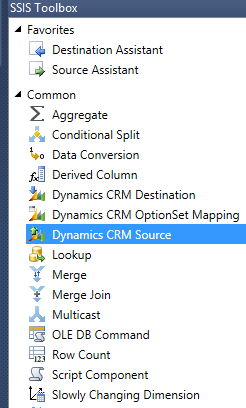
- After Installation of Toolkit, below options are visible in SSIS Toolbox in SSDT (SQL Server Data Tools).
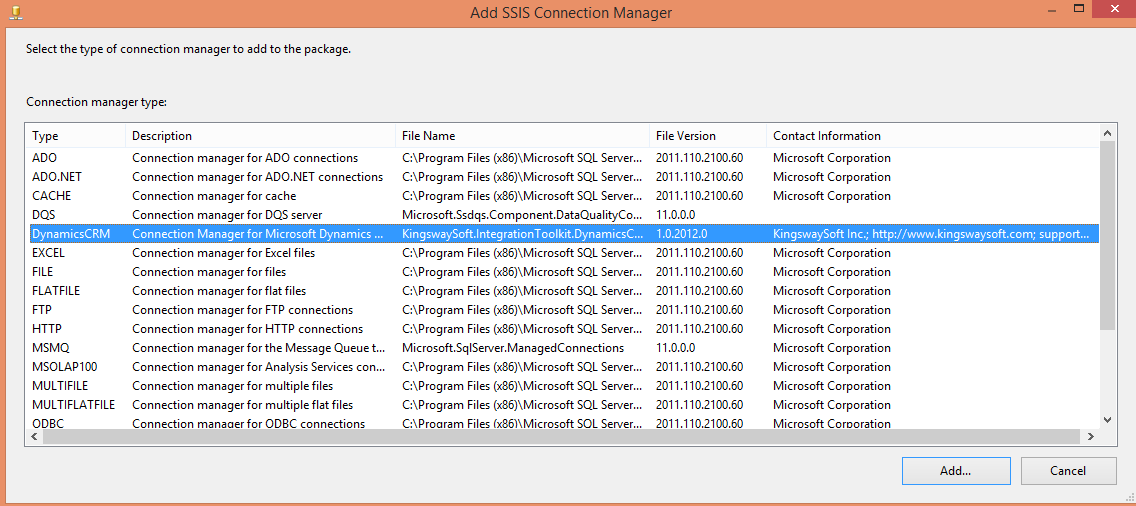
A new connection can be added in Connection Manager as below for DynamicsCRM.
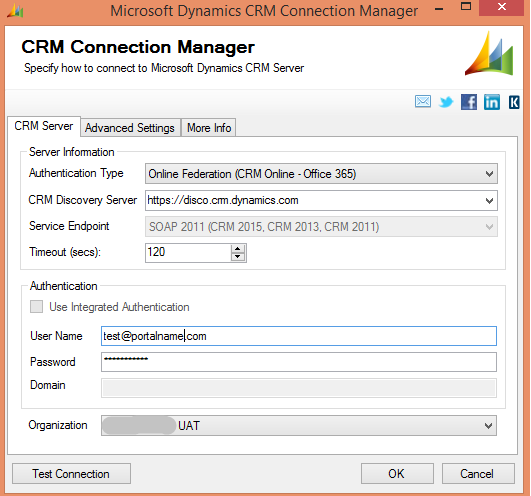
Information needs to be provided to connect to CRM server as below.
(http://www.kingswaysoft.com/products/ssis-integration-toolkit-for-microsoft-dynamics-crm/help-manual)
- The Authentication Type option allows us to specify the type of CRM server (deployment) and what authentication is used. There are four options available.
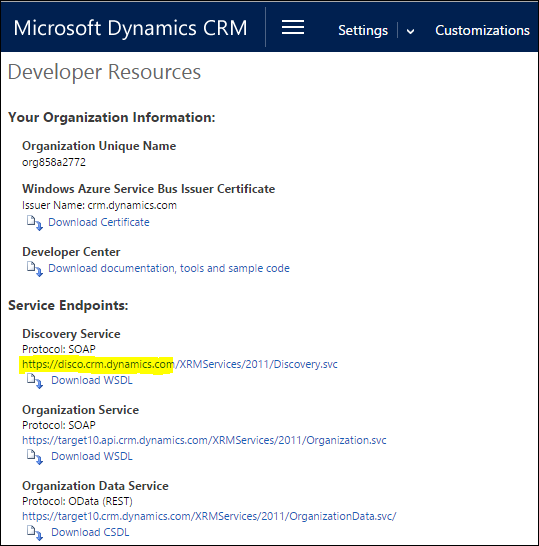
- The CRM discovery server can be found in the CRM system from Settings → Customizations → Developer Resources after logging in to your CRM application. Service endpoint gets auto populated.
- You can specify the Timeout in seconds. Default is 2 minutes.
- On providing the User Name and Password, Organization gets populated in drop down list. Select the Organization name and test the connection. Once the connection is successful. Click Ok. If you connectivity is through Proxy server you can specify the connection details for the same in the second tab Advanced Settings. It is recommended to have the box ticked-on for Retry on Intermittent Errors.
- Follow the same steps as above for creating Destination connection for Target CRM where the data is to be migrated.
- Launch SSDT (SQL Server Data Tools and select Integration Project and drag and drop the Source and the Target. Here in this example we have not performed any data or file transformations. It’s simply connecting to CRM source and pushing the data to Target CRM based on mappings specified for entities as well as Text Lookups specified if any.
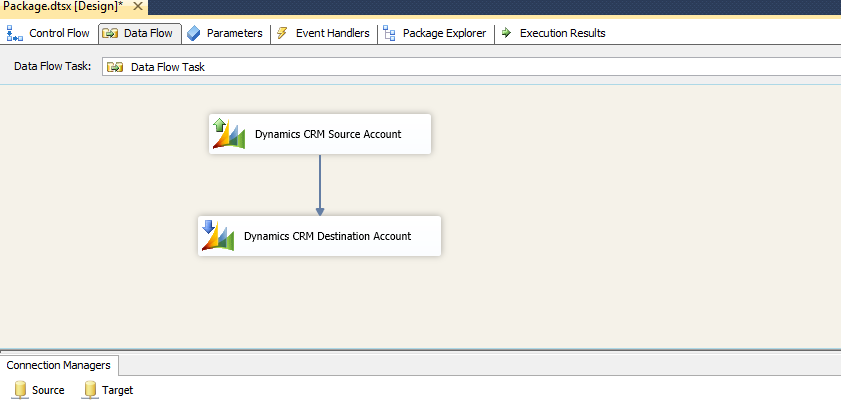
In this example we are migrating Entity – Accounts.
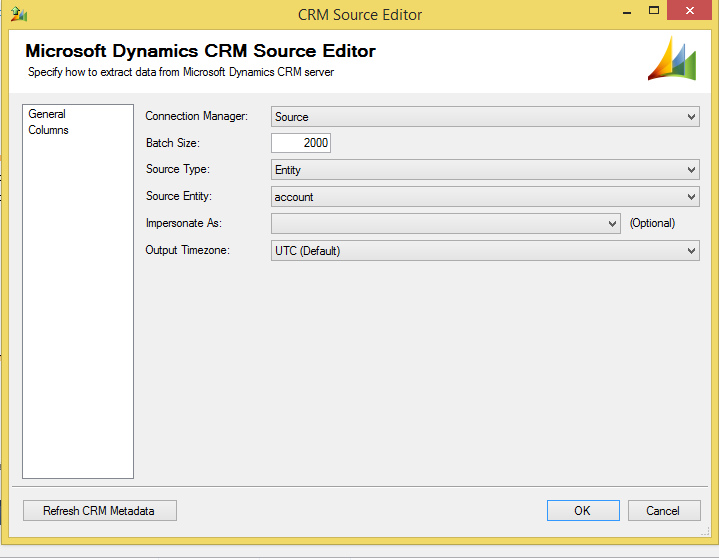
CRM source Connection name in this example is named as “Source” and CRM Destination connection as “Target”.
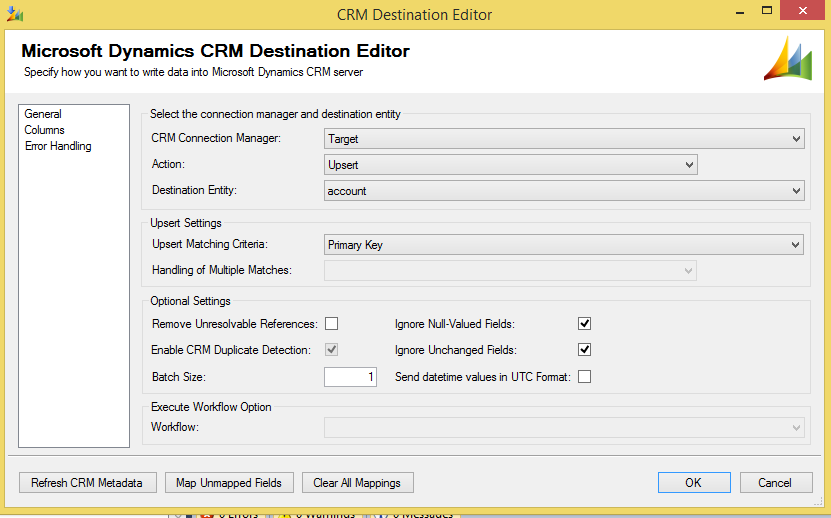
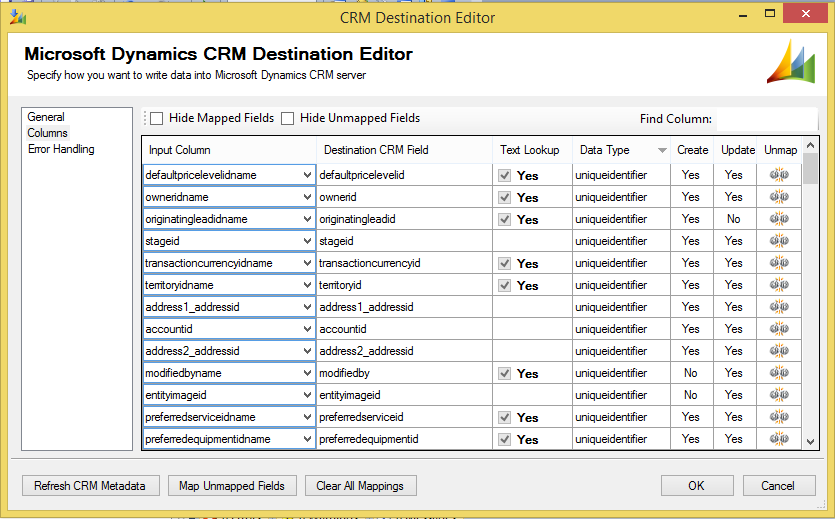
Using this toolkit, in the columns Tab, Most of the columns gets auto-mapped. Verify the mappings, specifically the ones with Text Lookup. Action gives the options like Create, Update, Delete, Upsert, Merge, Convert and Execute Workflow. We need to select Create if we are simply migrating the data into target CRM (History Load). Select the Destination entity. Upsert Settings are applicable only if Upsert Action is selected.
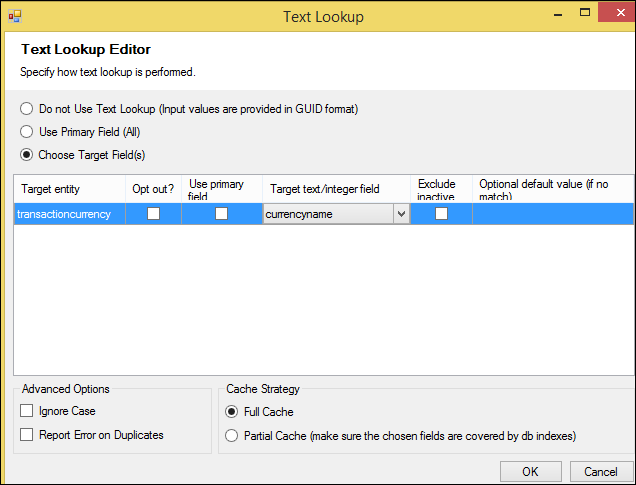
Choose Target Fields. Target Entity gets auto populated. Using the drop down list select Target text/ Integer Field. Advanced Options can be left unselected. Cache strategy needs to be selected with Performance and size of data that needs to be migrated. (This is similar to Cache mode in SSIS look-up transforms).
Now the package is ready to be executed. Execute the package and verify by logging into CRM, all the fields are populated.
Note: As a general practise during SSIS package creation, sequence containers are used for each entities that are to be migrated. Only one source and destination CRM connection needs to be created.
Benefits of Parallelism can be used for performance benefits as well as individual tasks (for single entity) can be selected in the data flow to be executed, with others as disabled.
