Customer Journeys in Dynamics 365 for Marketing
Introduction:
In this blog we will demonstrate how to create Customer Journeys in Dynamics 365 for Marketing. As you engage potential customers, they start by discovering your product, evaluate whether it meets their needs, look for a good offer, and finally make a purchase. This process is called as Customer journeys.
Pre Requisites:
- Before we start we need to have live segments towards whom we can target our marketing initiatives. Check out how to create segments here.
- We also need to have our Marketing emails designed and ready to go. Check out how to create marketing emails here.
Implementation:
In our scenario we have taken an example where CloudFronts wants to organize a web development webinar and as a marketing initiative we send out emails to web developers. Below shown is the view of the Customer Journey.
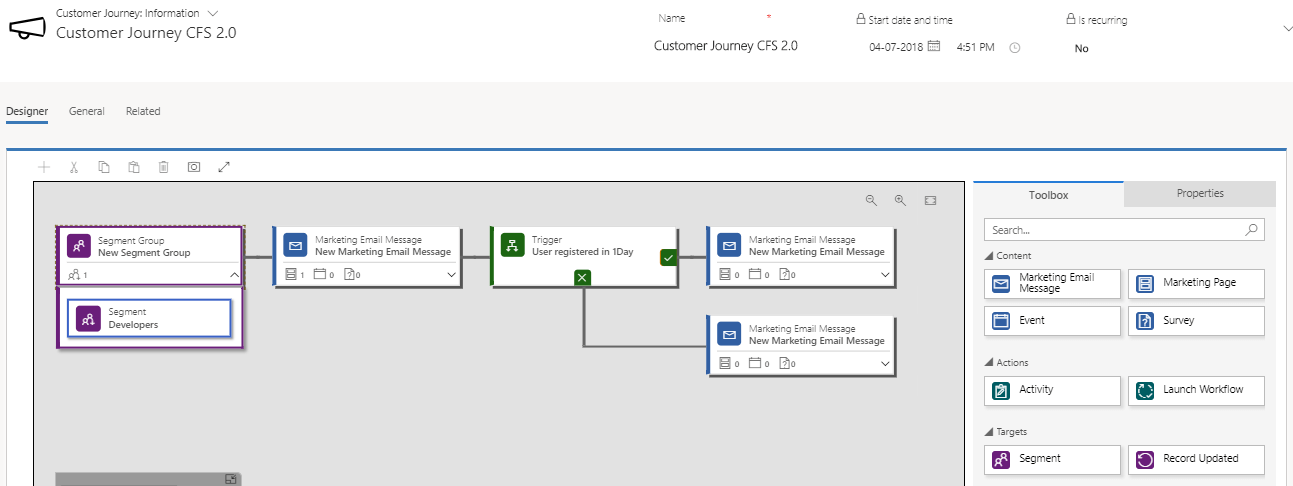
Step 1: First take a segment tile from the right toolbox panel and drag it on the canvas and we enter the name of the segment that we want to target. Here as stated earlier we have selected a target segment consisting of web developers.
Note: The segment will appear only if it is in the “Live” state.
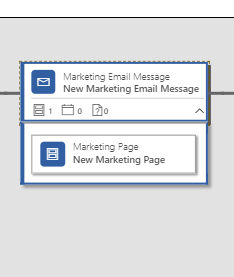
Step 2: We drag and drop the Marketing Email tile, and then add a Marketing page in the Marketing email. We have done this as we have added a link to a marketing page in our marketing email.
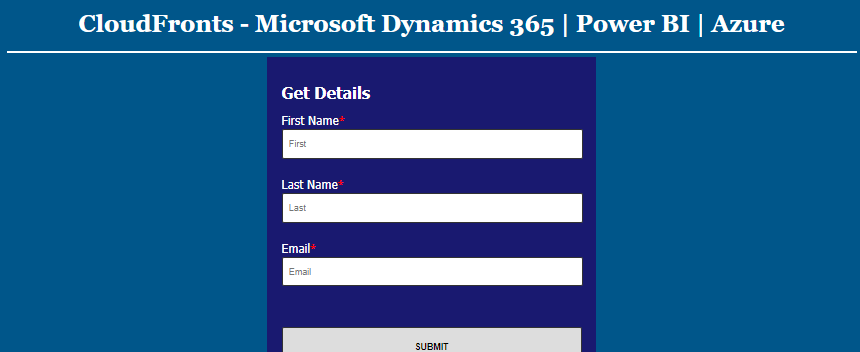
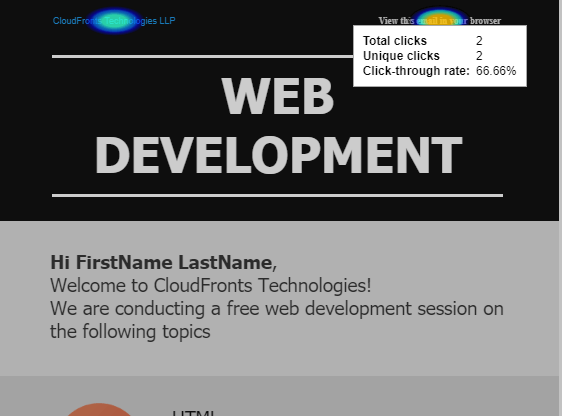
Step 3: The marketing page designed is as shown below. When the users click on the link in the email they will be redirected to this page which contains a Marketing Form.
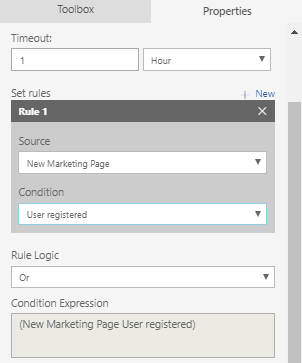
Step 4: Then we add a trigger tile in the customer journey with the condition to check if the user has submitted the marketing form in one hour as shown below.
 If the user has registered in one hour then he/she will receive a “Thank You” email with the details of the webinar.
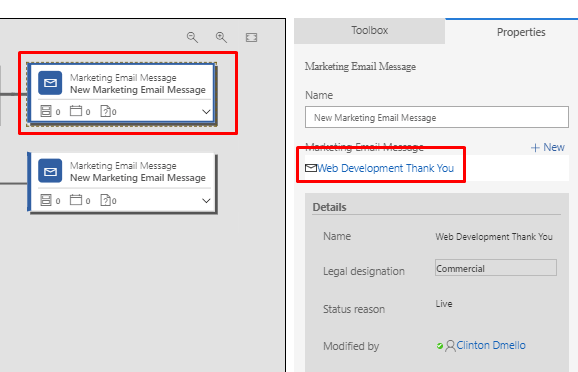
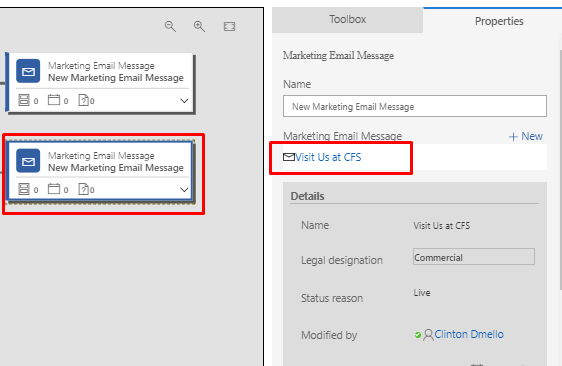
And if the user has not registered within the given period of time he will receive another email which says visit us as www.cloudfronts.com to know more about us.
 Once the everything is set, the customer journey will begin at the specified Start time and accordingly end at the specified End time. Once the customer journey is run completely we can get a lott of insights regarding the events that took place.
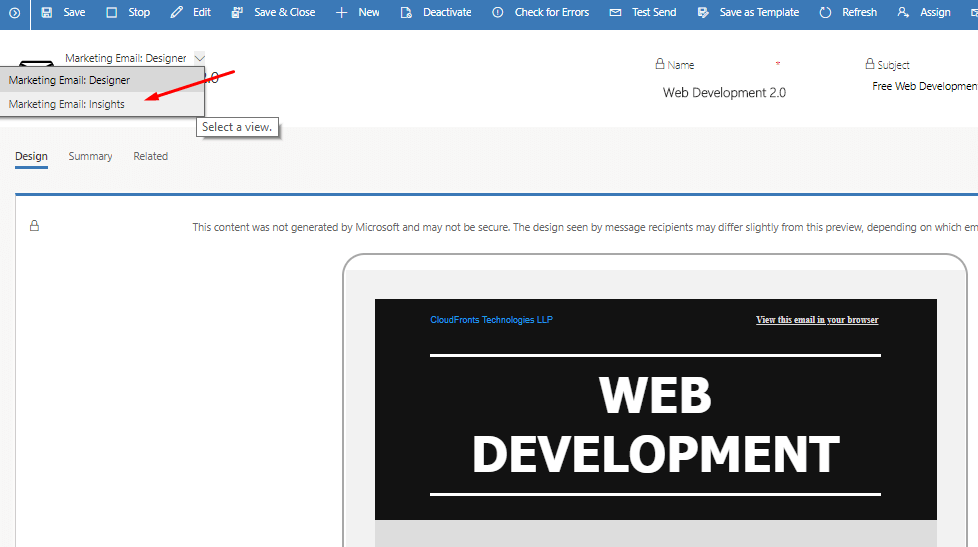
Step 5: We can go to the Marketing emails section and click on the insights option as shown in the pic below:
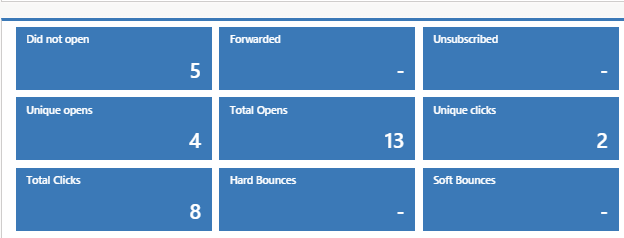
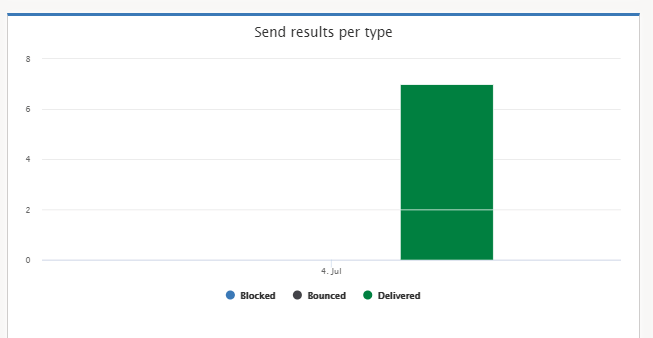
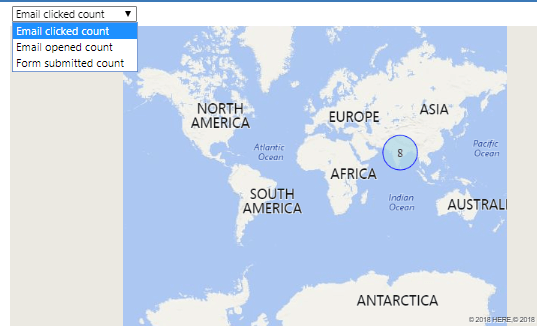
 Below shown are the insights generated:
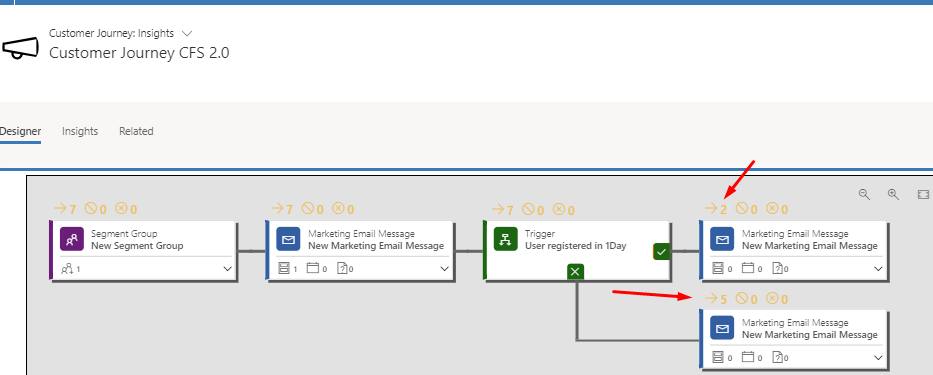
 Similarly we can also view the insights generated for the Customer journeys. The below image shows the number of contacts on each of the tiles as they progressed throughout the journey. The arrows show that only 2 contacts out of 7 submitted the Marketing form and hence received the Event details while the rest 5 contacts received the “Visit Us” Marketing email.
Conclusion:
Using this feature we have a control of how we want our users to interact with the emails and hence generate more and more leads and also gain insights on the process as a whole.
