Picking and Receiving – Transfer Out for Dynamics 365 Retail POS
Steps to Perform Transfer Out on Dynamics 365 for Retail:
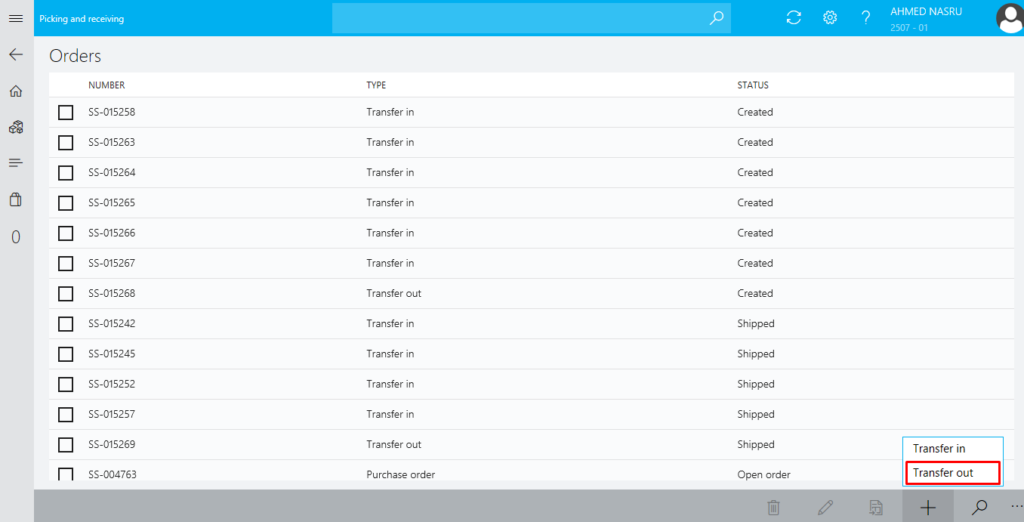
- Go to Picking and Receiving –> click on + icon and click Transfer out.
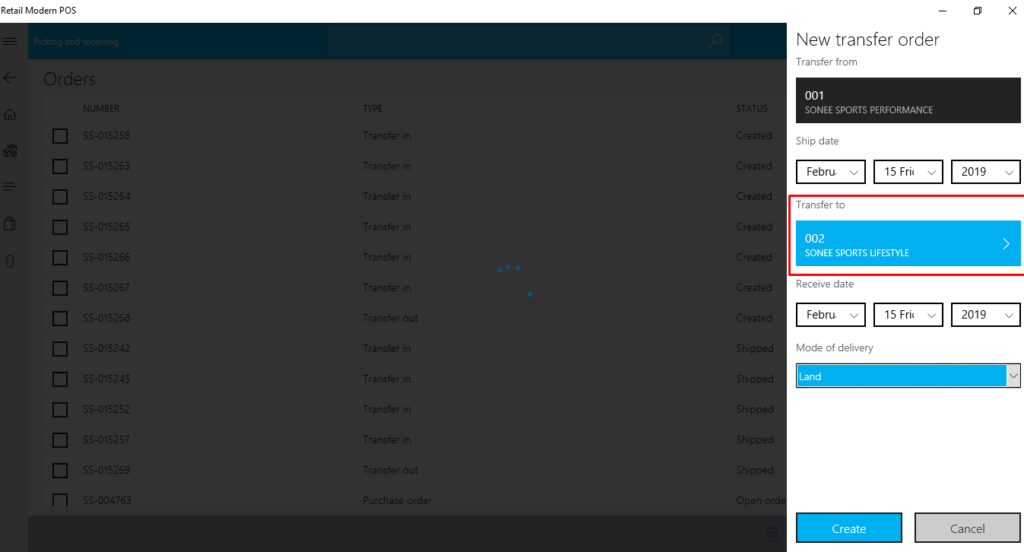
- Select the store to which you want to transfer out, Delivery date and mode of delivery.
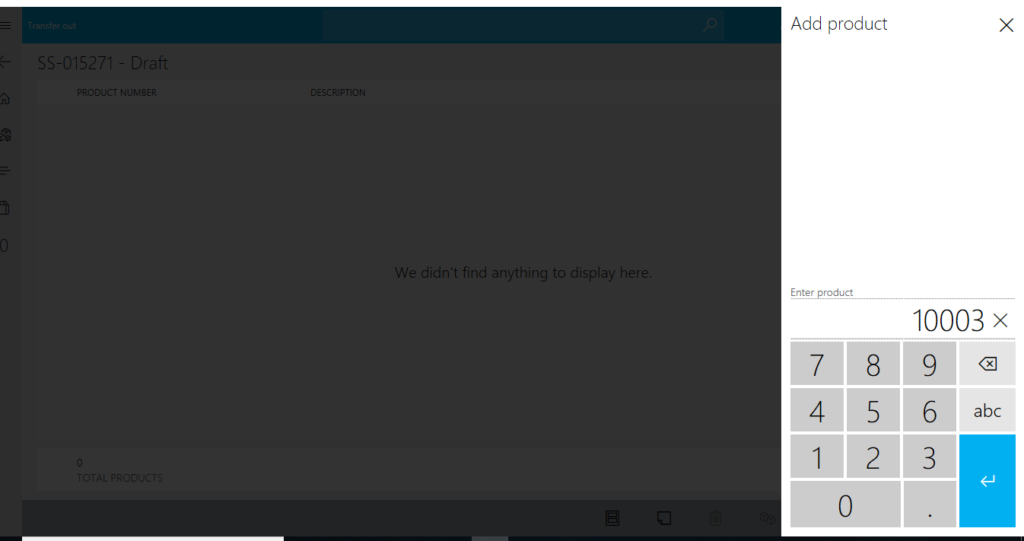
- Add or scan all the products and its quantity.
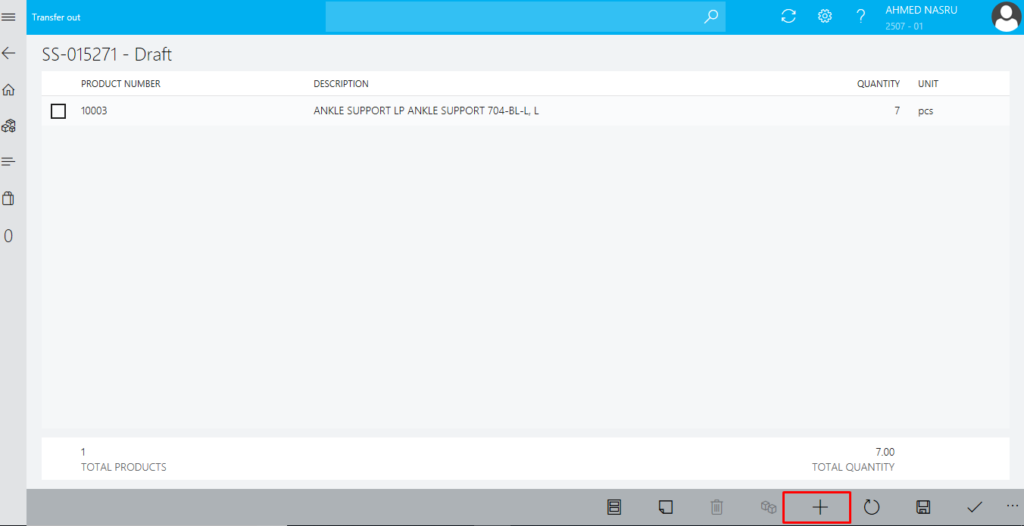
- Click on + icon to add more products to the transfer order.
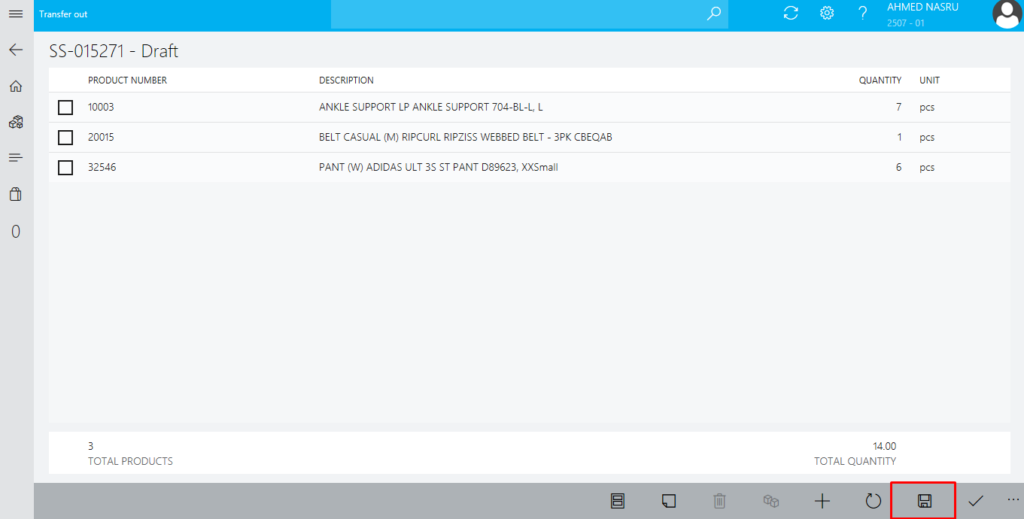
- You can save the products added by clicking on Save icon. The status of the order will be in Draft. You can continue adding products when it is in Draft state by clicking on + icon.
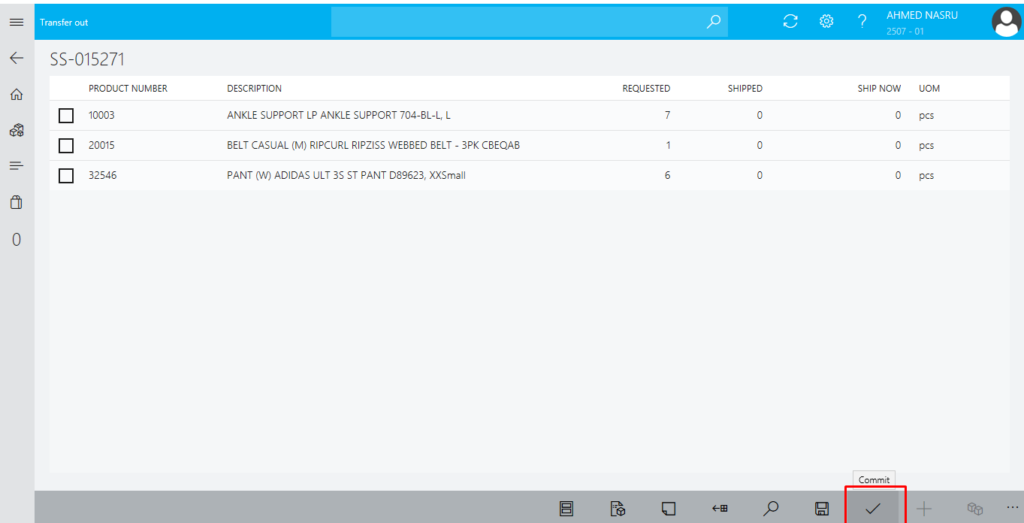
- Once you are done adding all the products click on commit icon. Once the order is committed the status will change to created and you will not be able to add products.
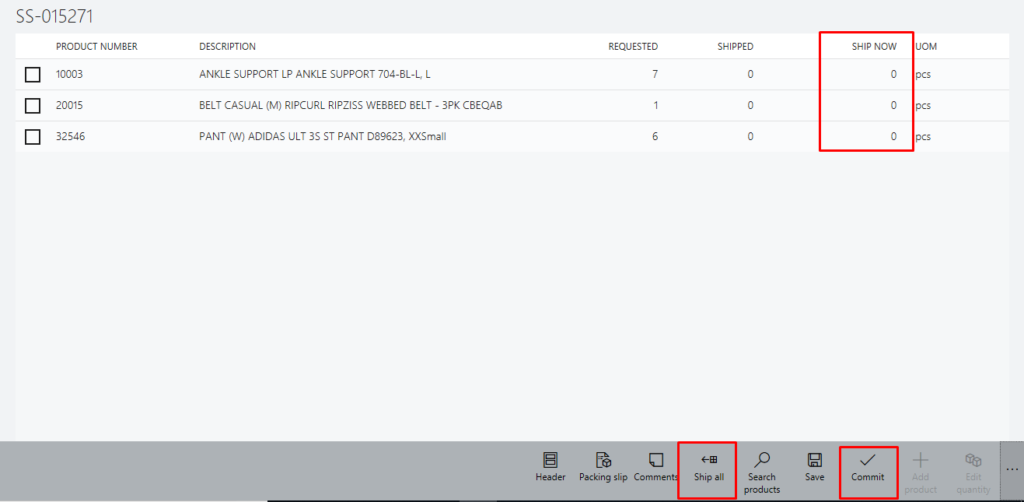
- Click on ship all icon to ship the products. This will change the ship now column with values to ship. Then click on commit.
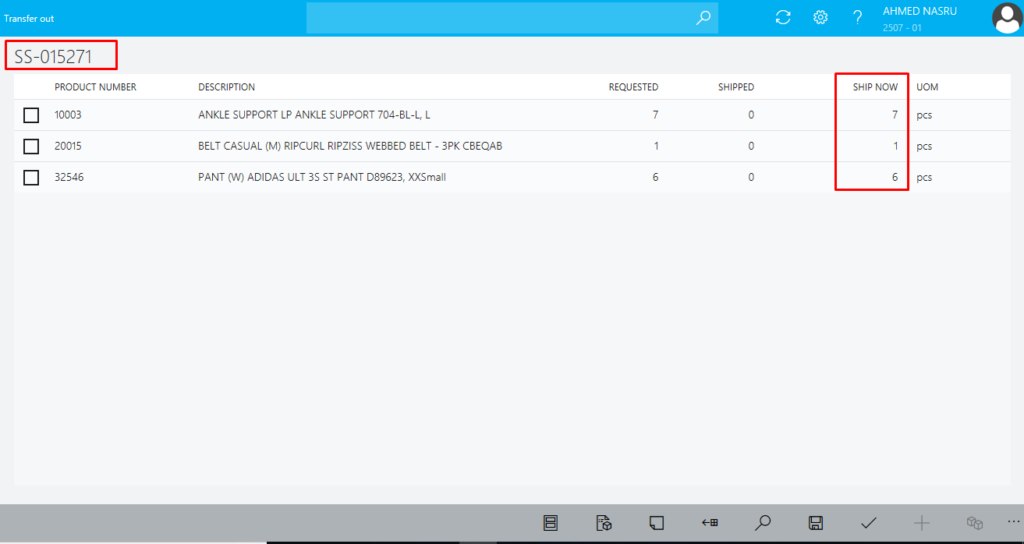
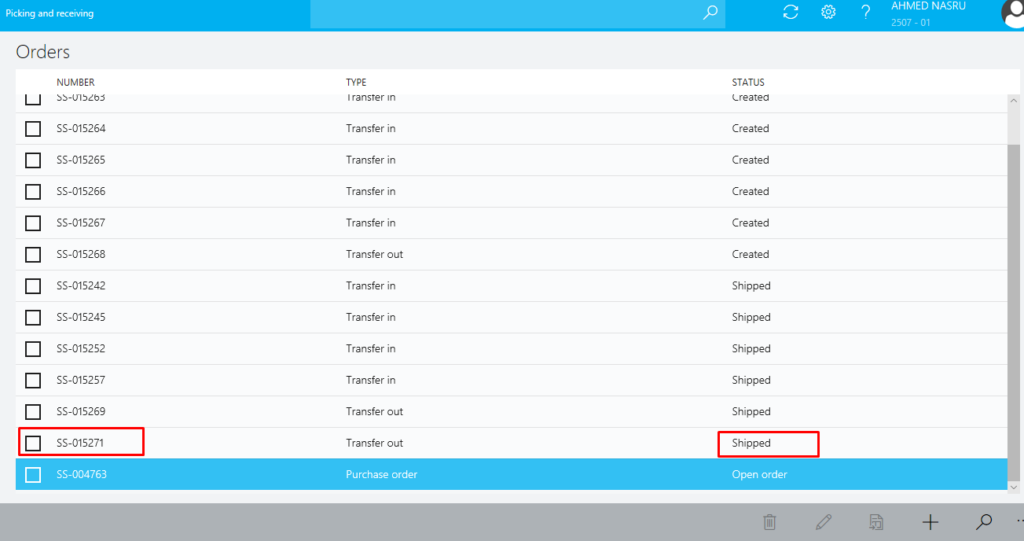
- This will change the status of the order to shipped.
- When the store Where the order is shipped to selects on Receive all icon the order will be complete.