Power BI – Row Level Security
Microsoft Power Bi enables you to find and visualize data, share your findings and collaborate in the modern ways in the form of reports and dashboards. In short, it is a collection of online services and features to enhance your business. Power bi support allows you to migrate huge data from various sites into power bi desktop using the integration process. You can easily edit the data or you can also plan to edit it later after you have imported it on your desktop.
Power bi helps you to overcome all your business problems with ease making you stay up-to-date with all necessary and relevant information that is of utmost value for you. The team of experts involved have a huge experience in working with all kinds of businesses across the world.
Introduction:
Row-level security (RLS) with Power BI can be used to restrict data access for given users. Filters restrict data access at the row level, and you can define filters within roles.
Steps:
-
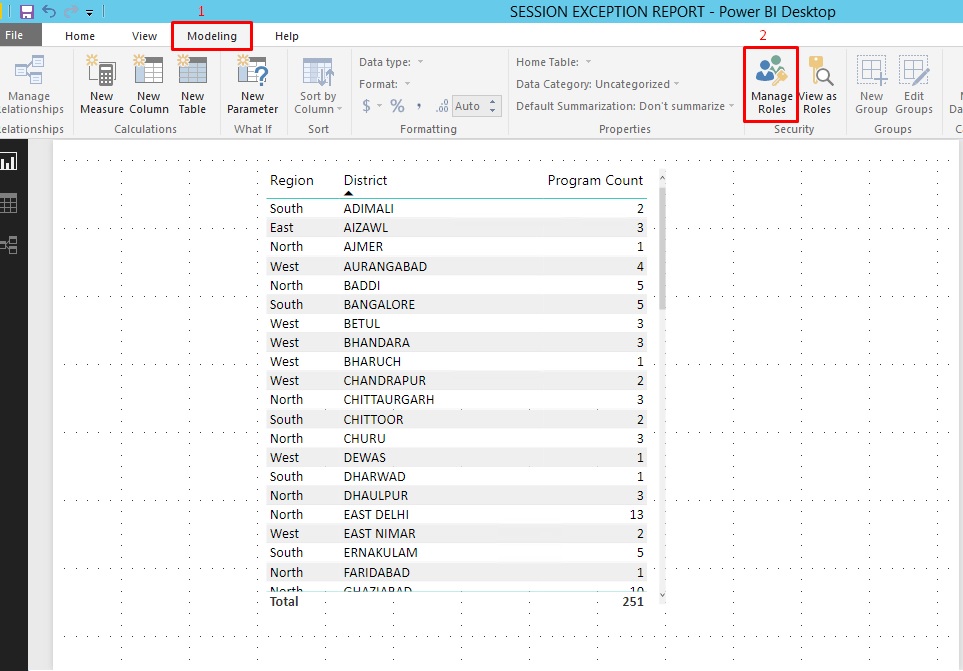
- To create on a Power BI Solution, you will start by going to the Modellingribbon and then select Manage Roles.
-
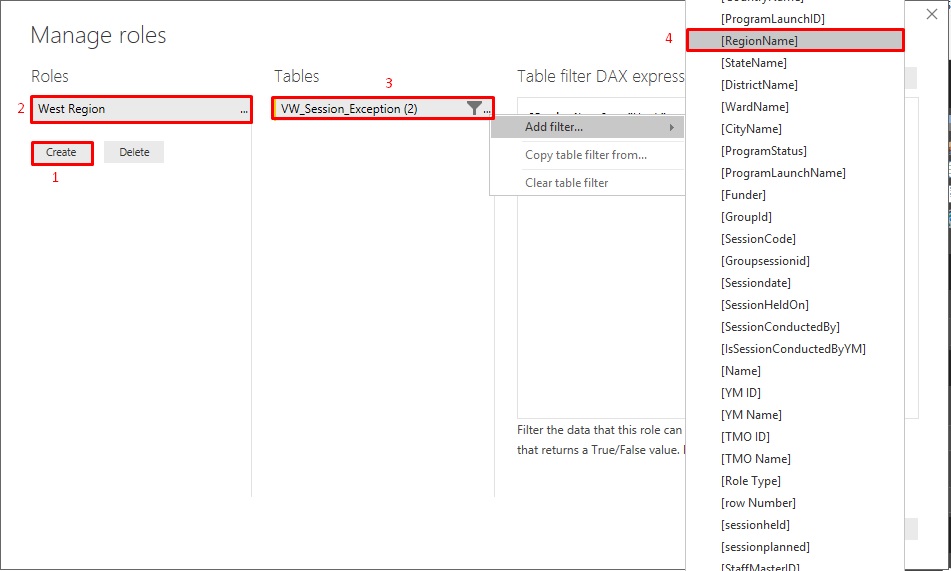
- This will launch the Manage roles window where you will select Createto add a new role.
- After you give the role a new name you can begin assigning DAX filter expressions to it.
- Click the ellipsis next to the table you would like to apply the filter to and then select Add filter.
- If you select Hide all rows,then all rows for this table will be hidden (as the name implies) but if you choose a field you can apply a filter to specific values in the table.
-
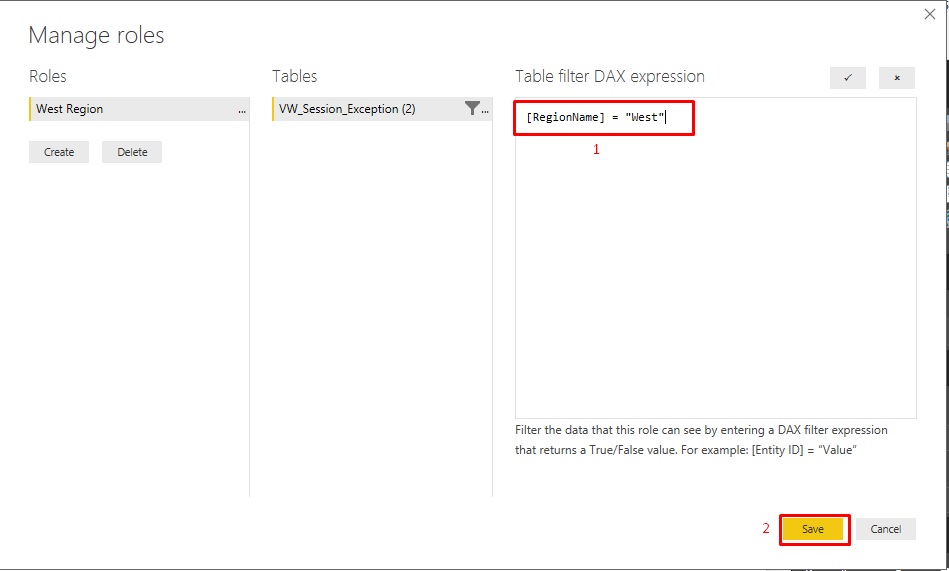
- Once you are happy with your selection, hit Save.
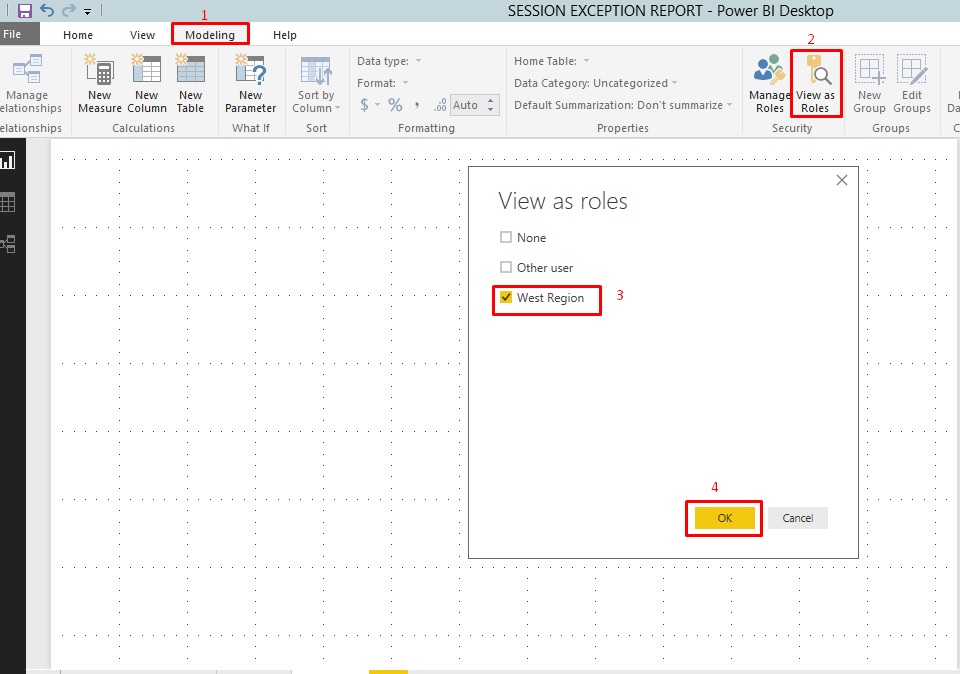
- To test the security model, go back to the Modellingribbon and select View As Roles.
- Here you can select the role you want to test and then click OK.
-
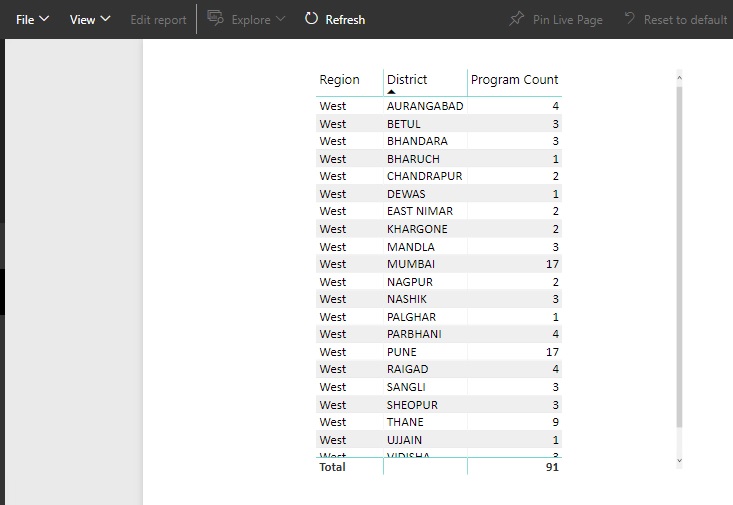
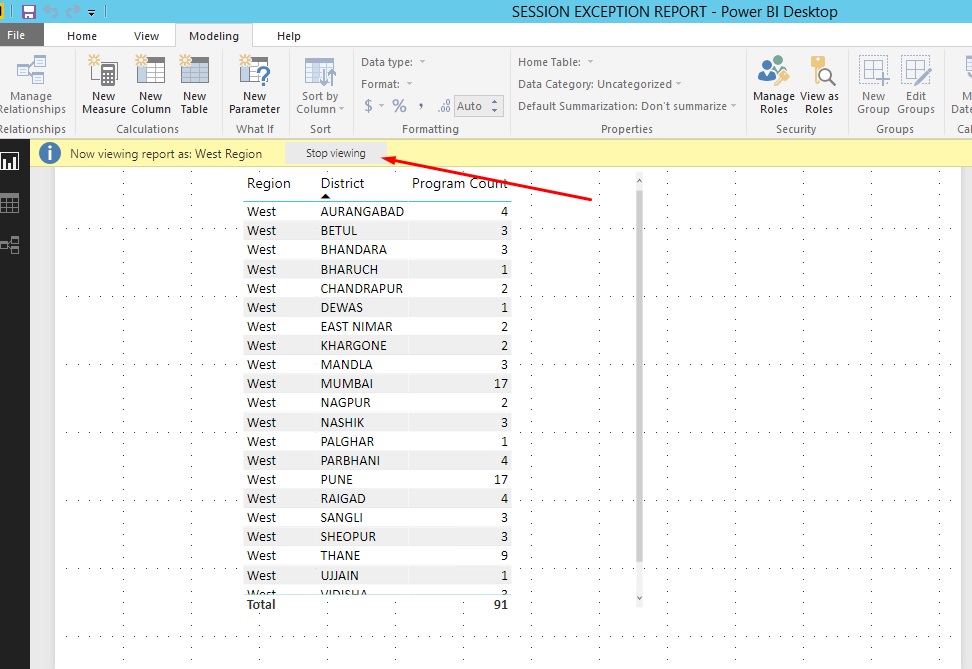
- This will filter the result to only show your selected roles filters.
- To stop impersonating this role you can click Stop Viewingto return to seeing the results without this filter applied.
-
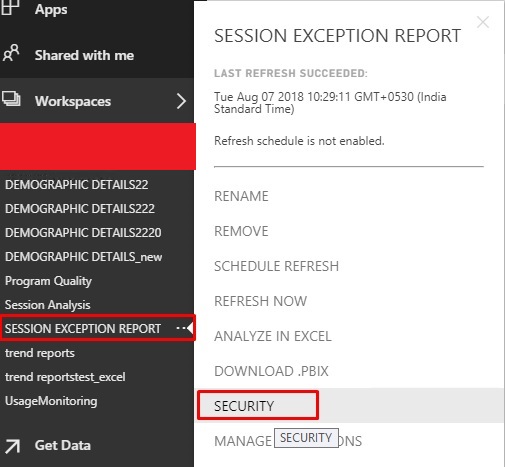
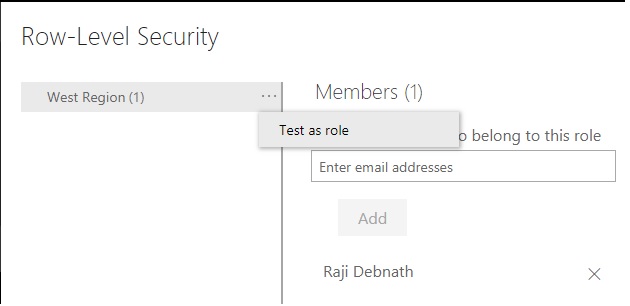
- The next step is to assign users to the roles, which must be done from the Power BI Service
- That means you must deploy your model to the Power BI Service first. To do that go to the Homeribbon and select Publish.
- Once you’ve published to the service login to Power.com and click on the ellipsis next to the dataset you just deployed. In this menu you will select Security.
-
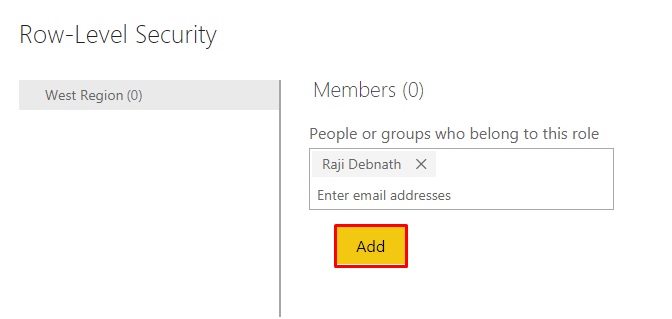
- Next, select the role you created and enter the email addresses of the users you would like to have the role assigned to. Click Add after you’ve entered all the users.
-
- Once you click Saveon the bottom your security is ready to go!
- To test it out click the ellipsis next to the role name and select Test as role.
-
- This will allow you to now view reports while impersonating this newly created role.