Securing an API using OAuth 2.0 in Azure API Management : Part 3 – OAUTH 2.0 Server setup
Introduction
Configuring OAuth 2.0 for your APIs hosted in Azure API Management adds an extra layer of security and prevents unauthorized access. This is a very important configuration form Security point of view for your Endpoints and is provided out of the box by Azure. This is the second part of a series of Blogs on Securing your API using OAuth 2.0 in Azure API Management. Please go through all the parts to find easy and detailed steps that will help you configure the OAuth 2.0 Authentication.
Enable OAuth 2.0 user authorization in the Developer Console
At this point, you have created your applications in Azure AD, and have granted proper permissions to allow the client-app to call the backend-app.
In this example, the Developer Console is the client-app. The following steps describe how to enable OAuth 2.0 user authorization in the Developer Console.
1. In Azure portal, browse to your API Management instance.
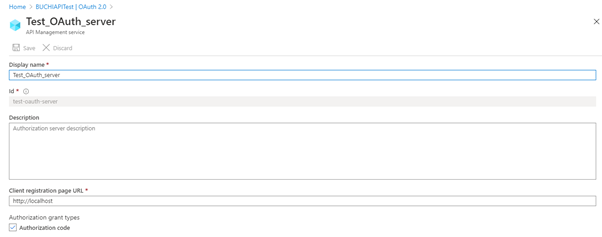
2. Select OAuth 2.0 > Add.

3. Provide a Display name and Description.
4. For the Client registration page URL, enter a placeholder value, such as http://localhost. The Client registration page URL points to a page that users can use to create and configure their own accounts for OAuth 2.0 providers that support this. In this example, users do not create and configure their own accounts, so you use a placeholder instead.
5. For Authorization grant types, select Authorization code.
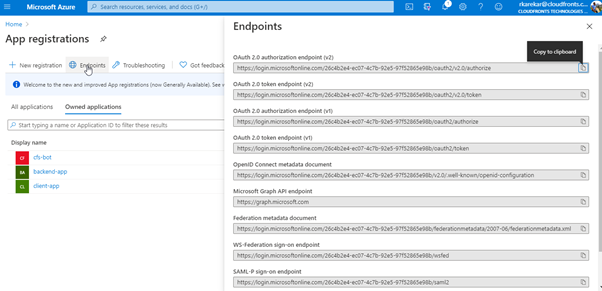
6. Specify the Authorization endpoint URL and Token endpoint URL. Retrieve these values from the Endpoints page in your Azure AD tenant. Browse to the App registrations page again and select Endpoints.
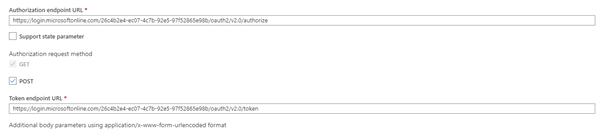
7. Copy the OAuth 2.0 Authorization Endpoint, and paste it into the Authorization endpoint URL text box. Select POST under Authorization request method.
8. Copy the OAuth 2.0 Token Endpoint, and paste it into the Token endpoint URL text box.
Note:
You can use either v1 or v2 endpoints. However, depending on which version you choose, the below step will be different. We recommend using v2 endpoints.
9. If you use v1 endpoints, add a body parameter named resource. For the value of this parameter, use Application ID of the back-end app.
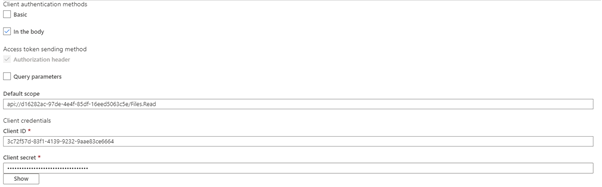
10. If you use v2 endpoints, use the scope you created for the backend-app in the Default scope field. Also, make sure to set the value for the accessTokenAcceptedVersion property to 2 in your application manifest.
11. Next, specify the client credentials. These are the credentials for the client-app.
12. For Client ID, use the Application ID of the client-app.
13. For Client secret, use the key you created for the client-app earlier.
14. Immediately following the client secret is the redirect_url for the authorization code grant type. Make a note of this URL.
15. Select Create.

16. Go back to your client-app registration in Azure Active Directory and select Authentication.
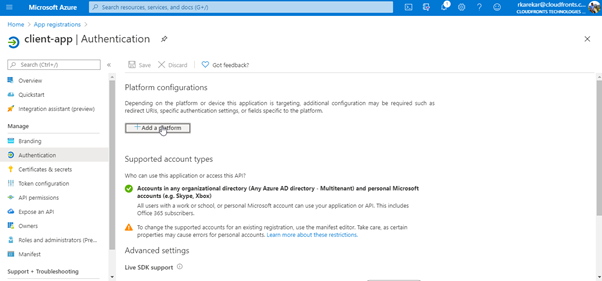
17. Under Platform configurations click on Add a platform, and select the type as Web, paste the redirect_url under Redirect URI, and then click on Configure button to save.

Now that you have configured an OAuth 2.0 authorization server, the Developer Console can obtain access tokens from Azure AD.
Enable OAuth 2.0 user authorization for your API.
This enables the Developer Console to know that it needs to obtain an access token on behalf of the user, before making calls to your API.
1. Browse to your API Management instance and go to APIs.
2. Select the API you want to protect. For example, you can use the Echo API.
3. Go to Settings.

4. Under Security, choose OAuth 2.0, and select the OAuth 2.0 server you configured earlier.
5. Select Save.

Part 1: Configuration of Applications in Azure AD
Part 2: Configuration of an Application (Client App) in Azure AD for Consumer
Part 3: OAUTH 2.0 Server setup
Part 4: Testing using Developer Portal and JWT Policy Configuration
