Develop D365 Finance, SCM and Retail Reports using Azure Data Lake Gen2
The BYOD feature for the Dynamics 365 for finance and Operations was release in 2016, it’s provide feature for the customer to bring their own Azure SQL Database, but the drawback through this was Entity Store only accessible for the inbuilt data warehouse only which means it is not accessible to outside D365.
The new feature for the Data Lake Gen2 makes the Entity Store get Sync with Data Lake. Following are the steps to setup the environment.
- Let’s create the Storage Account for the Data Lake Gen2
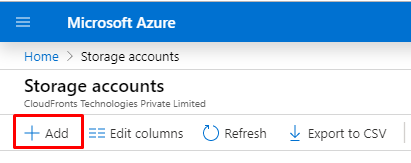
Click on the Create Resource and search for Storage accounts and go to the Storage Account
and click on Add.
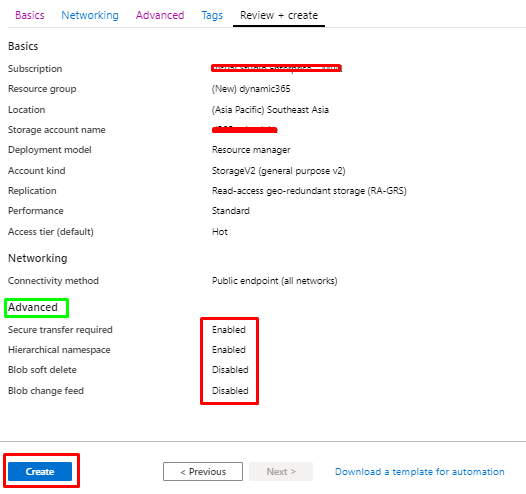
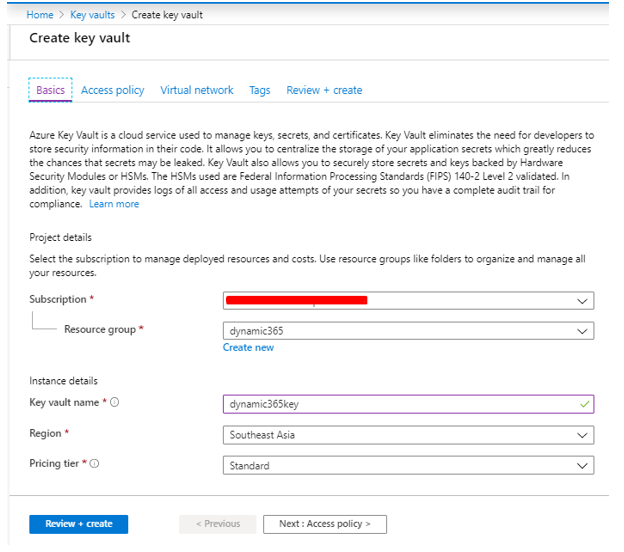
- Choose the Subscription and Resource group, resource group is the container that holds the resource. Here, we are creating the new resource for our Data Lake. Make sure you select the Location same as your Power BI dataset environment and set the other option as shown below.
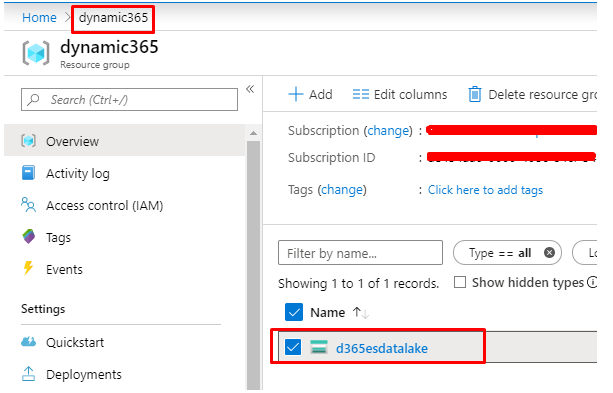
- Once storage account gets created, we can access it from the resource group open the storage account
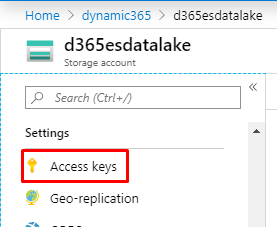
- Now let’s take a copy of the connection string since it will be required later, the connection string can be access by going to setting under the storage account.
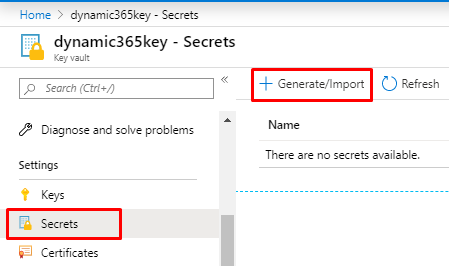
- Let’s create the Key vault resource to store the secret and create the secret for the connection string.
- Secret can be created by going to the key vault by going to the Key under the Settings tab, click on the generate the key.
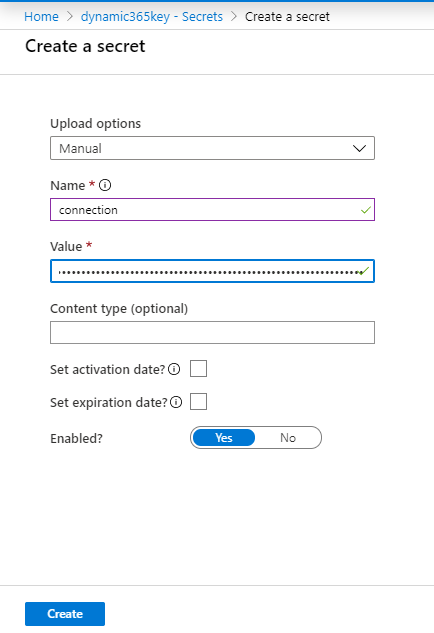
- We are creating the secret for the connection string that we have copied earlier, set the value for the connection string as the key that we have copied and click on the create.
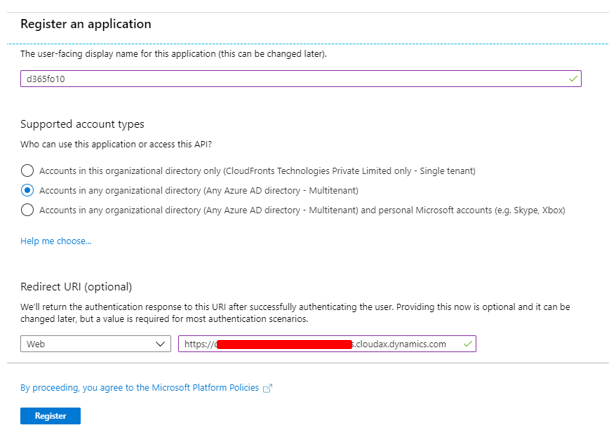
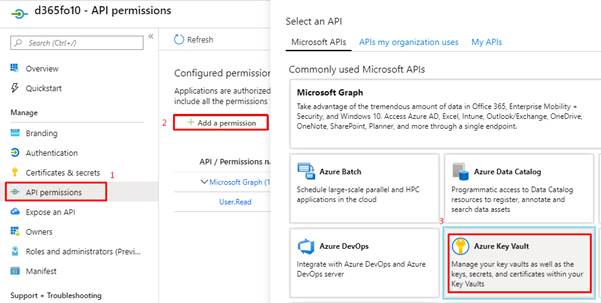
- Once we have created the app secret for the connection the next step is to authorize the user and resource to the request. Here we are going to register app for the authorization of the D365FO environment. To register the app, go to the Azure Active Directory and Select the app registration and click on the new registration.

- Fill the application name of your choice and redirect URI is set to WEB and select the D365 environment URI as shown below.
- Once we register the app the next step is to grant the API permission as a part of consent
process. Grant all the permission that application should require.
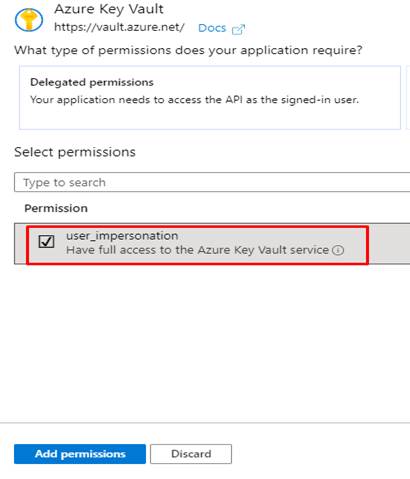
- From Azure Key Vault select the Permission as user_impersonation which provide full access to Azure Key Vault service.
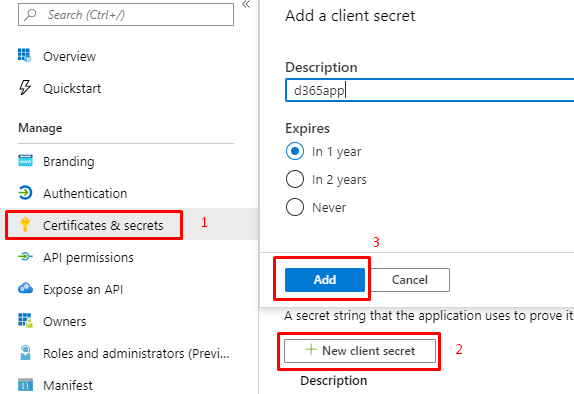
- The next step is to create client secret and make sure to note down the value of the app generated since we are going to use that in the D365FO environment.
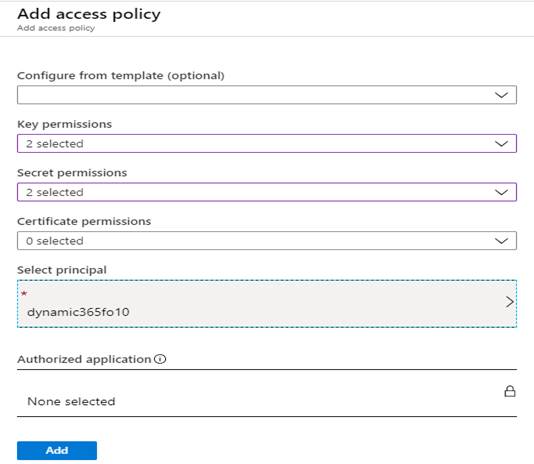
- Next is to add the D365FO in access policy list and select the Key and Secret permission to Get and List from the drop down.
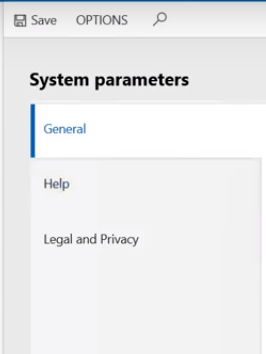
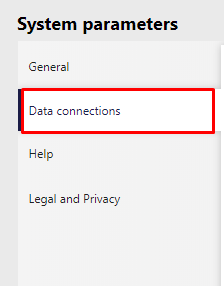
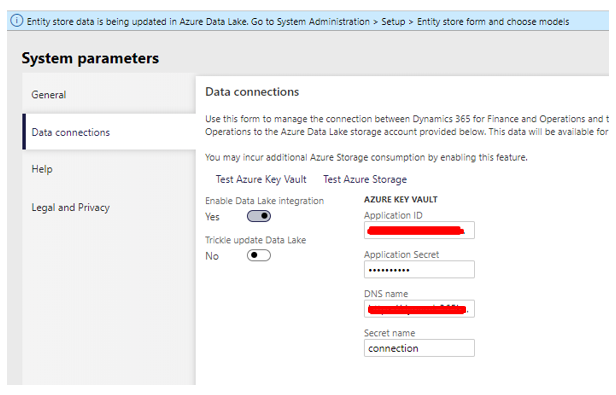
- Once we have added D365FO in access policy list the next step is to add the Application ID and Application Secret of Azure Key Vault in Data connection in D365FO environment, which can be access by going to Module > System administration > Setup > System parameters > Data connections tab.
Note:- Make sure if data connection tab is not visible to you which means you are missing some configuration setting during environment setup, to make the data connection tab available we need to check the Value of CDSAMaster in SQL Studio Management Studio.
Open SSMS go to the AxDW database and check the value in SYSFLIGHTING for CDSAMaster if not present then insert the value in table.
SELECT * FROM SYSFLIGHTING /*To check the Flightname values*/
INSERT INTO SYSFLIGHTING VALUES (‘CDSAMaster’,1,12719367,5637144576,5637144589,1)
/*
CDSAMaster FlightName
1 Enabled
12719367 FlightserviceID
5637144576 Partition
5637144589 RecID
1 Recversion
*/
Before Update
After Updating
- Once Data connections is added fill the Application ID, Application Secret, DNS name and connection secret name as shown below and make sure to enable the Data Lake Integration.
Test the Azure Key Vault and Azure Storage.
Note:- If you are getting error 401 which means Azure user in which data lake is hosted has no access to D365FO environment in that case you need to import the user in environment and assign role as Administrator.
Create Reports using Azure Data Lake Gen2
Once done with above steps the next step is to configure the storage account, following are the requirement for the Power BI.
- The storage account must be created in the same AAD tenant as your Power BI tenant.
- The storage account must be created in the same region as your Power BI tenant.
- The storage account must have the Hierarchical Name Space feature enabled (Make sure to enable this at time of storage account creation)
- Power BI service must be granted a Reader role on the storage account.
- You must have a Global Administrator account, this account is required to connect and configure Power BI to store the dataflow definition, and data, in your Azure Data Lake Storage Gen2 account
- As we have created storage account previously lets, grant the Reader role to the storage account, in Azure portal Go to the Storage account > Access control > Role Assignments then click on Add role.
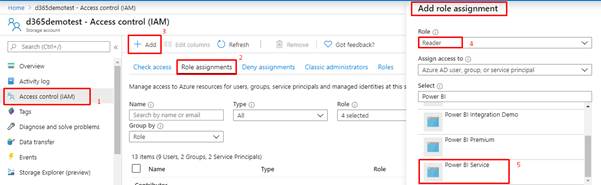
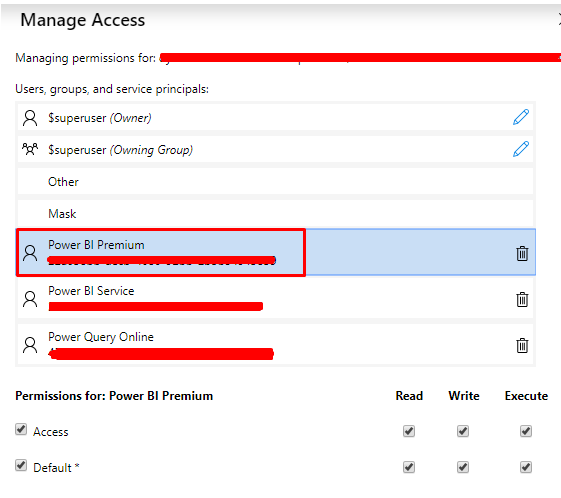
- Once we assign role to the Storage Account the next step is to Assign the directory level permission to the Storage that we have created. Here we are granting Power BI permission to the file system. We need to get the collection of IDs of the Power BI. Which can get by navigating to the AAD > Enterprise Application > All Application, copy the Object IDs of the Power BI Premium, Power BI Service and Power Query Online.
- For each Power BI Object that we have collected in previous steps grant the below access for each of the object.
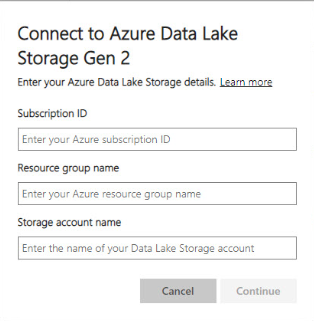
- Once we granted the access to the storage the next step is to connect your Azure Data Lake Storage Gen 2 to Power BI
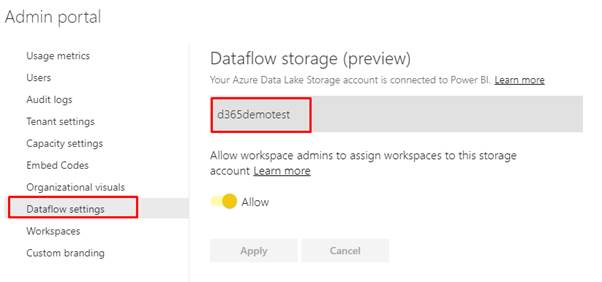
Go to your Power BI service > Click on Admin portal navigate to Dataflow settings then Select the Connect your Azure Data Lake Storage Gen2 button. The following window will appear
Fill the details and click on continue, once we done with all the steps, your Azure Data Lake Storage Gen2 account is connected to Power BI.
Note:- To configure a connection to Azure Data Lake Storage Gen2 in the Power BI admin portal, you must have Global Administrator permissions and Once storage account is configured it cannot be changed.
Create the Dataset for Power BI from Dataflow for Reporting
- You can add Common Data Model (CDM) folders stored in your organization’s Azure Data Lake Store Gen2 as dataflows. And once you create a dataflow from a CDM folder, you can use Power BI Desktop and the Power BI service to create datasets, reports, dashboards, and apps that are based on the data you put into CDM folders.
- To add the CDM folder stored in Data Lake Go to Workspace and then click on create and select Dataflow
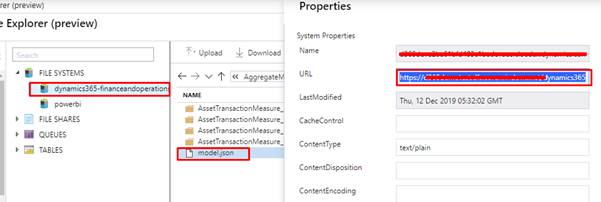
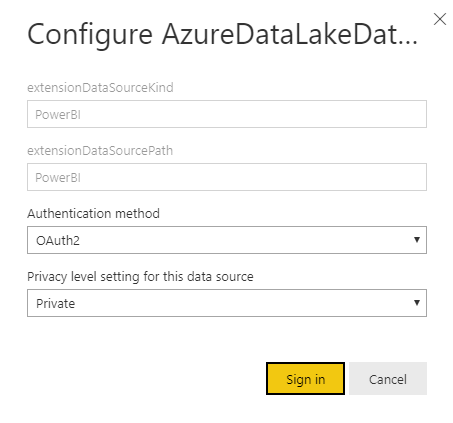
- Attach the URL of the CDM folder which can be found by going to storage explorer go to CDM folder and then copy the path of the Model.json and paste in the Common Data Model folder path textbox and click on create and attach.
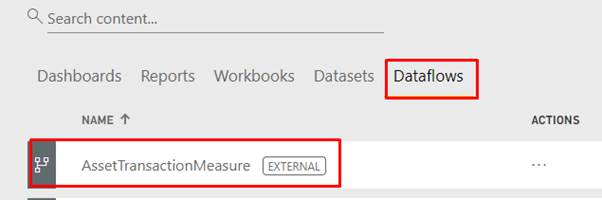
- If connected successfully it will create the Dataflow, you can check it by going to dataflow.
Note:-
- Dataflows from CDM folders cannot be edited
- Permissions to read a dataflow created from a CDM folder is managed by the owner of the CDM folder, and not by Power BI
- Creating dataflows from CDM folders is only available in the new work experience
- Linked entities are not available for dataflows created from CDM folders
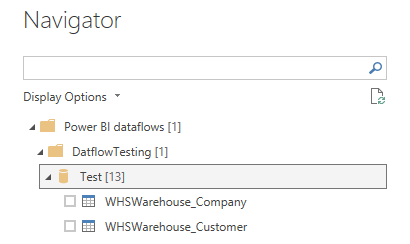
- You can now access this dataflow in your Power BI desktop by clicking on Get Data from menu and select dataflow
- We can see the list of dataflows created we can select the tables from the dataflow and create report.
- Once we publish the report on the Power BI workspace, we can set the refresh schedule for the report the dataset credential is as mentioned below.
In this way we have seen how to Develop D365 Finance, SCM and Retail Reports using Azure Data Lake Gen2
