Data Movement using Azure Data Factory
Prerequisite:
Azure Subscription, SQL Server Management Studio (SSMS), Azure Explorer
What is Azure Data Factory?
Data Factory is a cloud-based data integration service that orchestrates and automates the movement and transformation of data. Data Factory works across on-premises and cloud data sources and SaaS to ingest, prepare, transform, analyze, and publish your data. You can use Data Factory anytime you need to collect data of different shapes and sizes, transform it, and publish it to extract deep insights all on a reliable schedule.
Key Concepts in Azure Data Factory
- Dataset – Identify data structures within different data stores including tables, files, folders, and documents
- Linked Service – Define the information needed for Data Factory to connect to external resources
- Pipeline – Used to group activities into a unit that together perform a task
- Activity – Define the actions to perform on your data
Read more about Azure Data Factory here
In below example, we will demonstrate copy data activity from csv file stored in Azure Blob Storage to Azure SQL Database using Azure Data Factory Editor.
Steps for Data Movement using Azure Data Factory:
Step 1: Create Storage account and a container in Azure. Place file containing data into the container using Azure Explorer or similar tool
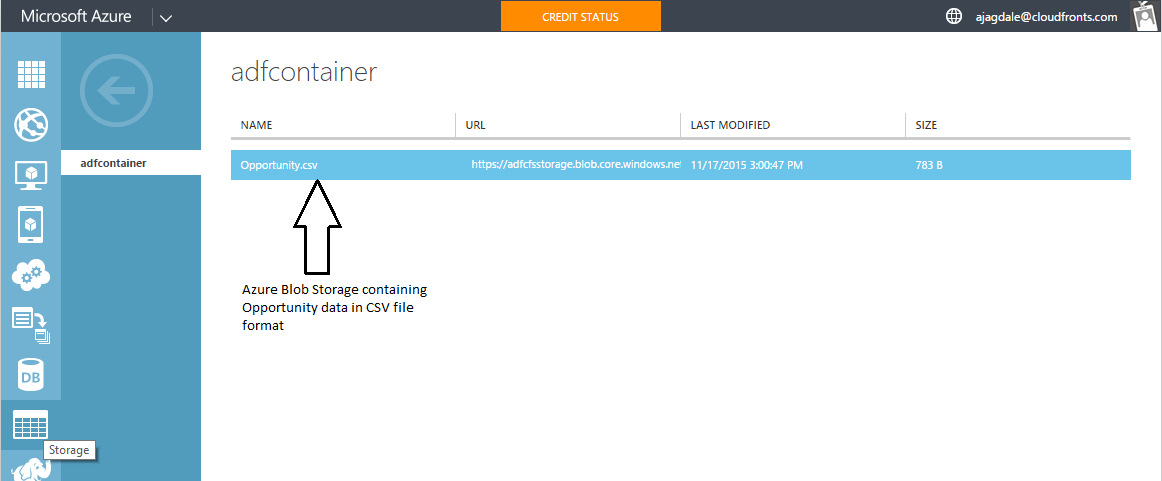
Step 2: Below image shows csv file content and same placed in Azure container using Azure Explorer

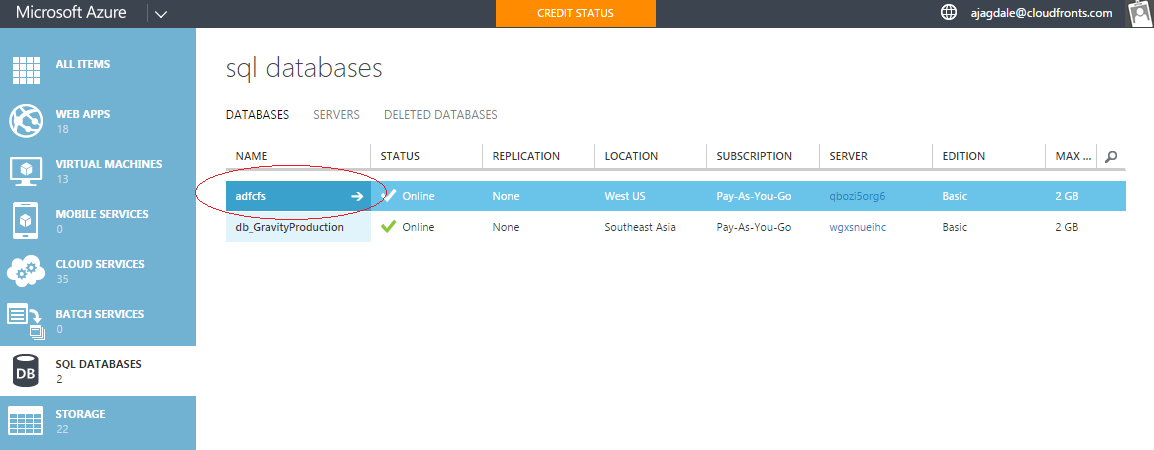
Step 3: Create an Azure SQL Database to store output data
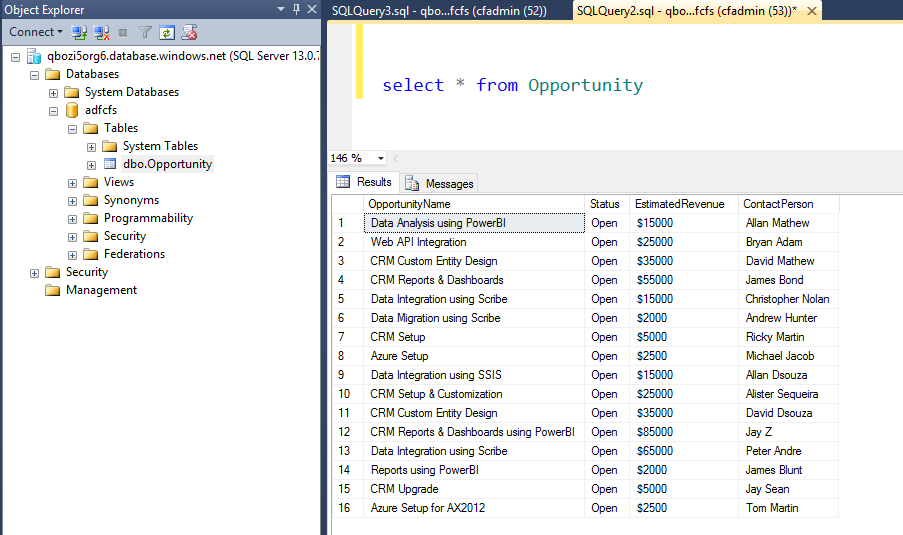
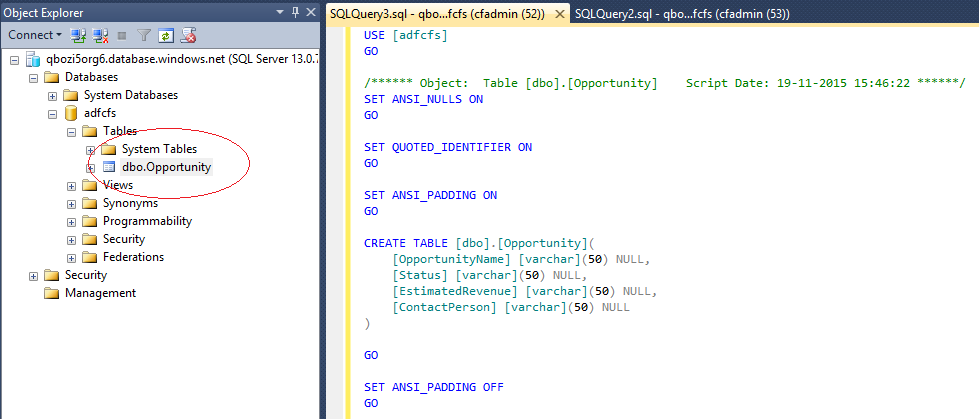
Step 4: By connecting SSMS to Azure SQL Database, we can create output table in Azure SQL Database
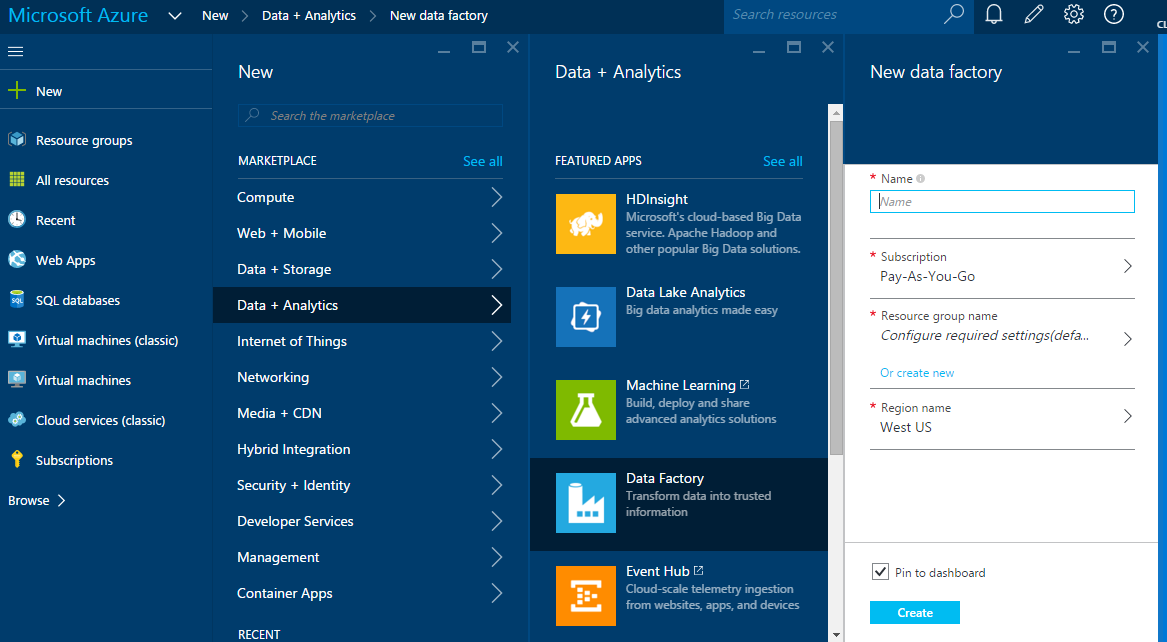
Step 5: Now go to new Azure Portal i.e. portal.azure.com and create a new Data Factory as shown
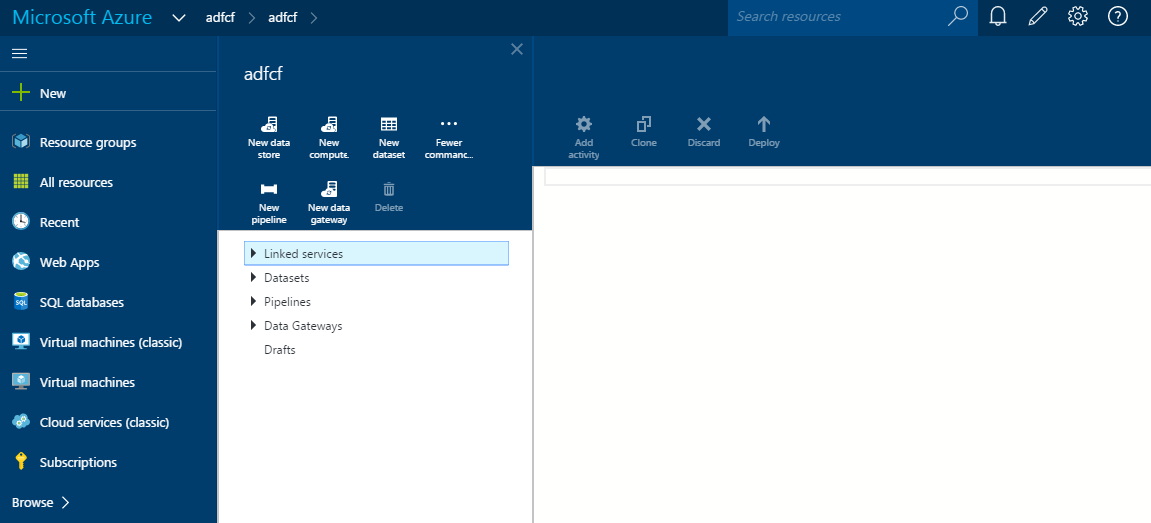
Step 6: We need to create 3 things to start data movement. Linked Services, Datasets and Pipeline. You can start creating by opening Azure Data Factory and click on “Author and deploy”
Step 7: First create linked service for Azure SQL Database and then for Azure Blob Storage
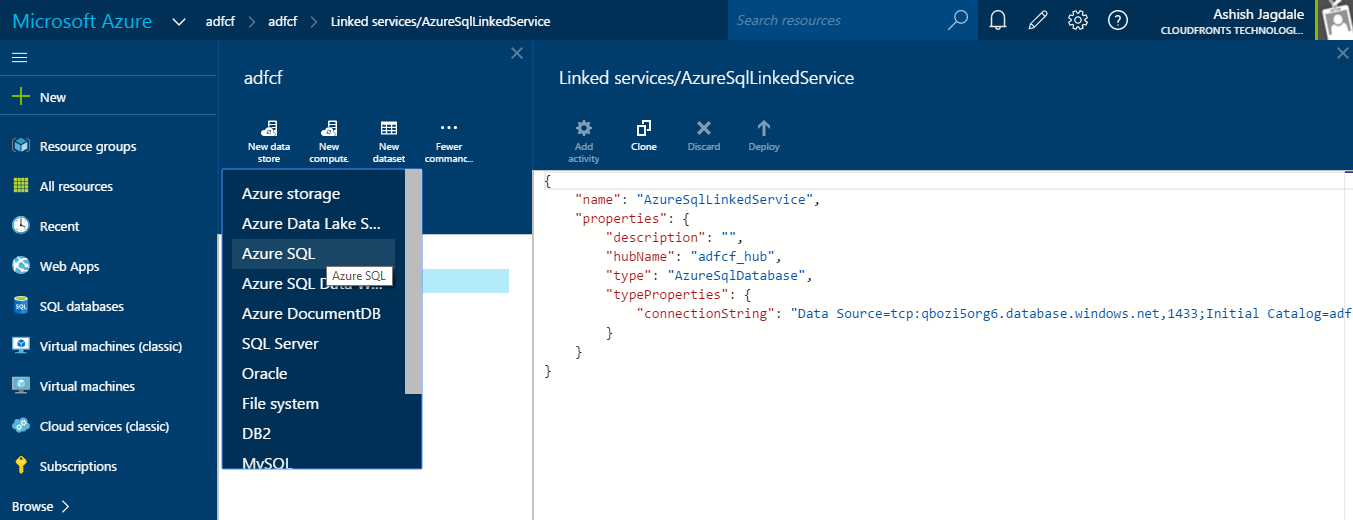
Find the JSON code for linked service given below:
{
    "name": "AzureSqlLinkedService",
    "properties": {
        "description": "",
        "hubName": "adfcf_hub",
        "type": "AzureSqlDatabase",
        "typeProperties": {
            "connectionString":"Data Source=tcp:qbozi5org6.database.windows.net,1433;Initial Catalog=adfcfs;Integrated Security=False;User ID=cfadmin@qbozi5org6;Password=**********;Connect Timeout=30;Encrypt=True"
        }
    }
}
For Azure Blob Storage:
{
    "name": "StorageLinkedService",
    "properties": {
        "description": "",
        "hubName": "adfcf_hub",
        "type": "AzureStorage",
        "typeProperties": {
            "connectionString": "DefaultEndpointsProtocol=https;AccountName=adfcfsstorage;AccountKey=**********"
        }
    }
}
Step 8: Now create datasets for source as well sink
For Azure SQL Database
{
    "name": "OpportunitySQLTable",
    "properties": {
        "structure": [
            {
                "name": "OpportunityName",
                "type": "String"
            },
            {
                "name": "Status",
                "type": "String"
            },
            {
                "name": "EstimatedRevenue",
                "type": "String"
            },
            {
                "name": "ContactPerson",
                "type": "String"
            }
        ],
        "published": false,
        "type": "AzureSqlTable",
        "linkedServiceName": "AzureSqlLinkedService",
        "typeProperties": {
            "tableName": "Opportunity"
        },
        "availability": {
            "frequency": "Hour",
            "interval": 1
        }
    }
}
For Azure Blob Storage
{
    "name": "OpportunityTableFromBlob",
    "properties": {
        "structure": [
            {
                "name": "OpportunityName",
                "type": "String"
            },
            {
                "name": "Status",
                "type": "String"
            },
            {
                "name": "EstimatedRevenue",
                "type": "String"
            },
            {
                "name": "ContactPerson",
                "type": "String"
            }
        ],
        "published": false,
        "type": "AzureBlob",
        "linkedServiceName": "StorageLinkedService",
        "typeProperties": {
            "fileName": "Opportunity.csv",
            "folderPath": "adfcontainer/",
            "format": {
                "type": "TextFormat",
                "columnDelimiter": ","
            }
        },
        "availability": {
            "frequency": "Hour",
            "interval": 1
        },
        "external": true,
        "policy": {}
    }
}
Step 9: Create a pipeline. Find the JSON code below
{
    "name": "ADFDataCopyPipeline",
    "properties": {
        "description": "Copy data from a blob to Azure SQL table",
        "activities": [
            {
                "type": "Copy",
                "typeProperties": {
                    "source": {
                        "type": "BlobSource"
                    },
                    "sink": {
                        "type": "SqlSink",
                        "writeBatchSize": 10000,
                        "writeBatchTimeout": "60.00:00:00"
                    }
                },
                "inputs": [
                    {
                        "name": "OpportunityTableFromBlob"
                    }
                ],
                "outputs": [
                    {
                        "name": "OpportunitySQLTable"
                    }
                ],
                "policy": {
                    "timeout": "01:00:00",
                    "concurrency": 1,
                    "executionPriorityOrder": "NewestFirst"
                },
                "scheduler": {
                    "frequency": "Hour",
                    "interval": 1
                },
                "name": "CopyFromBlobToSQL",
                "description": "Push Regional Effectiveness Campaign data to Azure SQL database"
            }
        ],
        "start": "2015-11-17T08:00:00Z",
        "end": "2015-11-17T09:00:00Z",
        "isPaused": false,
        "pipelineMode": "Scheduled"
    }
}
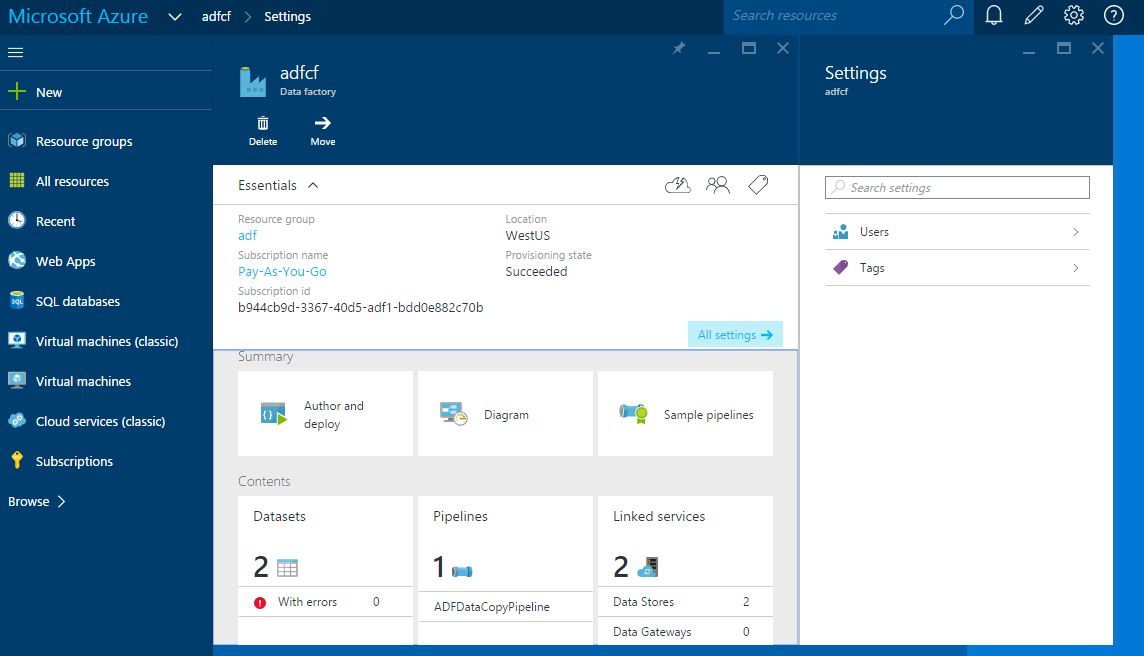
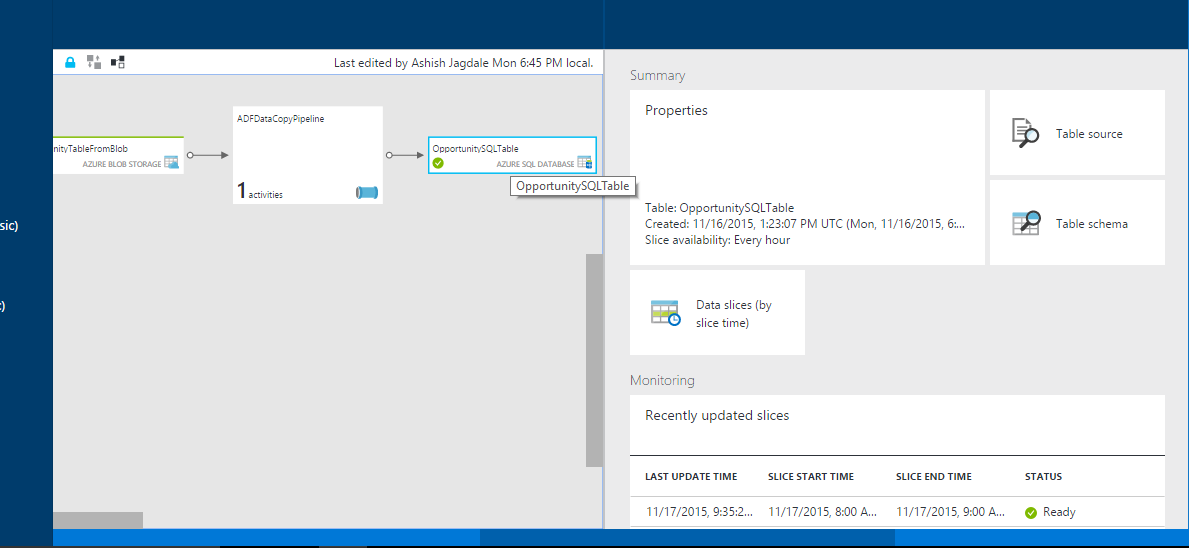
Step 10: Now go back to your Data Factory editor and you can see status of different linked services, datasets and pipeline created
Step 11: Click on “Diagram” and check the status of slices scheduled for data movement
Step 12: Once in ready status, you can go back to Azure SQL Database and check if data has been copied/moved.