Email Encryption in Office 365
Overview:
O365 Message Encryption is a service based on Microsoft Azure Rights Management (Azure RMS). Once an RMS is setup, Email messages can be encrypted under certain rules set and provide the recipients with 2 options to read the encrypted email –
- By an OPT
- By signing into organization account.
Pre-Requisites:
- Activate Azure RMS in Office 365.
- Setup Azure Rights Management for Exchange Online
- Setup transport rule to enforce message encryption in Exchange Online.
Activate Azure Rights Management in Office 365:
Following are the steps to enable Email Encryption. I’m going to enable encryption on one of my trial environments-
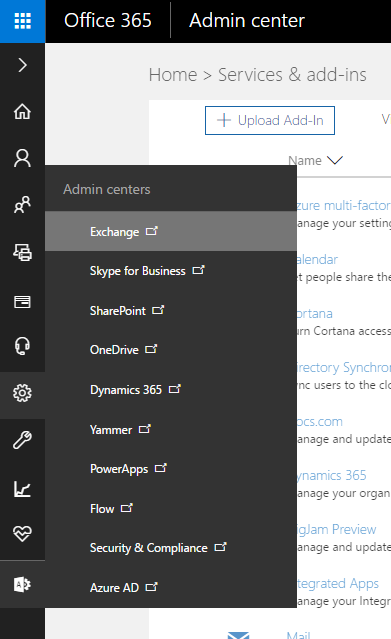
- Log in to Office 365 Admin Center as a Global Administrator
- Navigate to Settings section and then select Services and add-ins
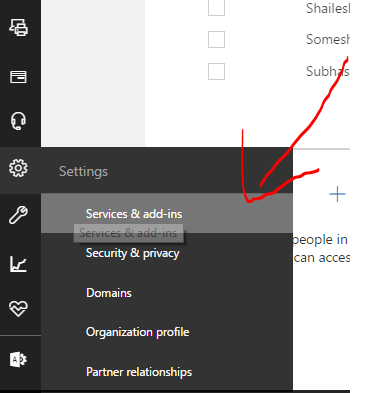
- Then, look for Microsoft Azure Information Protection
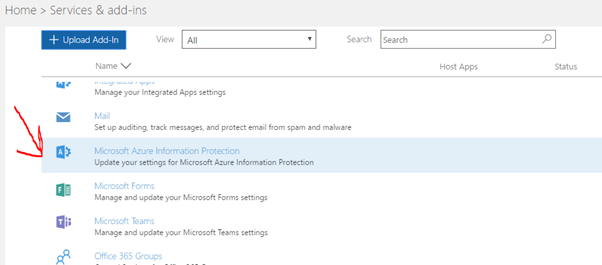
- Open the same by clicking on the highlighted link as shown below
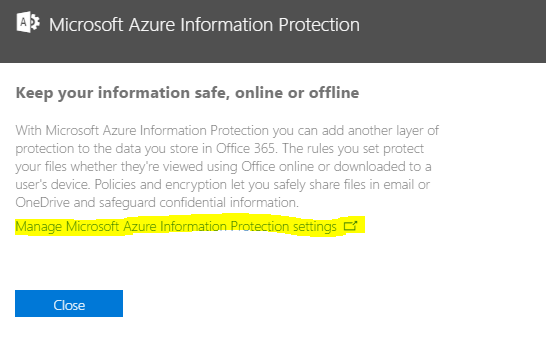
- On the rights management page, you’ll see the rights management is not activated and you’ll get an option to activate the same.

- Once you activate the same, it will be activated and you’ll see a page like this
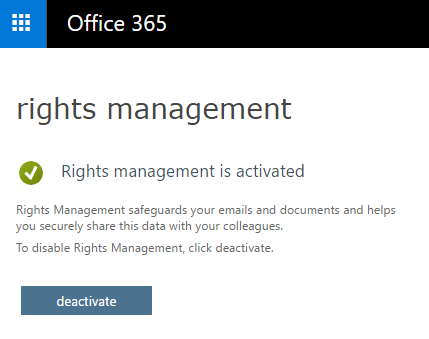 Here, Rights Management has been activated!
Setup Azure Rights Management for Office 365 Email Encryption:
Following steps are carried to setup Azure RMS for Email Message Encryption.
- Enter the following steps to authenticate and connect to the session.
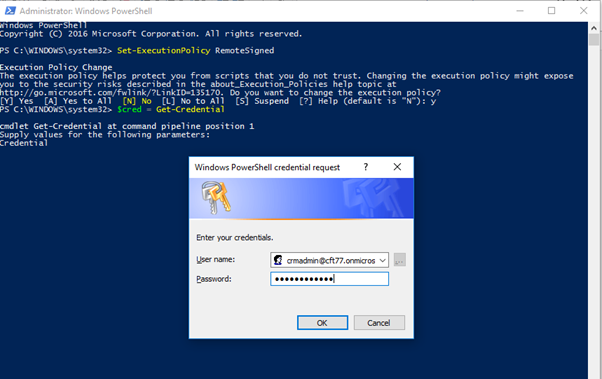 As shown above, enter the commandsSet-ExecutionPolicy RemoteSignedEnter Y/y when asked about changing the Execution Policy.Then, enter $cred = Get-CredentialThen, enter the admin credentials to your O365.
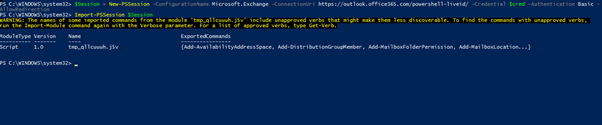
2. You’ll be authenticated, then enter the following commands $Session = New-PSSession -ConfigurationName Microsoft.Exchange -ConnectionUri https://outlook.office365.com/powershell-liveid/ -Credential $cred -Authentication Basic -AllowRedirection
3. Then, Import-PSSession $Session as shown below
4. Next step is to verify that IRM is not configured yet.
Get-IRMConfiguration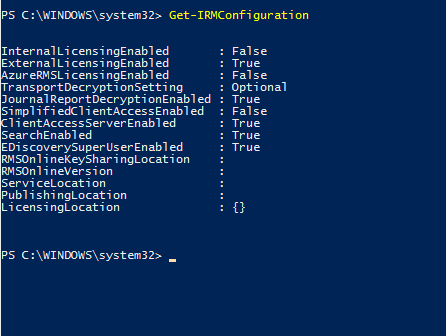
5. Now, configure with key-sharing location. For my North America environment, I’ll use the following –Set-IRMConfiguration -RMSOnlineKeySharingLocation https://sp-rms.na.aadrm.com/TenantManagement/ServicePartner.svc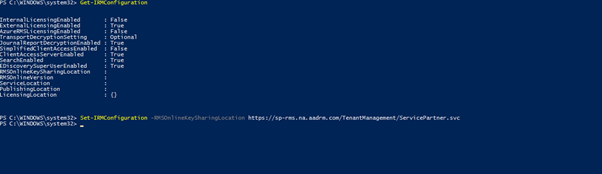 Here’s the list of key sharing locations depending where your tenant resides
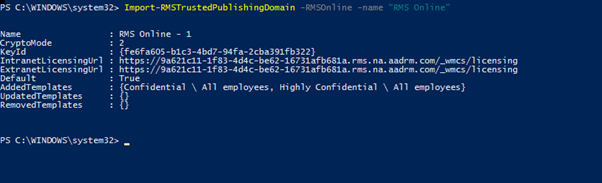
Location RMS key sharing location North America https://sp-rms.na.aadrm.com/TenantManagement/ServicePartner.svc European Union https://sp-rms.eu.aadrm.com/TenantManagement/ServicePartner.svc Asia https://sp-rms.ap.aadrm.com/TenantManagement/ServicePartner.svc South America https://sp-rms.sa.aadrm.com/TenantManagement/ServicePartner.svc Office 365 for Government https://sp-rms.govus.aadrm.com/TenantManagement/ServicePartner.svc1 6. Import TPD i.e. Trusted Publishing Domain from RMS Online
Import-RMSTrustedPublishingDomain -RMSOnline -name “RMS Online”
7. Now, test the successful setup of IRM in Exchange Online
Test-IRMConfiguration -sender crmadmin@cft77.onmicrosoft.com (Enter your Admin username)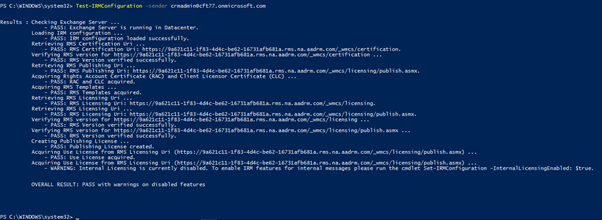
8. Enable InternalLicensing and test again
Set-IRMConfiguration -InternalLicensingEnabled: $true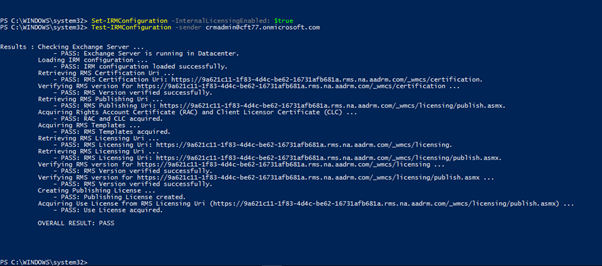 And you’ll get the passed result.
9. Few more steps – Disable IRM templates in OWA and Outlook
Set-IRMConfiguration -ClientAccessServerEnabled $false
and Enable IRM for O365 Message Encryption
Set-IRMConfiguration -InternalLicensingEnabled $true

10. Now, check the IRM Configuration
Get-IRMConfiguration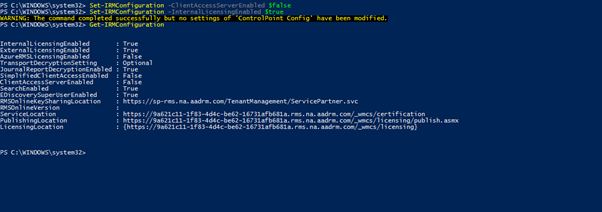 IRM is now setup!
Configure Rules in Exchange Admin Center:
Now, we will setup a very simple rule which where the Exchange will send out an encrypted email
- Navigate to Exchange Admin Center in O365
- Under Mail Flow section, create the below rule
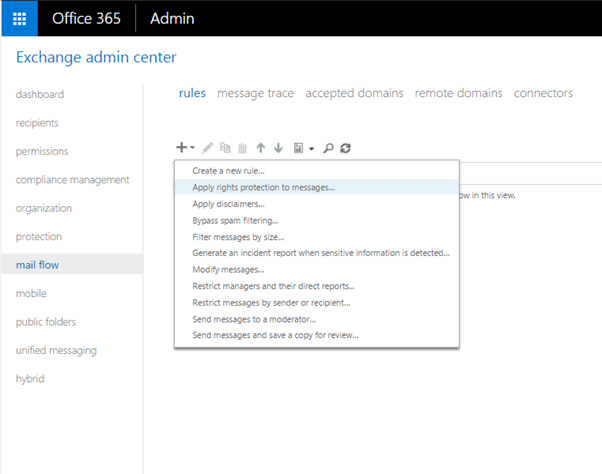
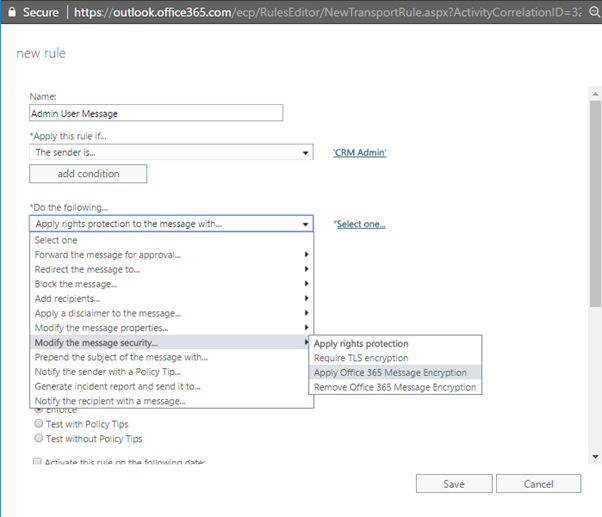
- And set the conditions as – If the sender is CRM Admin, encrypt the email. And then save.
- And try sending a sample email –
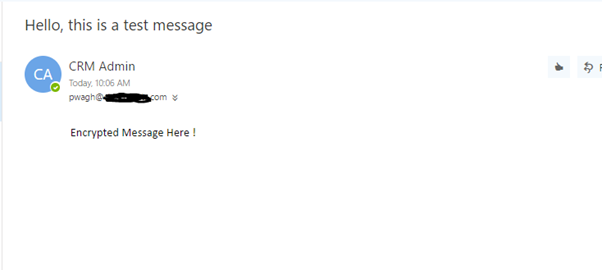
- The email will be received like this
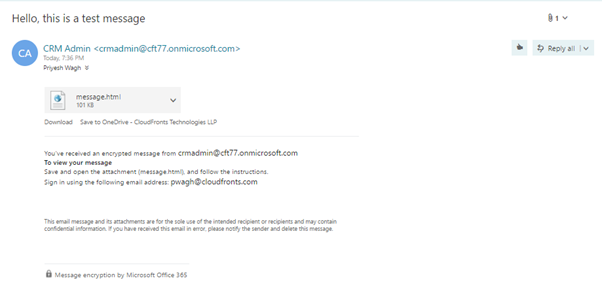 Download the HTML file and open the same.
 - The HTML file will have the following options –
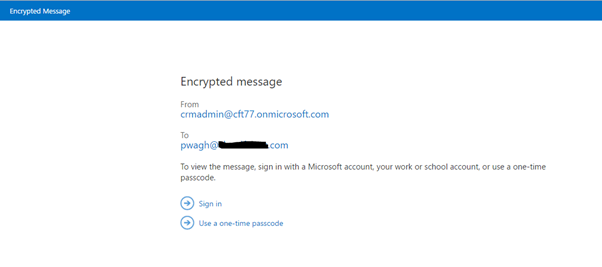
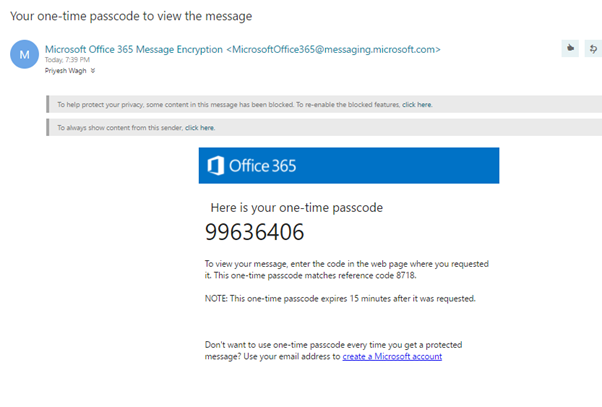
- Let’s say, I select OPT, I’ll get another email as this
- And I enter that OTP, I can then see the message
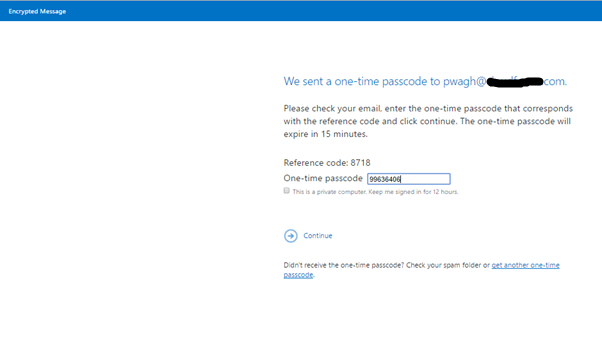
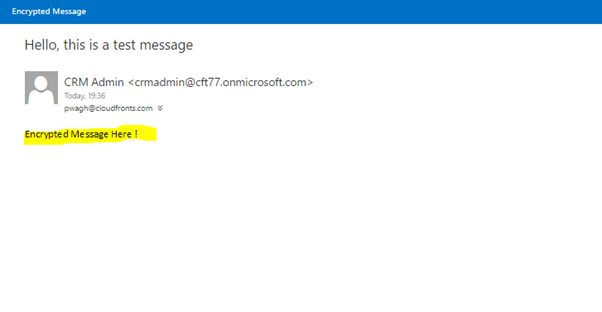 And you have the encrypted message feature as shown above! Hope this was helpful!
