Spam Filter Policy in Exchange Online.
Introduction:
Spam is an irrelevant or unsolicited messages sent over the Internet, basic spam filter settings in Exchange Online include selecting the action to take on messages identified as spam. Spam-filter policy settings are applied to inbound messages only. You can edit the default spam filter policy to configure your company-wide spam filter settings and create custom spam filter policies and apply them to domains in your organization.
Administrator needs to have Organization Management and Hygiene Management role group assigned to them.
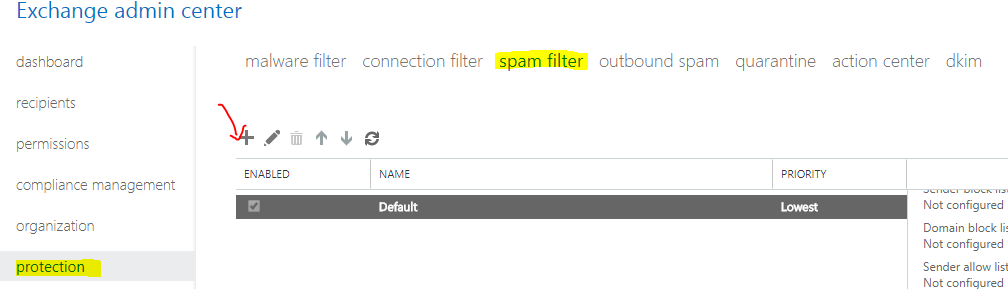
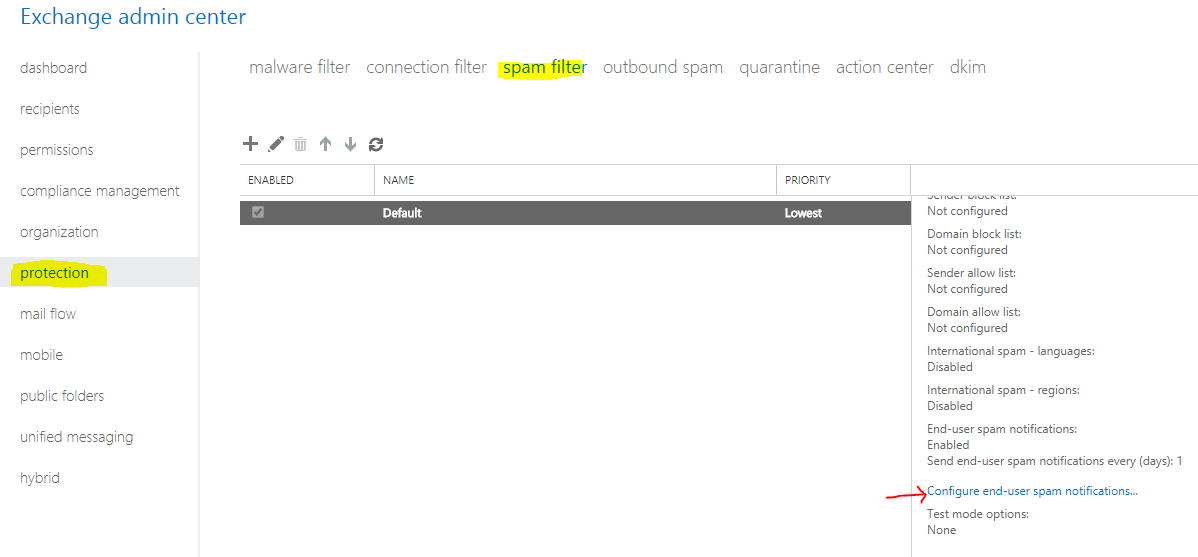
- In EAC, go to Protection > Spam filter.
- You can either edit the default settings or create a custom spam filter by click on +.
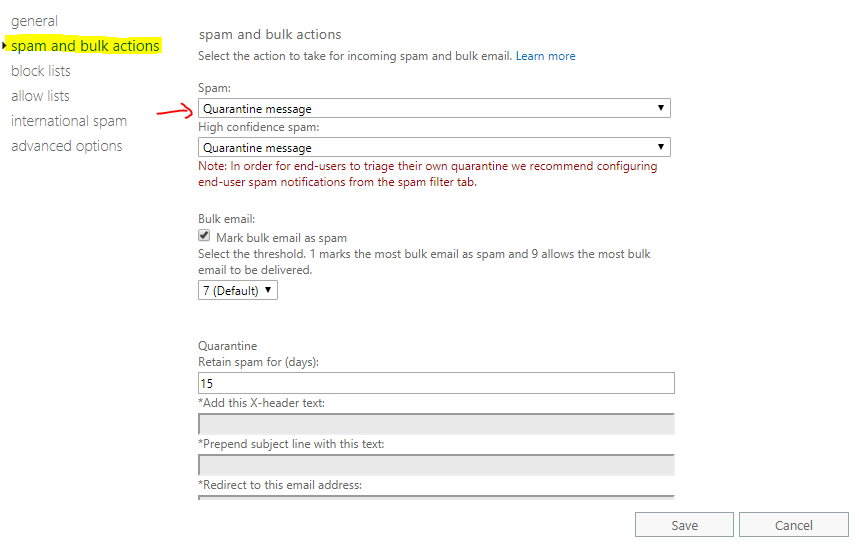
- On Spam and Bulk action page, under Spam and High confidence spam, select the action to take for incoming spam email. By default, move messages to Junk Email folder is selected. In this case, we are selecting Quarantine Message.
- When you select quarantine message, In Retain spam for (days) specify the number of days during which the spam message will be quarantined.
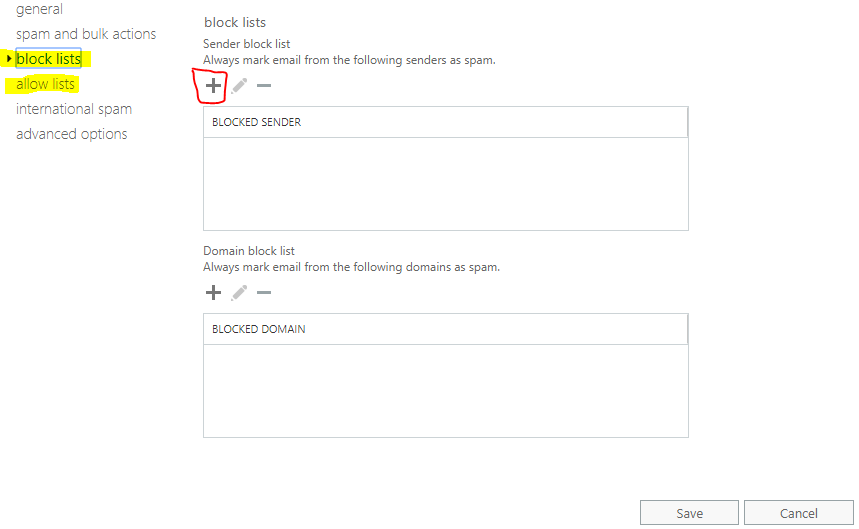
- On the Block & Allow list page, you can specify entries, such as senders or domains. Message will always be marked as spam if it is in block list and message will always be delivered if sender is in allow list.
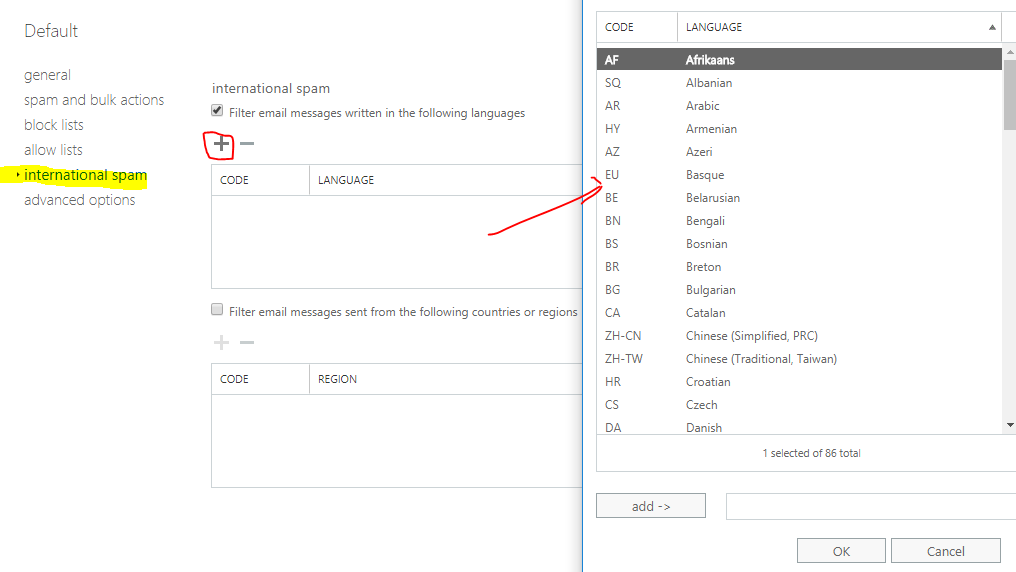
- On the International Spam page, you can filter email messages written in specific languages, or sent from specific countries or regions. You can configure up to 86 different languages and 250 different regions.
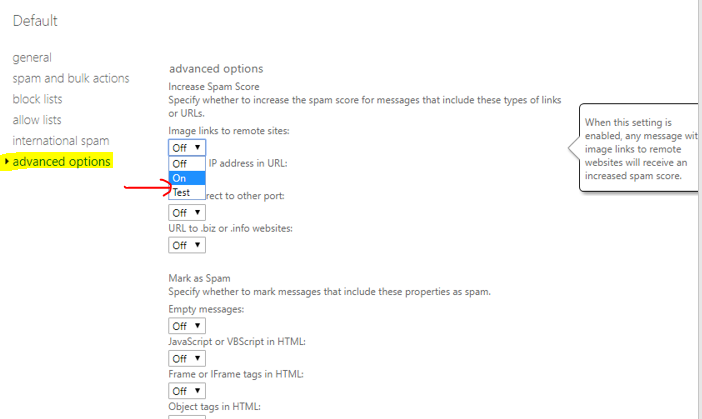
- On the Advanced Optionspage, you can choose On, Off, or Test for each advanced spam filtering option.
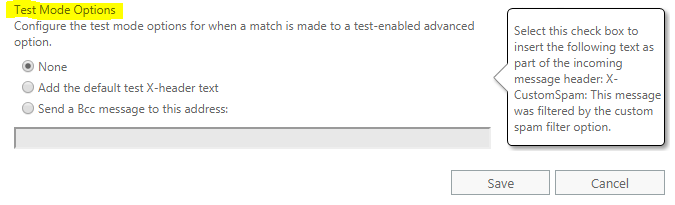
If you select Test, no action is taken on messages that meet the spam filter criteria however, messages can be tagged with an X-header before they are delivered to the recipient. If you select Test for any of the advanced options, you can configure the following test mode settings when a match is made to a test-enabled option:
- None – Take no test mode action on the message. This is the default.
- Add the default test X-header text– Checking this option sends the message to the recipients but adds a X-header to the message that identifies it as having matched a specific advanced spam filtering option.
- Send a Bcc message to this address– Checking this option sends a Bcc of the message to the email address you provide.
Quarantine Message – Sends the message to quarantine instead of to the intended recipients.
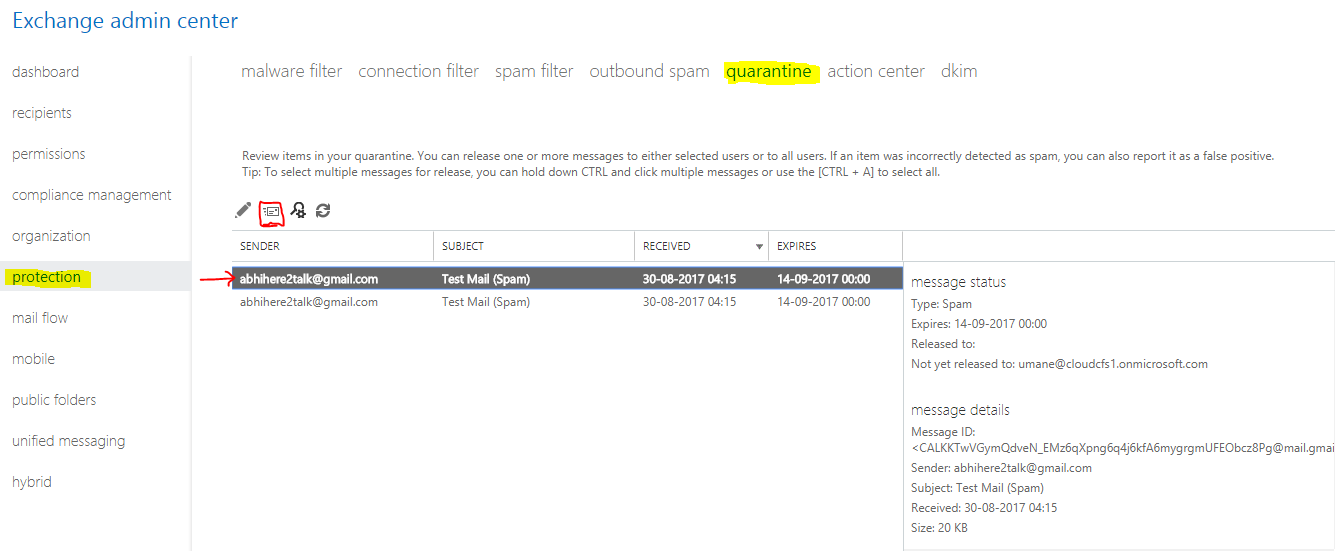
Quarantine –
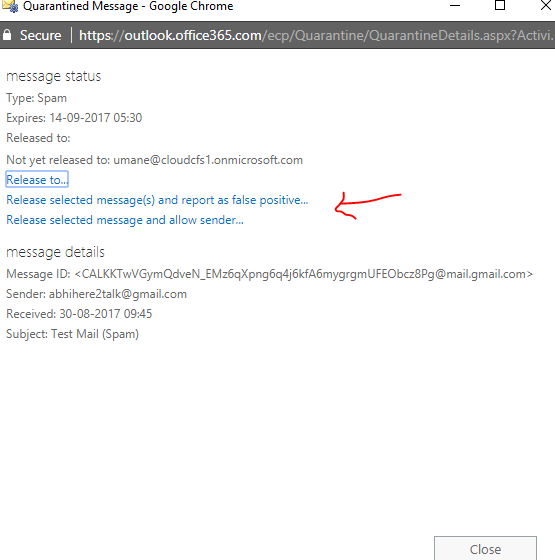
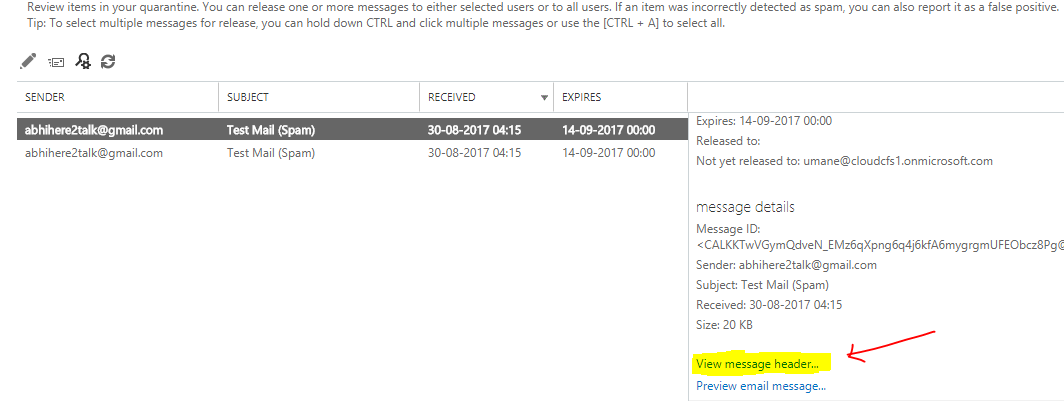
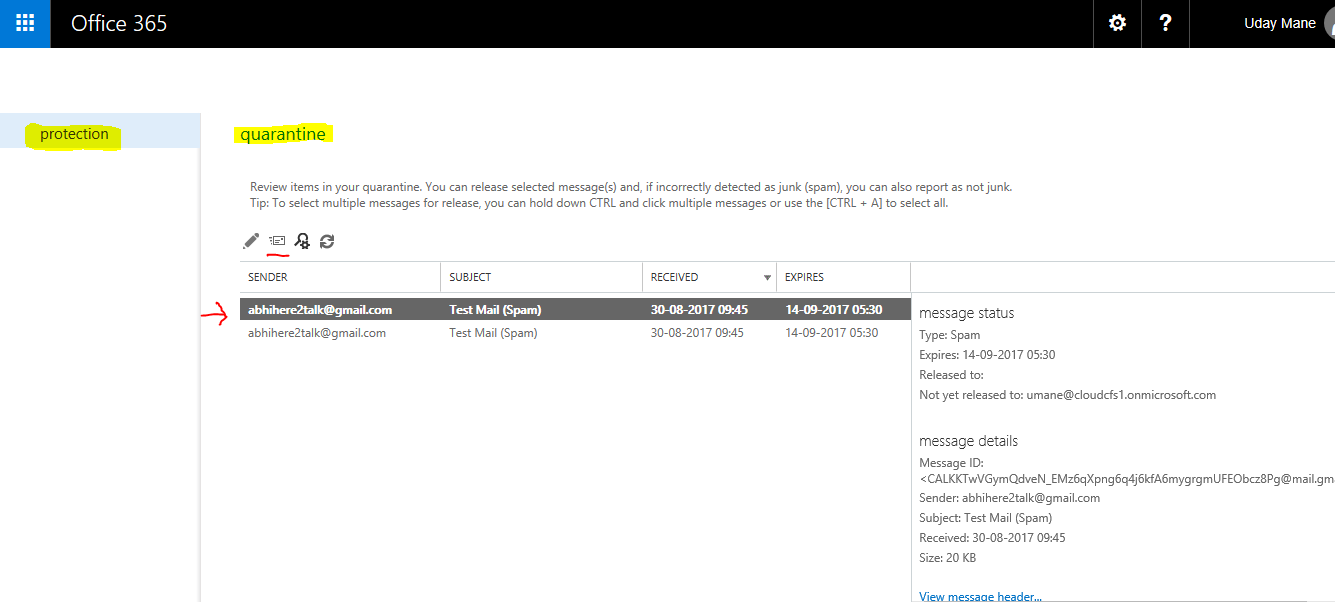
If you have selected to move the spam messages in quarantine then you review spam items in quarantine, messages can be released from there either to selected users or all the users. If an item was incorrectly reported as spam, you can also report it as a false positive. If reported as a false positive and it’s a spam-quarantined message, it will also be reported to the Microsoft Spam Analysis Team, who will evaluate and analyse the message.
In the below screen, you can see test spam mails and the message status in the right pane. You can review & release the message as an administrator from EAC by selecting the message and clicking on the Release Message icon.
If there are more than 500 messages, then you can have an advanced search to find the message.
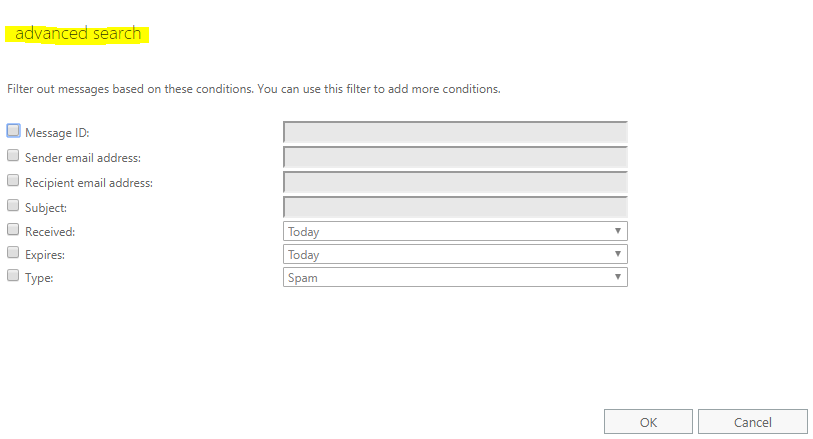
You can use several parameters to find the message, for targeted search for a specific message you can select Message ID.
Message ID – If you discover that the message was sent to the quarantine you can then easily find this message in the quarantine by specifying its Message ID. For example, if a specific message is sent by, or intended for, a user in your organization, but it never reaches its destination, you can search for the message using the message trace feature. If you discover that the message was sent to the quarantine you can then easily find this message in the quarantine by specifying its Message ID.
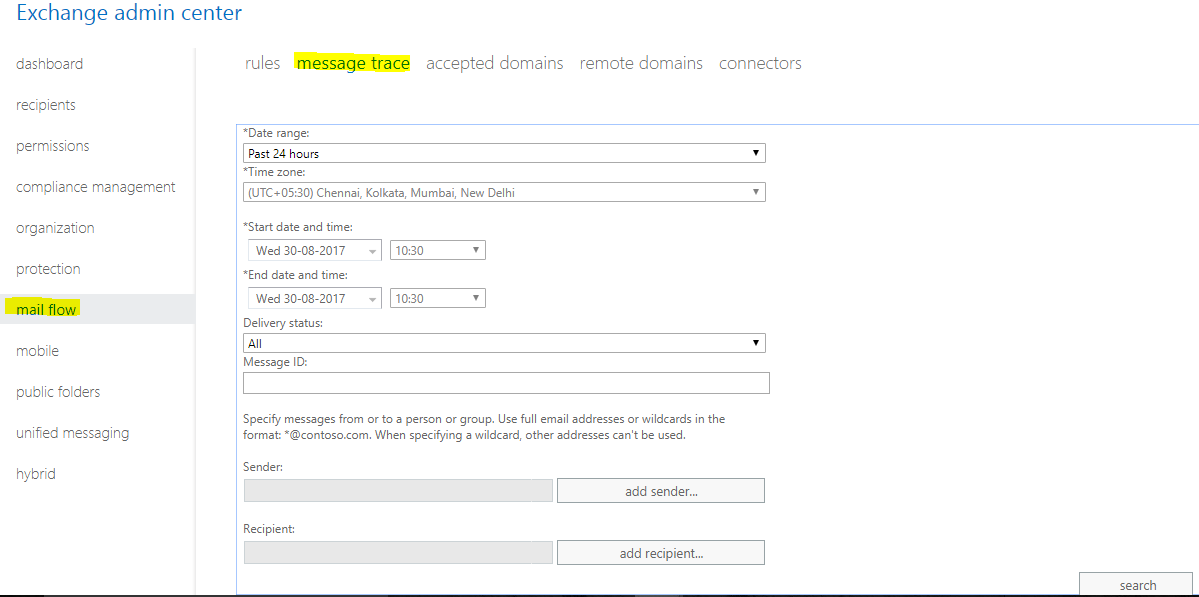
Message trace: As an administrator, you can find out what happened to an email message by running a message trace in the Exchange admin center (EAC).
- Enter the Data range or select custom to specify the search dates, and then click Search.
- From the Message trace results, select the message and click Edit. You will able to see the details of the message, status, message ID.
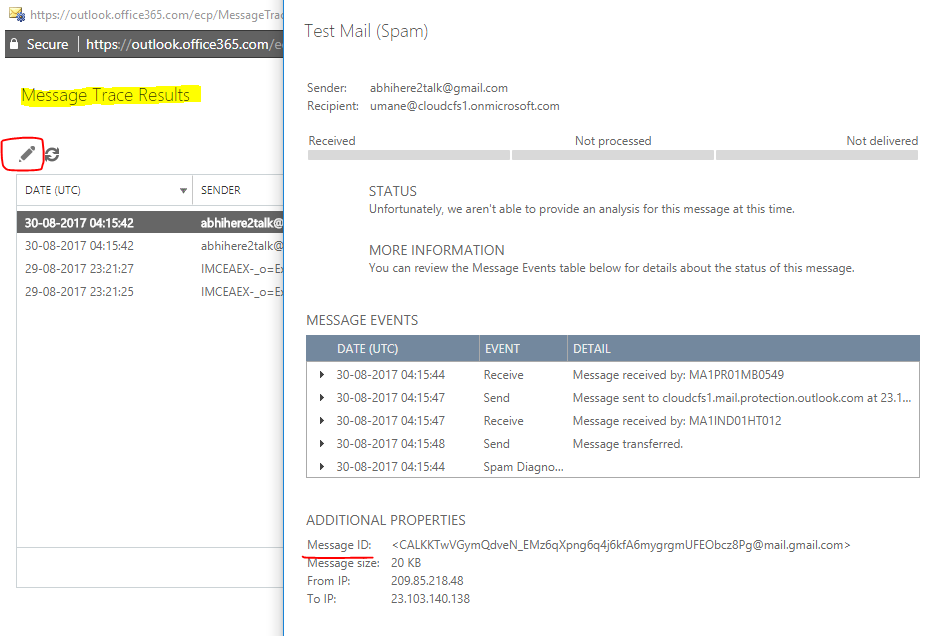
Hence, you can get the message ID from message trace feature in Exchange Online and can do an advanced search in Quarantine.
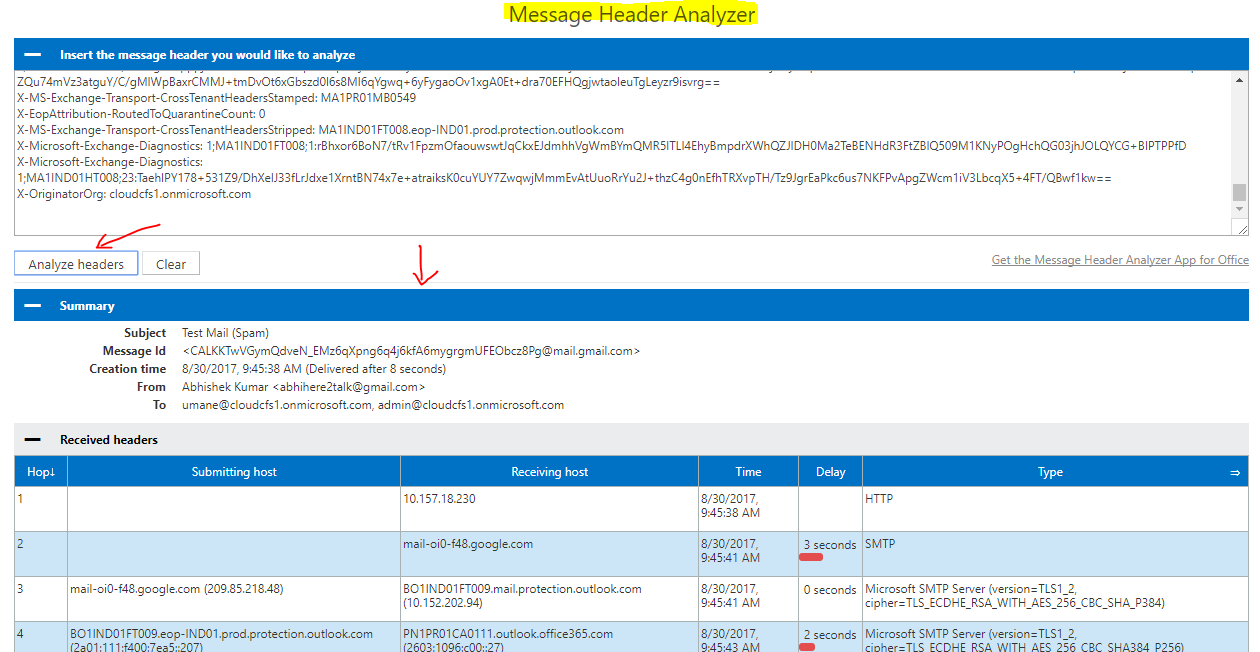
You can also analyse the message header from Microsoft remote connectivity analyser URL: https://testconnectivity.microsoft.com/?tabid=mha.
Message Header – Message headers provide a list of details about the message, such as who sent it, the software used to compose it, and the email servers that it passed through on its way to the recipient.
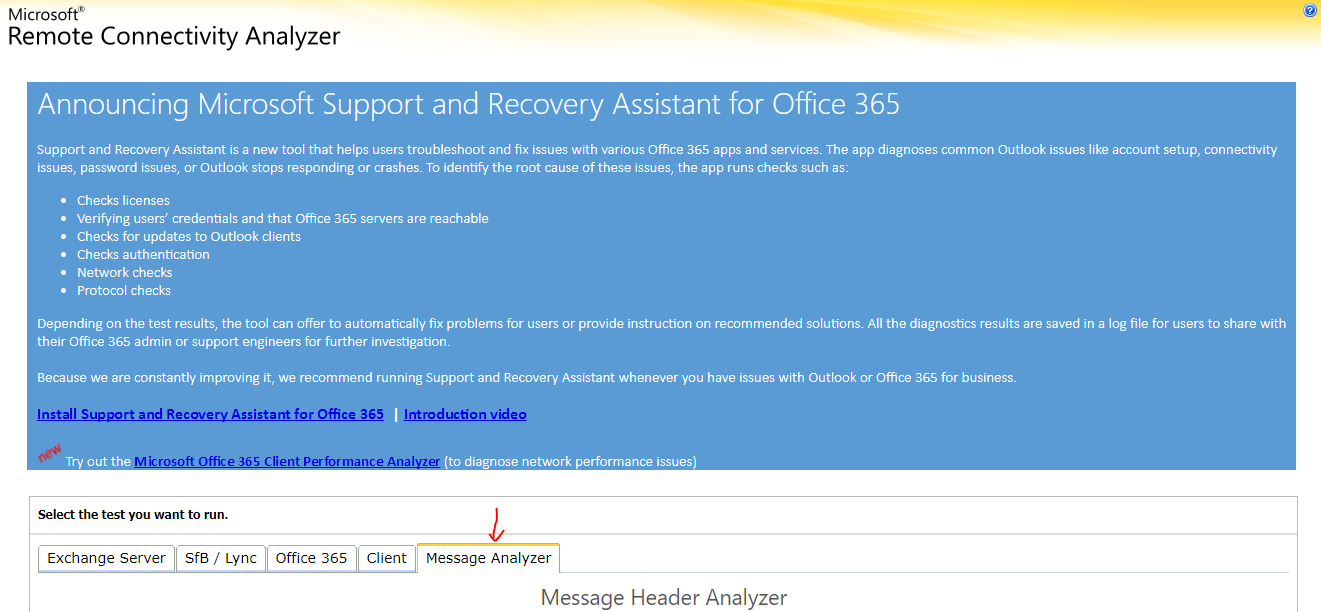
You can find message header in quarantine message, click on the message for which you want the message header.
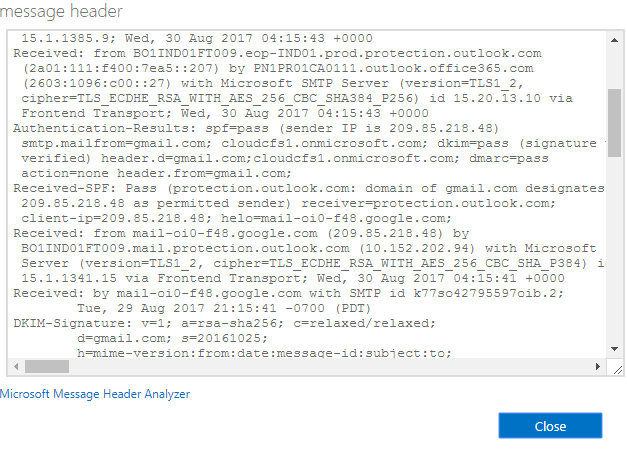
Copy the message header and paste it under message header analyser in Microsoft remote connectivity analyser.
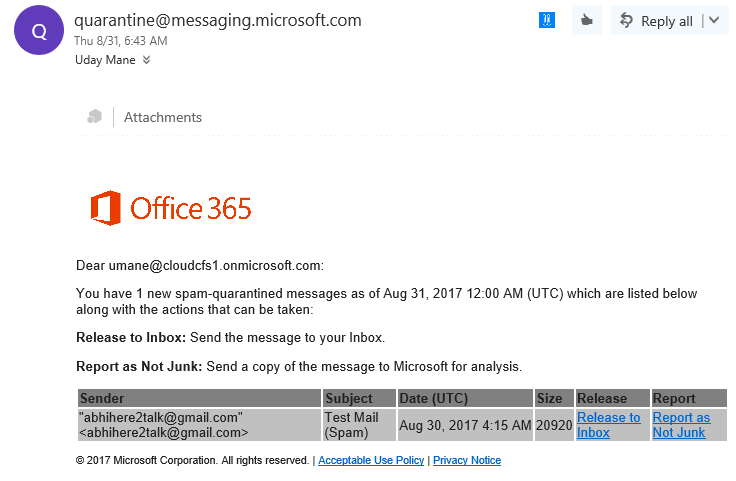
For end users to access spam-quarantined message and release message.
- Go to following URL: https://admin.protection.outlook.com/quarantine, provide Office 365 credentials and sign in.
- After you’ve signed in and been authenticated, you’ll be directed to the end user spam quarantine.
User can view the details of the message and release messages from user quarantine.
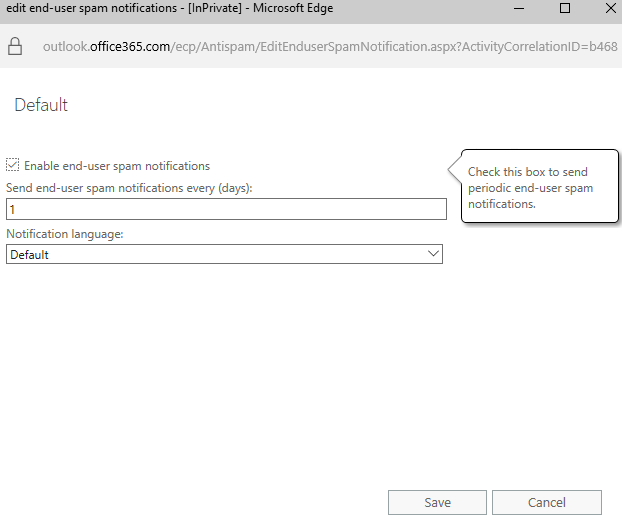
Configure end-user spam notification.
Administrator can also configure spam notification for end-users. So that users get the notifications of spam quarantined message.
- Go to EAC > Protection > Spam Filter.
- Select the Spam filter policy for which you want to configure end-user spam notification.
- On configuration page, select the days in the range of 1-15 and tick on Enable end-user spam notifications.
- User will get a mail notification for the same.
Conclusion:
By this way, you can apply a default spam filter policy or create a custom policy for your organization which will help to protect organization from spam mails.
