Print Custom Size Report using Document Routing in D3FOE
Introduction:
Recently I was working on Cheque Report. I created a custom size Cheque design and it was working fine while downloading it. Then the task was to print the cheque and test but the printout was off size. In this blog I will guide you how the custom size report prints using document routing agent in Dynamics 365 for Operations.
Pre-requisites:
- Install Document Routing agent
- Configure Network Printers
- Adobe Reader
Note: Click here to refer how to configure Document routing and network printer
Steps:
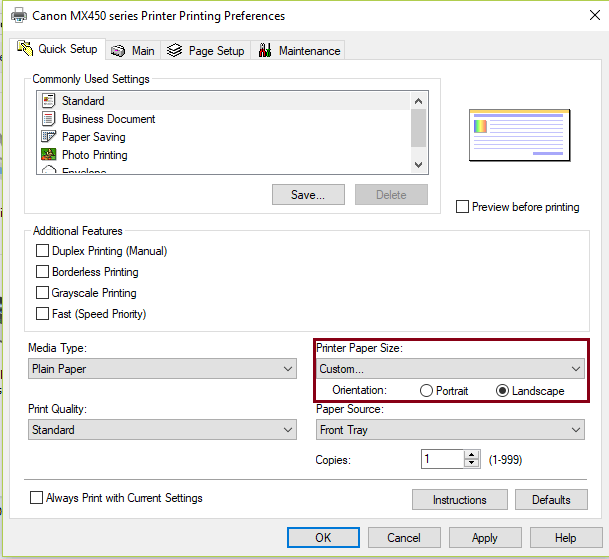
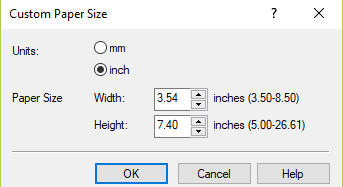
1. Setup Printer Page Size
You need to configure your printer to print custom size report. Go to Printer Paper size and select custom. A new dialog will ask for page size. Enter the Custom Paper size. Make this custom size as your default size.
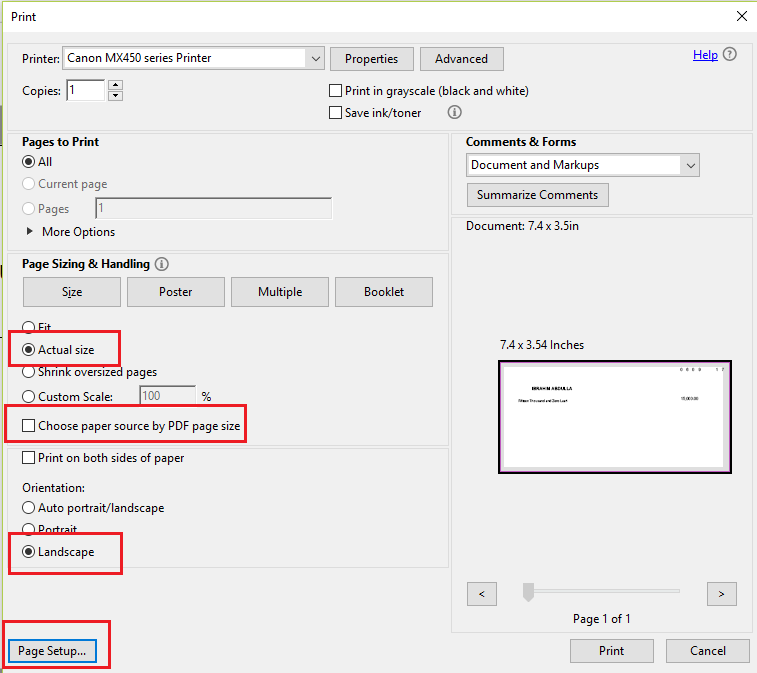
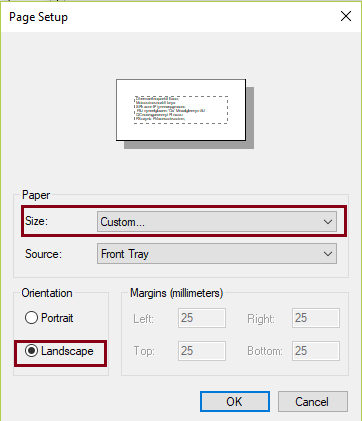
2. Setup Adobe Reader
Once you print the report from Operations with Print Destination as Printer, The Document Routing will take the command and send the document to Adobe Reader. Thus, it takes printing configurations of Adobe Reader and send it to Printer for printing. So, we need to setup the Adobe Reader as well. Please refer below screenshot for Adobe Reader Settings.
Conclusion:
After setting up Printer size and Adobe Reader with same orientation and page size you can print the Custom size report from D365 Operations directly to Printer with correct print layout.
