How to Setup POP3/SMTP email configuration in Dynamics CRM
Introduction:
This blog explains how to Setup POP3/SMTP email configuration in Dynamics CRM.
Steps to be followed:
Step 1: Create new Email Server profile.
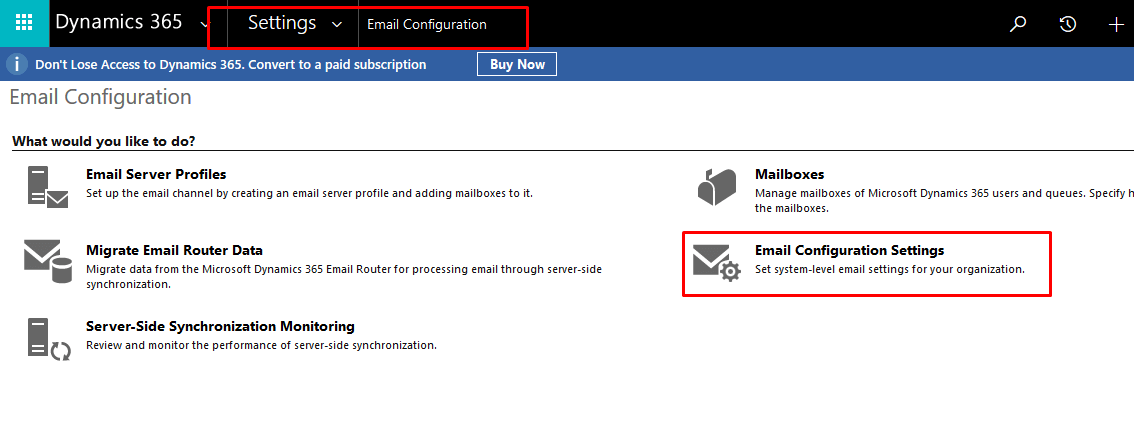
a. Go to Settings –> Email Configuration –> Email Server Profile.
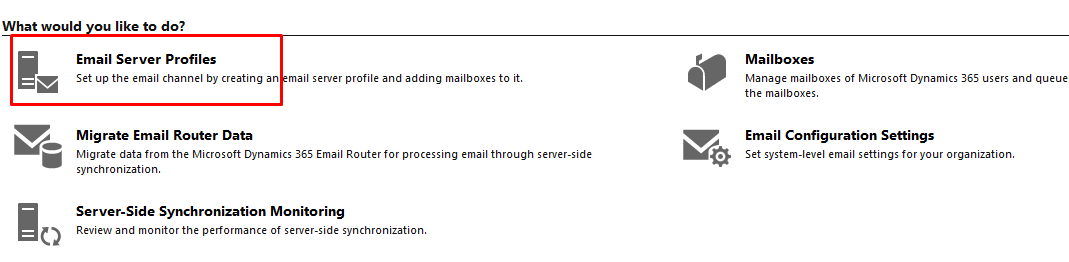
b. Click on +New –> POP3/SMTP server.
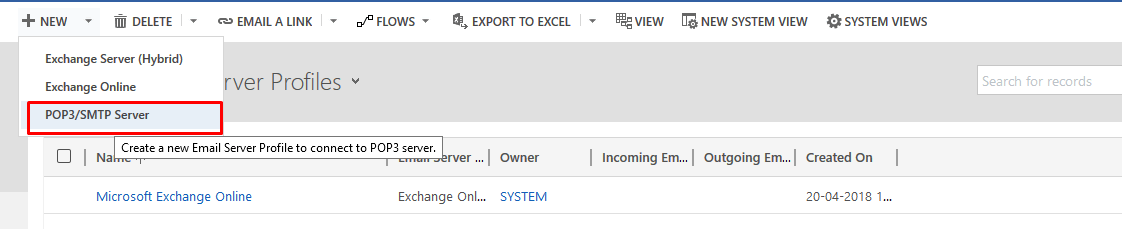
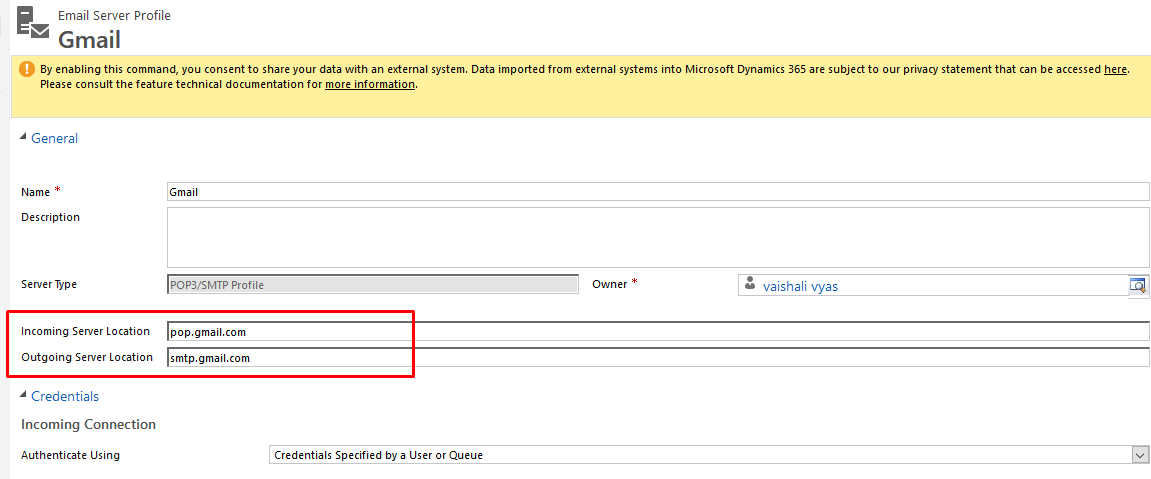
c. Fill Details in the form.
Name: Gmail
Incoming Server Location: pop.gmail.com
Outgoing Server Location: smtp.gmail.com
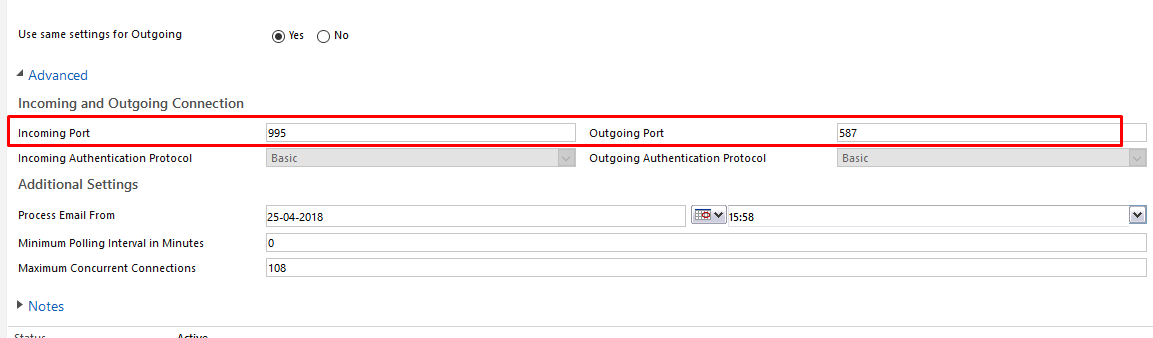
Now Go in Advanced Tab and Provide this Port values for Incoming and Outgoing Port.
Incoming Port: 995
Outgoing Port: 587
d. Save.
Step 2: Go to Email Configuration settings and then change Server Profile.

Step 3:
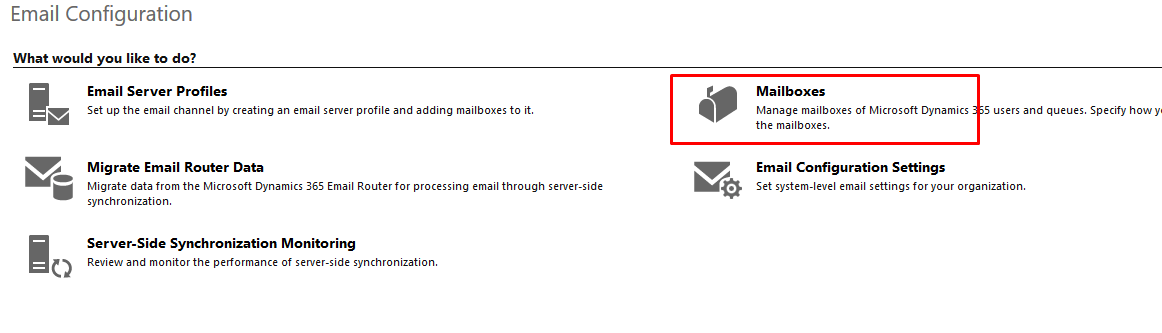
a. Go to Mailboxes.
b. Select the user for whom you want to activate.
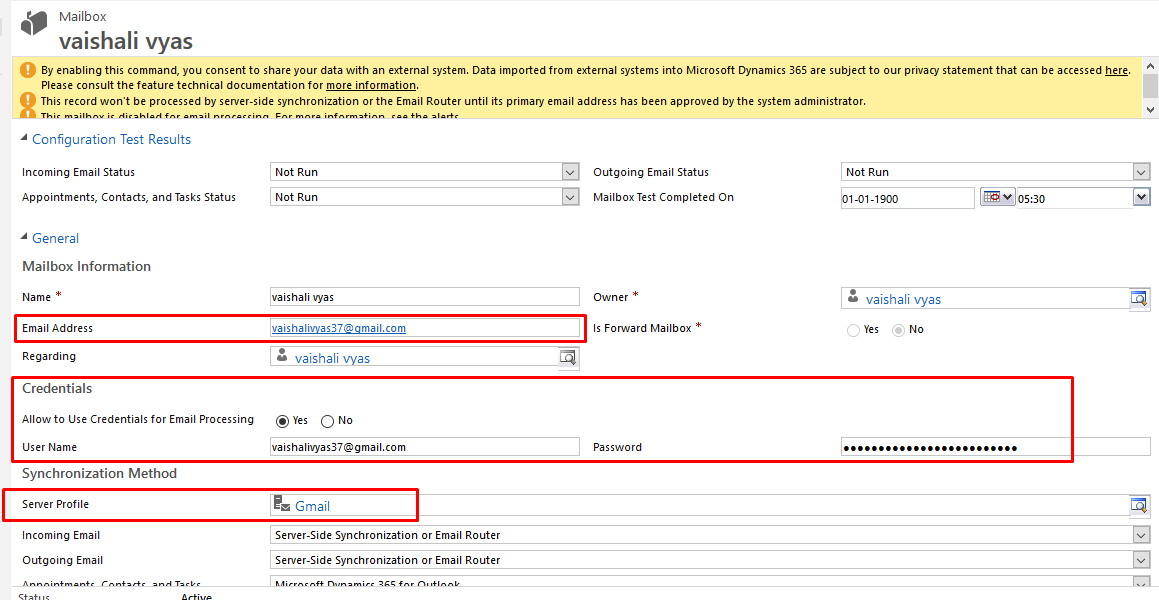
c. Add following details.
- Email Address: Enter your Gmail’s Email Address.
- In Credentials Allow to use Credentials for Email Processing and Provide your Gmail User Name and Password.
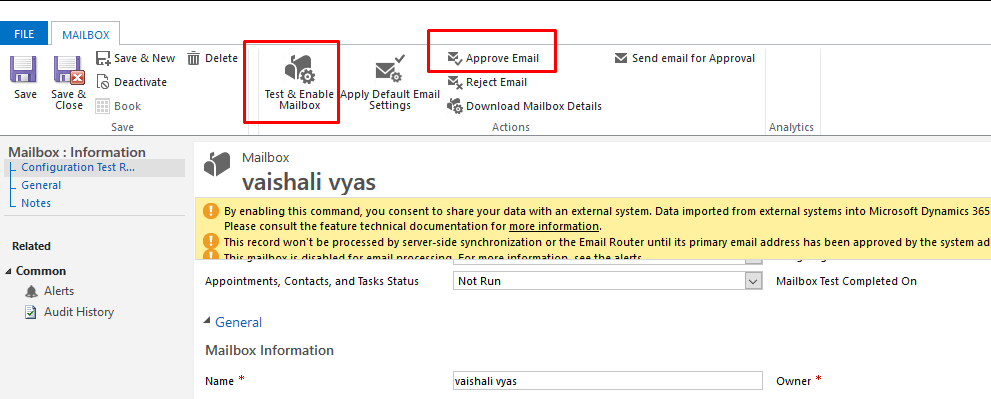
d. Click on Approve Email
e. Click on Test & Enable Mailbox.
You may get following error.
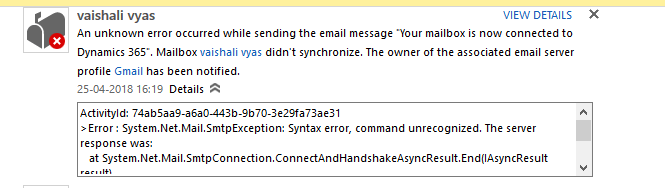
REASON:
Due to hidden settings within Gmail that may be blocking connections from third party apps.
SOLUTION:
a. Make sure you access these links while logged into the Gmail account, and make sure they’re turned on/enabled.
- https://www.google.com/settings/security/lesssecureapps
- https://accounts.google.com/DisplayUnlockCaptcha
b. After enabling again go to mailbox and Click on Approve Email and Test & Enable Mailbox.
c. Incoming and Outgoing Email Status is Success.

