Using Shared Mailbox in Office 365
Now often, you want to have a common mail address for everyone within a team to monitor and interact through like info@domain.com or support@domain.com
Office 365 provides this capability with something called as Shared Mailbox.
Features of Shared Mailbox
- Shared Mailbox doesn’t need an Exchange license.
- Shared Mailbox doesn’t have its own credentials. Users add this mailbox to theirs and use their own credentials to access it.
- Shared Calendar is available in a Shared Mailbox where everyone can see who is available when
Setting up Shared Mailbox
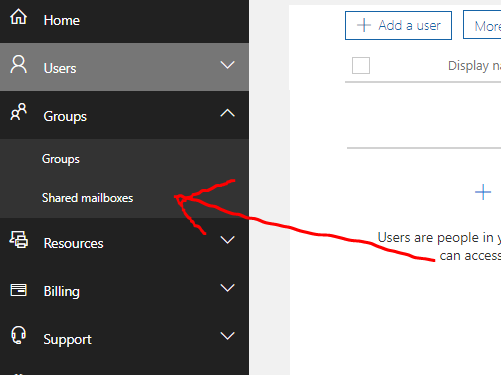
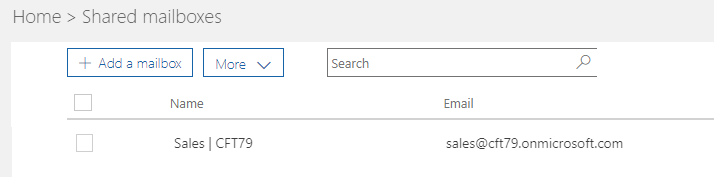
- You’ll need to be an administrator in Office 365 to be able to create a Shared Mailbox. Navigate to Office 365 Admin Center and find Shared Mailboxes options under Groups.
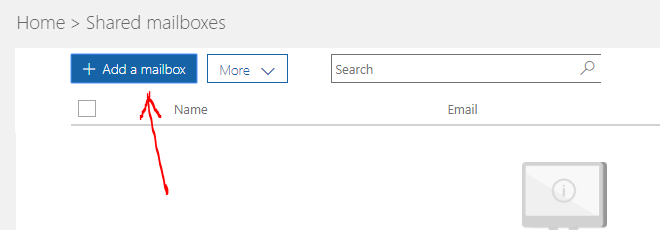
- Click on Add a mailbox
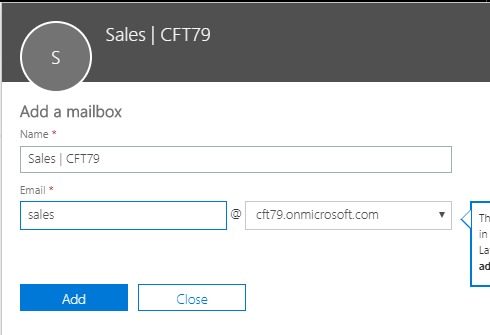
- I’ll call it Sales@domain.com, for example. And click Add.
- I selected both the users seen in above step to add to the Shared Mailbox.
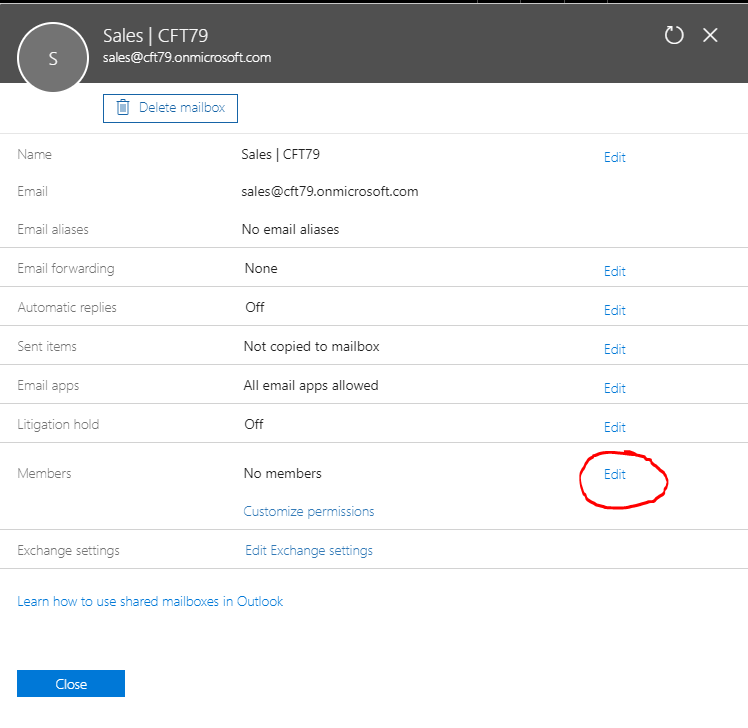
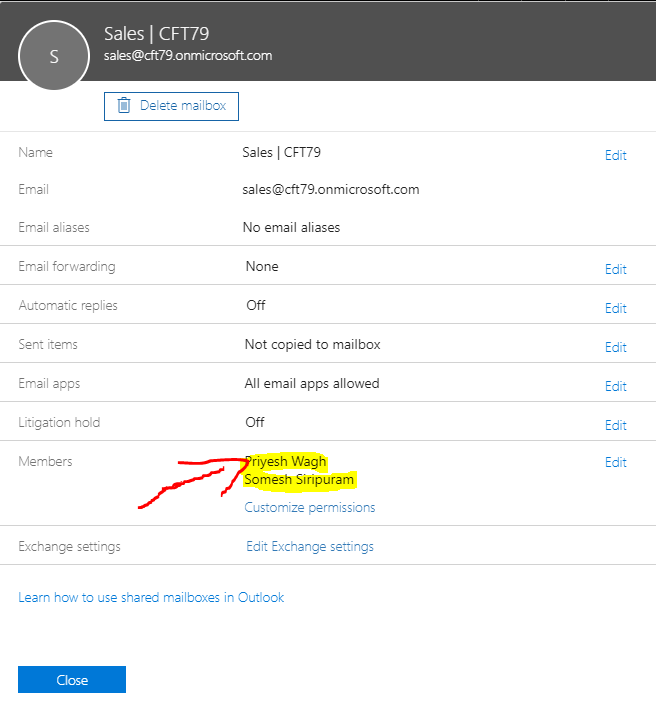
- Those members are seen on the detail pane of the selected Shared Mailbox as shown below
- Shared mailbox gets created within moments!
Adding Users to the Shared Mailbox
Only users who have an Exchange Online license can be added to Shared Mailboxes.
- Click on the mailbox and then on Edit in Members area to add O365 users to the mailbox as shown below
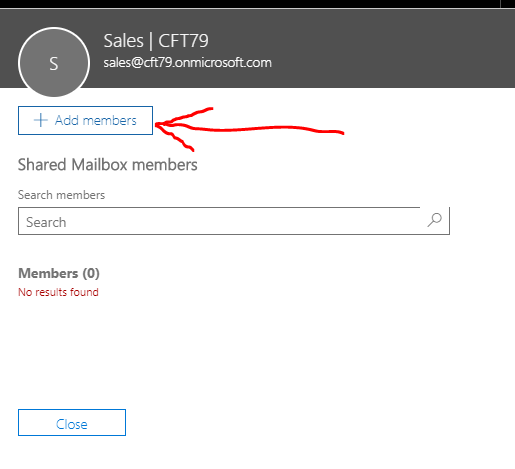
- Click on +Add Members to add users to the mailbox.
- You’ll find all the members who already have an Exchange Online license are eligible for adding to the shared mailbox.
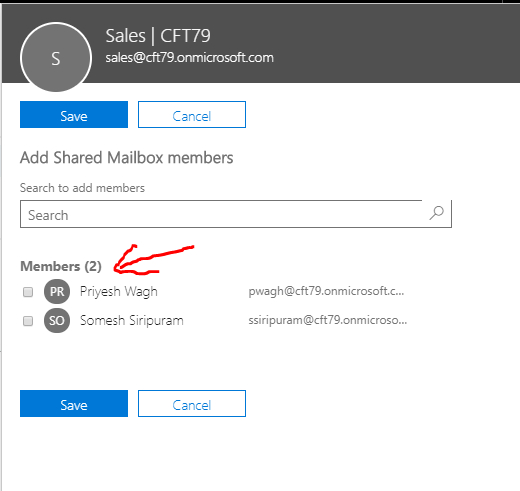
- I selected both the users seen in above step to add to the Shared Mailbox.
- Those members are seen on the detail pane of the selected Shared Mailbox as shown below
Adding Shared Mailbox to Outlook
I will show the OWA example in this blog to show how to add the shared mailbox to the user’s Outlook
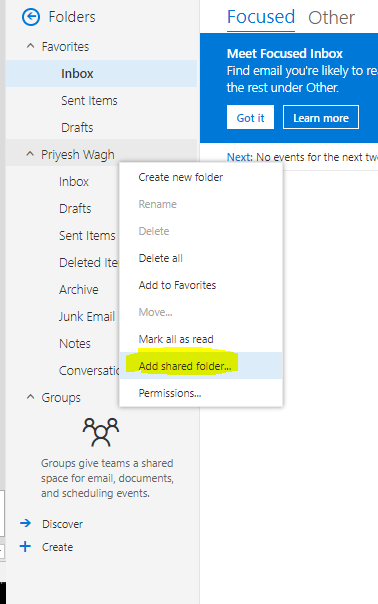
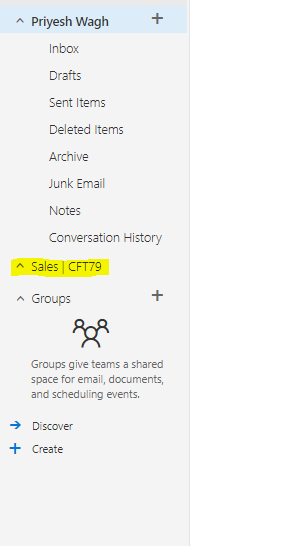
- Let’s assume we have the mailbox pwagh@cft79.onmicrosoft.com and we want to add the shared mailbox sales@cft79.onmicrosoft.com to pwagh’s mailbox.
- In OWA, right click on the root folder of the mailbox and click on Add shared folder
- Start typing the name of the Shared Mailbox and it should auto-populate the same for you. Select the Shared Mailbox and click Add.
- The mailbox should then appear in your OWA.
 Note: It takes a few minutes until the Shared Mailbox is accessible from your mailbox after adding it
Hope this was helpful.