Using POS Tags in LS Central - CloudFronts

Using POS Tags in LS Central

Introduction:

Tags are small pieces of Information that we can display on the POS.

This information may be a field from a table or just some text.

If we are using a field from some table, it is necessary that, the table can be referenced using only the fields available in the current “POS Transaction” record.

There are multiple types of Tags available like:

  1. System :- These tags display system information.
  2. Transaction :- These Tags display information regarding the current Transaction.
  3. Session:- These Tags display information regarding the current Session.

References:

https://help.lscentral.lsretail.com/Content/LS%20Retail/POS/Data/Tags.htm

Prerequisite:

Microsoft Dynamics 365 Business Central

LS Central

Demonstration:

In most cases, we are going to use “Transaction” type Tags so let take an example.

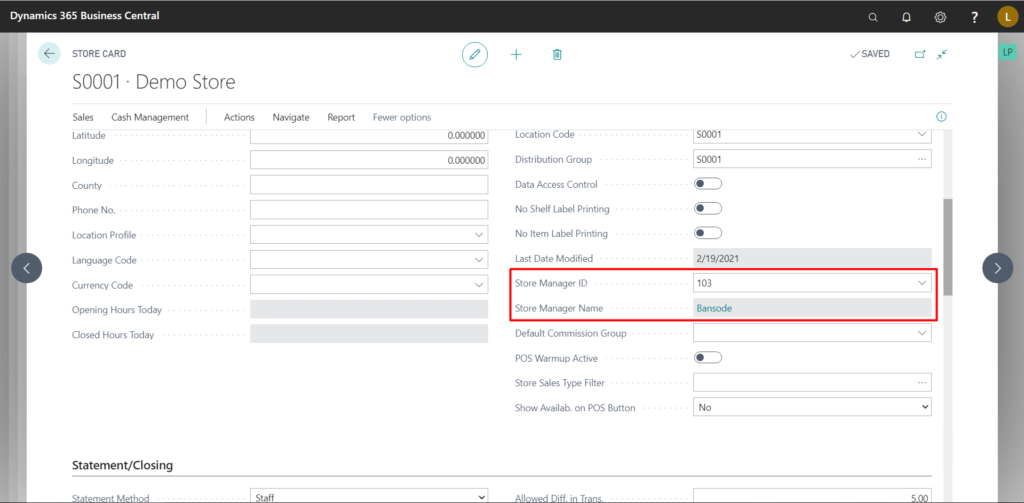
In this example, we are going to create a Tag which will display the manager of the Store.

To create a Tag:

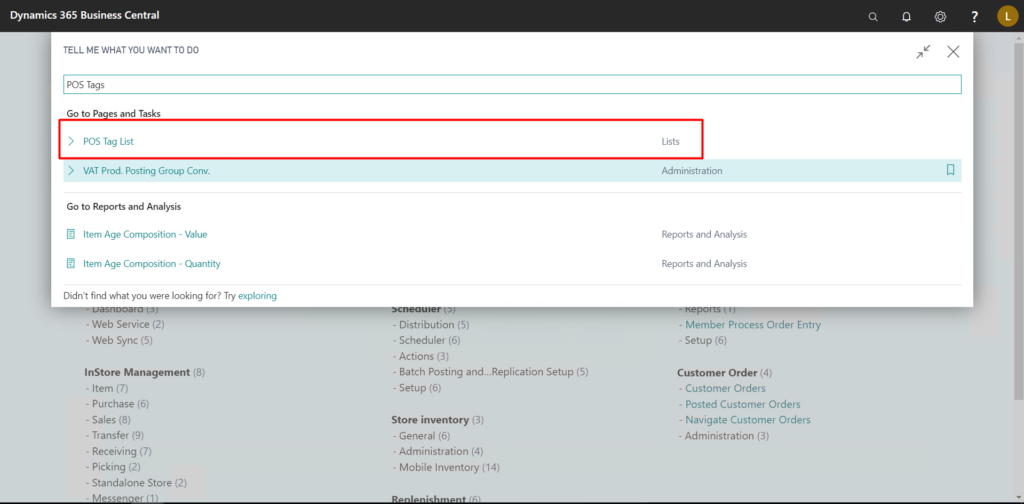
  1. Search for POS Tag in BC
Dynamics 365 Business Central 
TELL ME WHAT YOU WANT TO DO 
pos Tags 
Goto P es and Tasks 
> pos Tag List 
> VAT Prod. Posting Group Conv. 
Go to Reports and Analysis 
Item Age Composition - Value 
Item Age Composition - Quantity 
Didn't find what you were looking for? Try exploring 
- Web Service (2) 
- Distribution (S) 
- Web Sync (5) 
- Scheduler (6) 
- Actions (3) 
- Batch Posting Setup (5) 
lnStore Management (8) 
- Setup (6) 
- Item (7) 
- Purchase (6) 
- Sales (8) 
Store inventory (3) 
• Transfer (9) 
- General (6) 
• Receiving (7) 
• Administration (4) 
- Picking (2) 
• Mobile Inventory (14) 
- Standalone Store (2) 
- Messenaer (l I 
Lists 
Administration 
Reports and Analysis 
- Member Process Order Entry 
- Setup (6) 
Customer Order (4) 
- Customer Orders 
- Posted Customer Orders 
- Navigate Customer Orders 
- Administration (3)
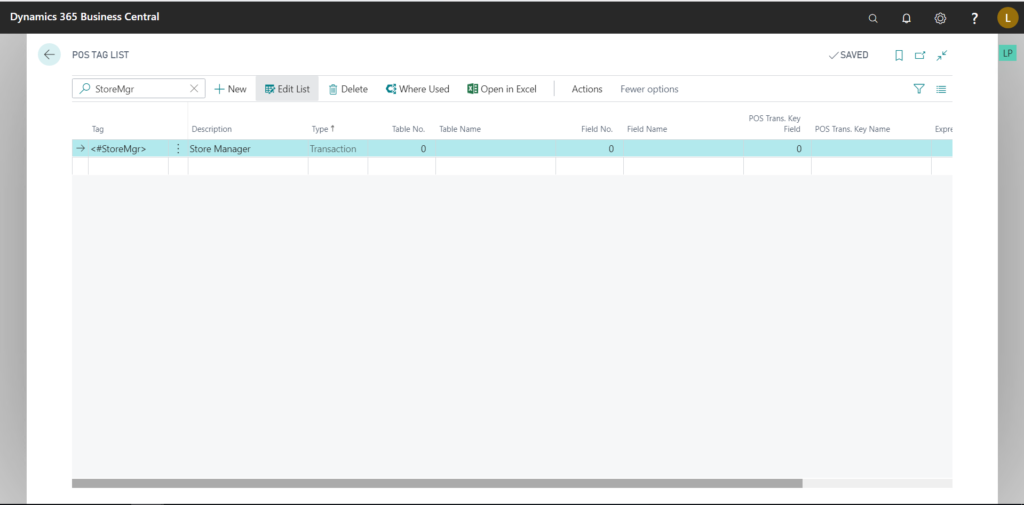
  1. Create a new POS Tag, by convention the naming is <#TagName> so we are going to follow the same.
Dynamics 365 Business Central 
pos TAG LIST 
p StoreMgr 
o 
(0 
v SAVED 
X + New 
Description 
Store Manager 
Edit List Delete 
Type t 
Transaction 
Where Used Open in Excel 
Table No. 
Table Name 
Actions 
Field No. 
Fewer options 
Field Name 
pos Trans. Key 
Field 
pos Trans. 
Key Name
  1. Since the data we need is from the “Store” table we set the “Store” table’s ID in the “Table No.” field  and as we need the “Manager Name” from the “Store” record, we set the “Field No.” accordingly.
  1. In the “POS Trans. Key Field” we specify which field will be used to reference the table mentioned in the “Table No.” field which, in our case, is Store. This list of fields is from the “POS Transaction” table.

In the “Expression” we can specify how the data should be presented, %1 is substituted for the data.

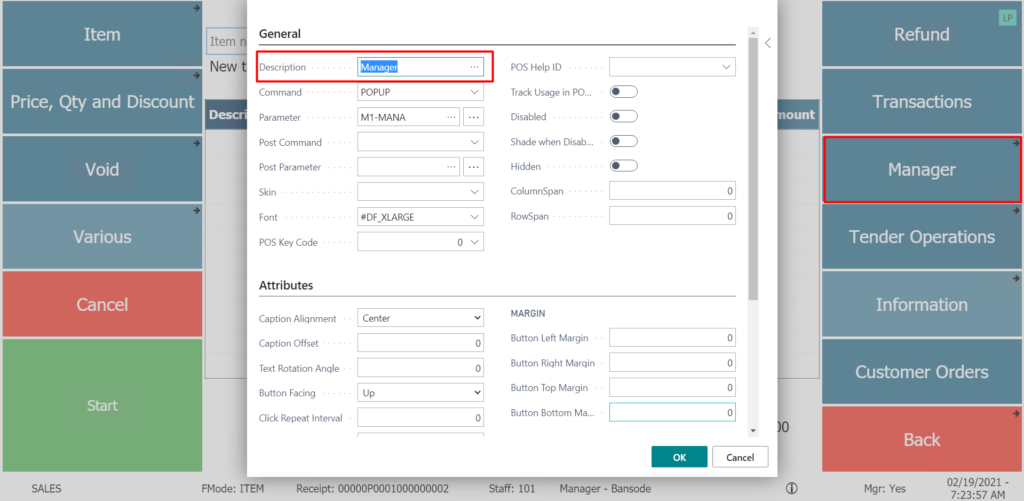
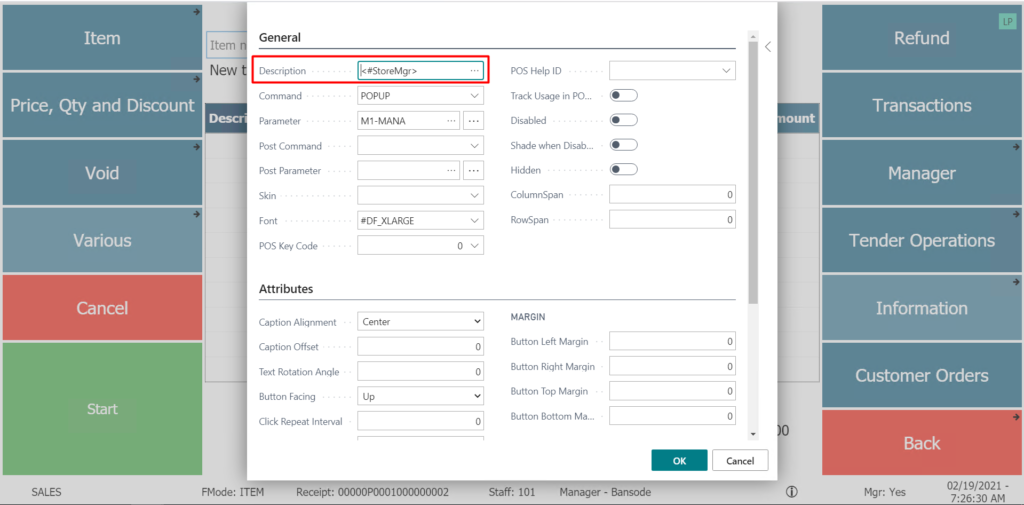
  1. On the POS, we can use this Tag in the “Description” field of any and all Menu Lines, for example, we can use this as the name of a button, thus the button will change depending on which Store it is being used on. 

In this example, I am going to set it on “Manager” button on POS.

Right Click on the “Manager” button and click on “Button Properties.

Item 
Price, Qty and Discount 
Void 
Various 
Cancel 
Start 
SALES 
Item 
New 
General 
Description 
Command 
Parameter 
Post Command 
Post Parameter 
Skin 
Font 
pos Key Code 
Attributes 
Caption Alignment 
Caption Offset 
Text Rotation Angle 
Button Facing 
Click Repeat Interval 
Mana er 
popup 
MI-MANA 
Center 
up 
pos Help ID 
Track usage in PO... 
Disabled 
Shade when Disab... 
Hidden 
ColumnSpan 
RowSpan 
MARGIN 
Button Left Margin 
Button Right Margin 
Button Top Margin 
Button Bottom Ma... 
lount 
Cancel 
Refund 
Transactions 
Manager 
Tender Operations 
Information 
Customer Orders 
Back 
FMode: ITEM 
Receipt 
OOOOOP0001000000002 
Sta 
: 101 
Manager 
Mgr: Yes 
02/19/2021 - 
7:23:57 AM
  1. Click on the three dots and choose the “Tag” that we just created and click on OK.
  1. Click on OK again so that the “Button Properties” page closes.
Item 
Price, Qty and Discount 
Void 
Various 
Cancel 
Start 
SALES 
Item 
New 
General 
Description 
Command 
parameter 
Post Command 
Post Parameter 
Skin 
Font 
pos Key Code 
Attributes 
Caption Alignment 
Caption Offset 
Text Rotation Angle 
Button Facing 
Click Repeat Interval 
POPUP 
MI-MANA 
XLARGE 
Center 
Up 
pos Help ID 
Track usage in PO... 
Disabled 
Shade when Disab... 
Hidden 
ColumnSpan 
RowSpan 
MARGIN 
Button Left Margin 
Button Right Marqin 
Button Top Margin 
Button Bottom Ma... 
lount 
Cancel 
Refund 
Transactions 
Manager 
Tender Operations 
Information 
Customer Orders 
Back 
FMode: ITEM 
Receipt. 
• 00000P0001000000002 
Staff. 
• 101 
Manager - Bansode 
Mgr: Yes 
02/19/2021 - 
AM
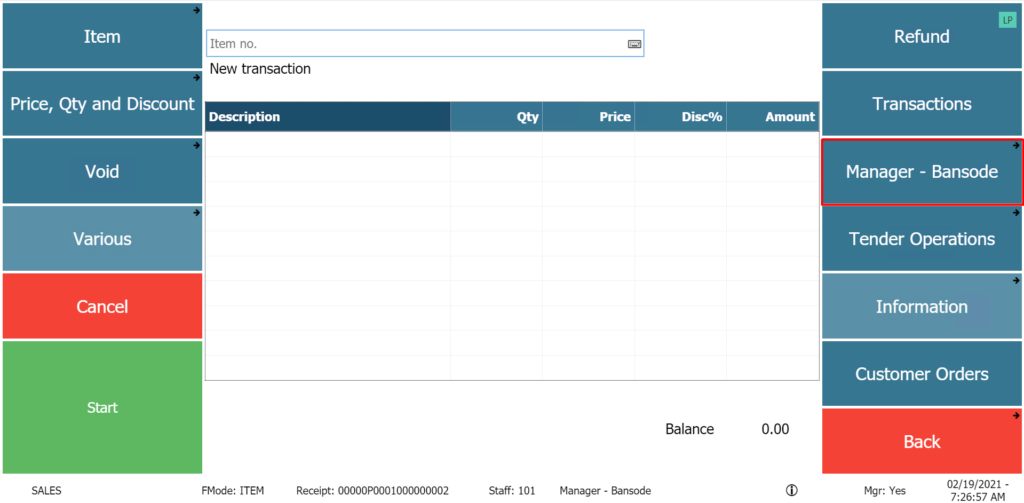
  1. The button now shows the “Manager Name” field of the Store, in the expression that we provided.
Item 
Item no. 
New transaction 
Price, Qty and Discount 
Description 
Manager - Bansode 
Mg Yes 
Price 
Void 
Various 
Cancel 
Start 
FMode: ITEM 
Disc% 
Balance 
Amount 
0.00 
Refund 
Transactions 
Manager - Bansode 
Tender Operations 
Information 
Customer Orders 
Back 
Receipt: OOOOOP0001000000002 
Staff: 
101 
02/19/2021 - 
7:26:57 AM
Dynamics 365 Business Central 
STORE CARD 
SOOOI • Demo Store 
v SAVED 
p 
Sales Cash Management 
Latitude 
Longitude 
County 
Phone No. 
Location Profile 
Language Code 
Currency Code 
Opening Hours Today 
Closed Hours Today 
Statement/Closing 
Actions 
Navigate 
Staff 
Report 
Fev.'er options 
0000000 
0.000000 
Location Code 
Distribution Group 
Data Access Control 
No Shelf Label Printing 
No Item Label Printing 
Last Date Modified 
Store Manager ID 
Store Manager Name 
Default Commission Group 
POS Warmup Active 
Store Sales Type Filter 
Show Availab. on pos Button 
SOOOI 
soool 
(02) 
2/19/2021 
103 
Bansode 
No

Conclusion:

Thus, we saw how to configure and use “Tags” in POS, in LS Central.

Thanks for reading!


Share Story :

Secured By miniOrange