Configuration of Analysis Services
Microsoft SQL Server Analysis Services is a server-based solution that provides online analytical processing (OLAP) functionality. Analytical reports help users examine business data and identify trends that they might not otherwise discover when viewing data on traditional reports.
To integrate Microsoft Dynamics AX and Analysis Services, you must perform the following steps:
Step 1:
Complete the prerequisite tasks:
- Verify that you have the permissions that are required to configure Analysis Services.
- Create a domain account to run the Analysis Services service.
- Assign the .NET Business Connector proxy account to the server administrator role in Analysis Services.
- Install prerequisites.
Step 2:
Configure Microsoft SQL Server Analysis Services:
- Start Microsoft Dynamics AX Setup. Under Install, select Microsoft Dynamics AX components.
- On the Select components page:
- Select the Analysis Services configuration check box.
- Click Next.
- On the Prerequisite Validation page, resolve any errors. When no errors remain, click Next.
- On the Select a file location page, select the location, and then click Next.
- On the Specify a location for configuration settings page, specify whether you want the cubes to access configuration information from the registry on the local computer or from a shared configuration file. If you select to use a shared configuration file, you must enter the network location of the file. Click Next.
- On the Connect to an AOS instance page, enter the name of the computer that is running the Application Object Server (AOS) instance
- On the Specify Business Connector proxy account information page, enter the password for the proxy account that is used by Business Connector. Click Next.
- On the Specify an Analysis Services instance page, select an instance of Analysis Services. Click Next.
- On the Connect to a SQL Server Database page, follow these steps:
- Select the computer that hosts your Microsoft Dynamics AX online transaction processing (OLTP) database.
- Select the Microsoft Dynamics AX OLTP database.
- Click Next.
- On the Ready to install page, click Install.
- Click Finish to close the Setup wizard.
Step 3:
Complete the Analysis Services integration:
- Install SQL Server Shared Management Objects on Microsoft Dynamics AX client computers.
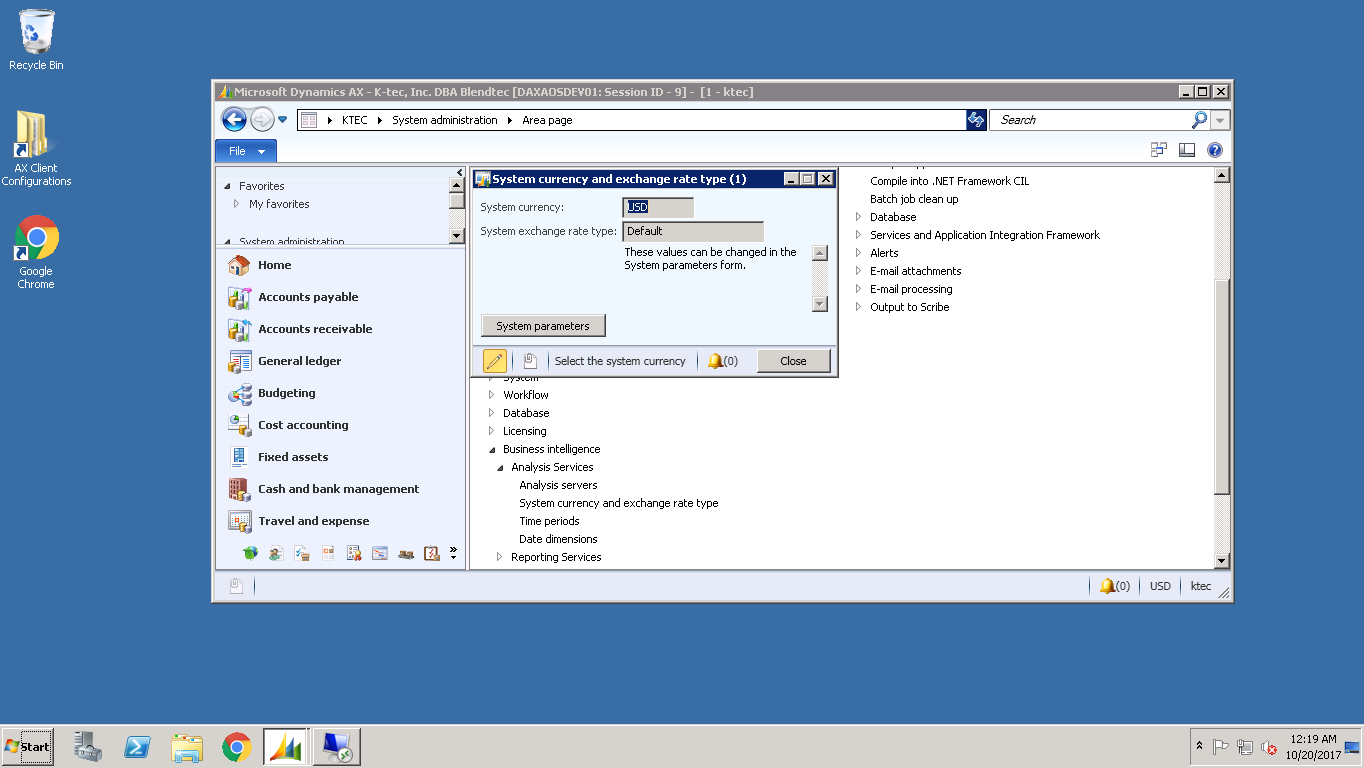
- Verify that information about exchange rates has been entered.
- Click System administration> Setup > Business intelligence > Analysis Services > System currency and exchange rate type.
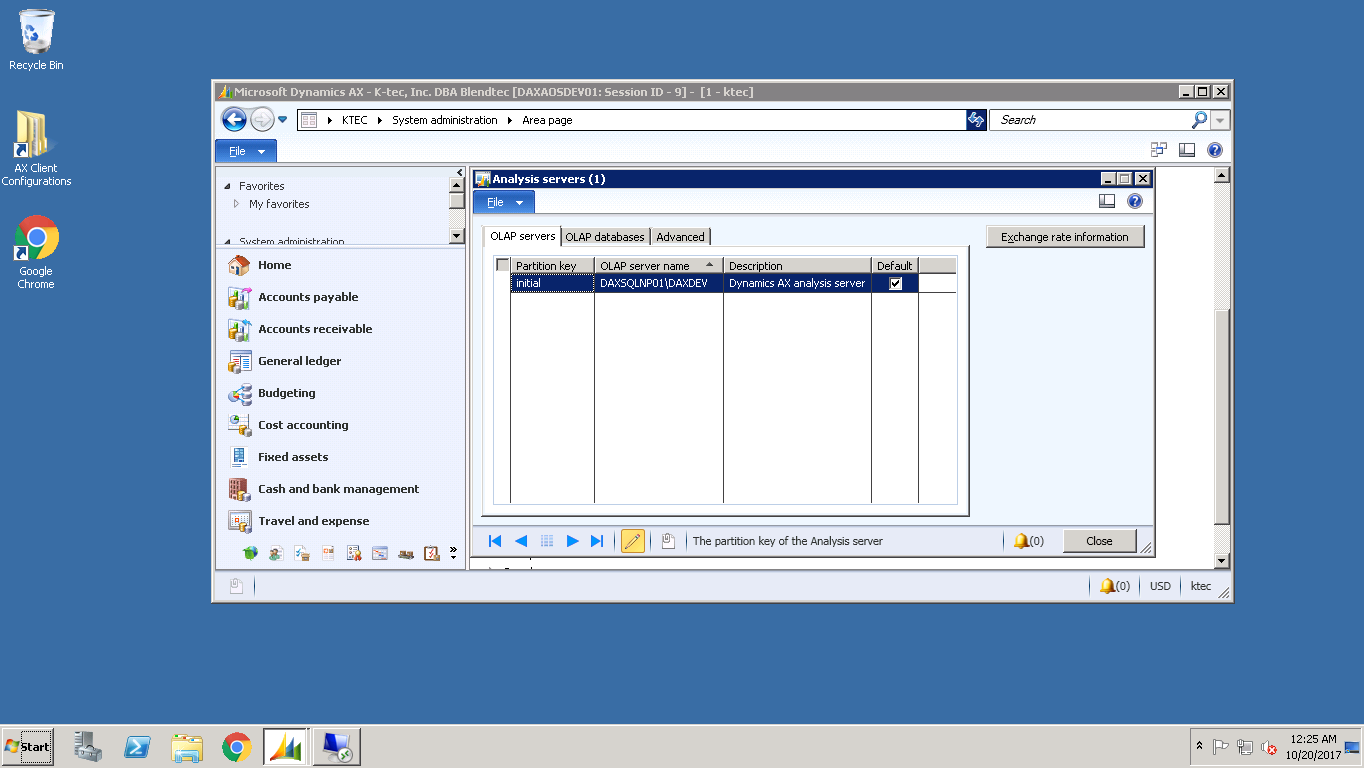
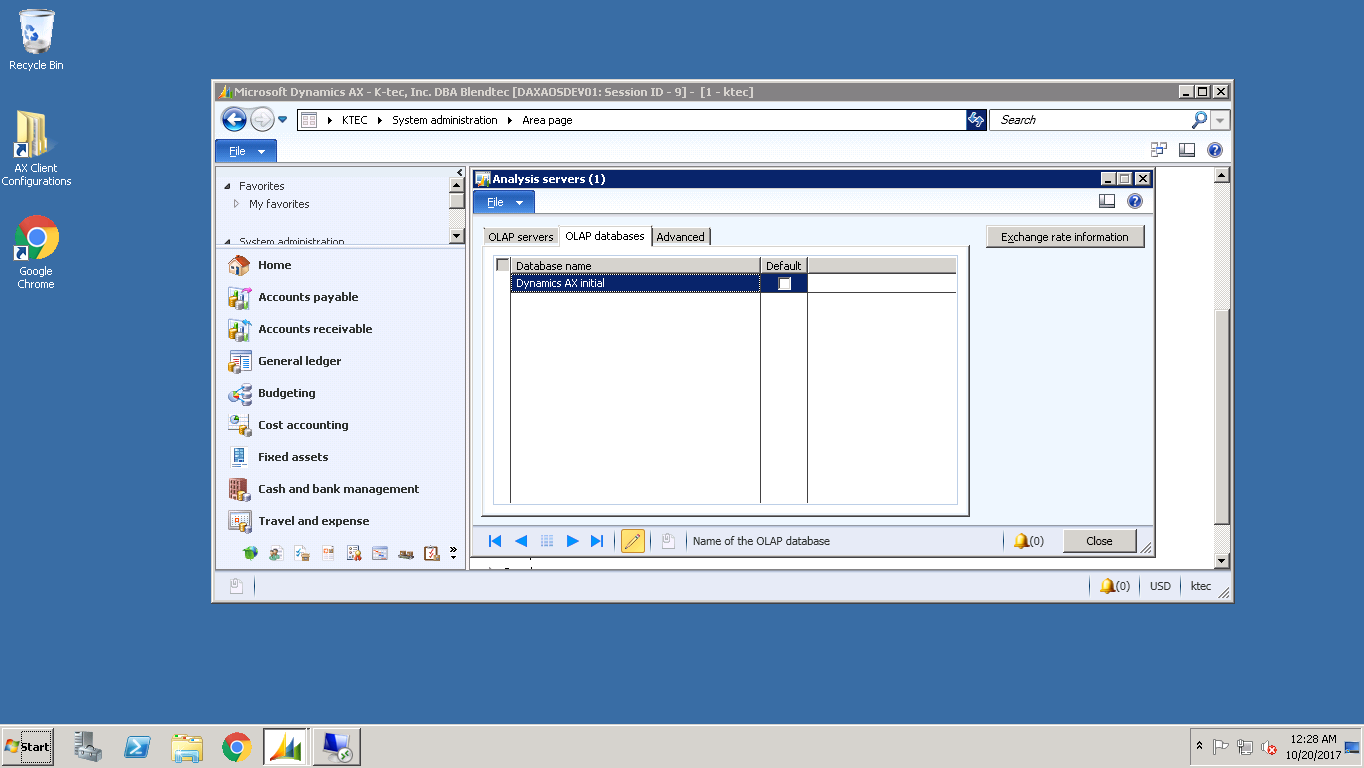
- Set up OLAP Administration Form
- Click System administration> Setup > Business intelligence > Analysis Services >Analysis Server
- Deploy the default cubes that are included with Microsoft Dynamics AX.
-
PS: Ensure that the Microsoft Analysis Server should be connected to the Microsoft SQL Server Management Studio for the respective Server along with correct logon Credentials.
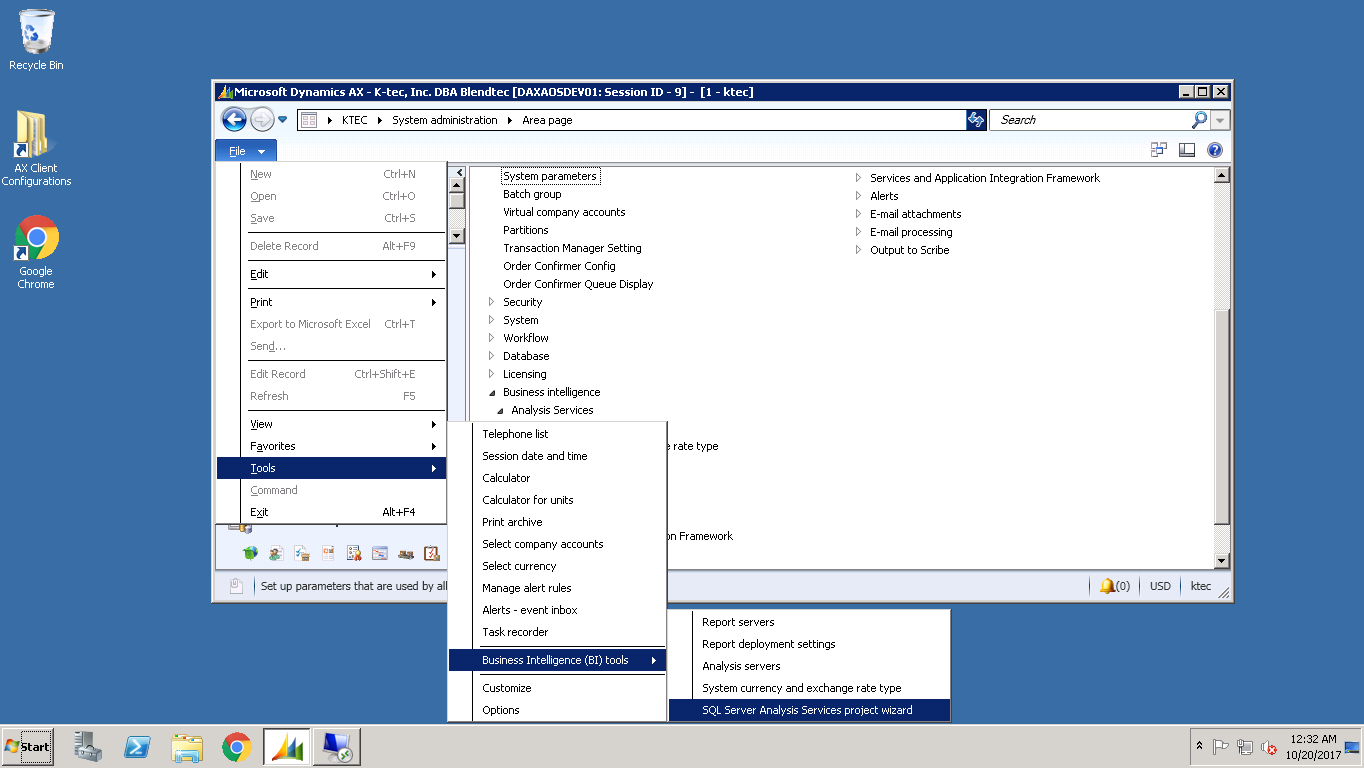
- Open the Microsoft Dynamics AX client.
- Click File > Tools > Business Intelligence (BI) tools > SQL Server Analysis Services project wizard.
- On the Analysis Services project wizard page, click Next.
- On the Select an option page, click Deploy, and then click Next.
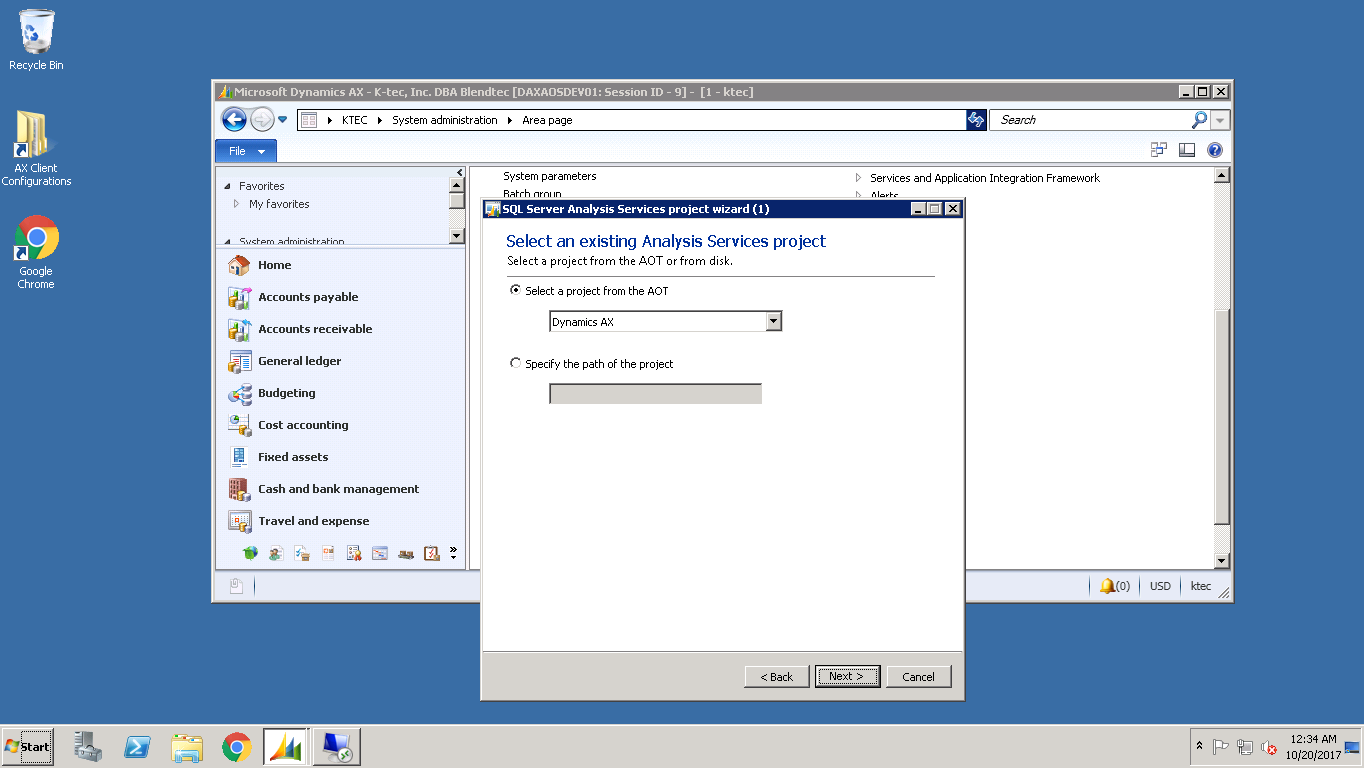
- On the Select an existing Analysis Services project page, click Select a project from the AOT. Select the project you want to deploy from the list, and then click Next
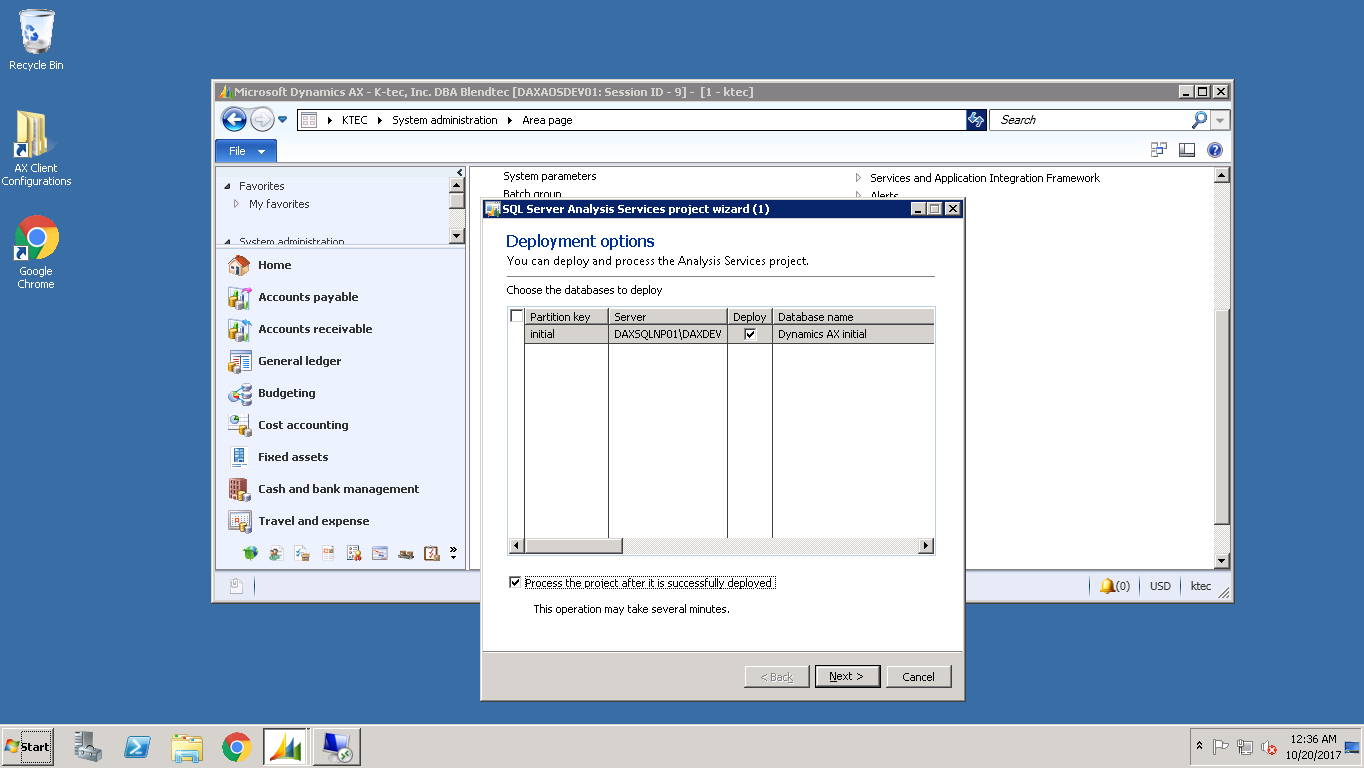
- On the Deploying page, click Next when the deployment is completed.
- Click Finish to close the wizard.
- Configure the cubes, based on the changes that you have made to the Microsoft Dynamics AX configuration or license keys.
- Click Tools> Business Intelligence (BI) tools > SQL Server Analysis Services project wizard. Click Next.

- On the Select an option page, select Configure. Click Next.
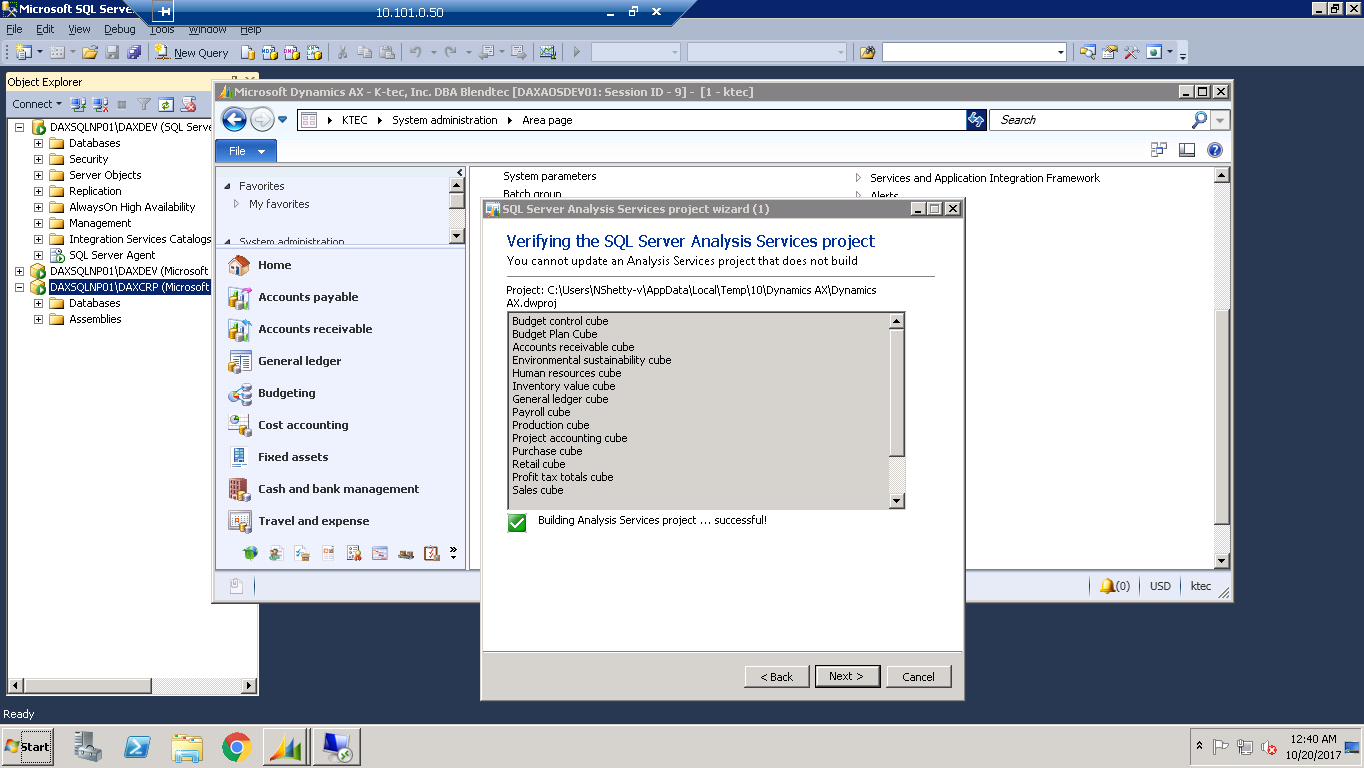
- On the Select an existing Analysis Services project page, select the project to update. You can select a project from the AOT or from disk. Click Next After the project builds, click Next
- Select the Apply the Microsoft Dynamics AX configuration to the Analysis Services project check box. Click Next.
- Select additional languages for which to provide label translations and then click Next.
- Click Tools> Business Intelligence (BI) tools > SQL Server Analysis Services project wizard. Click Next.
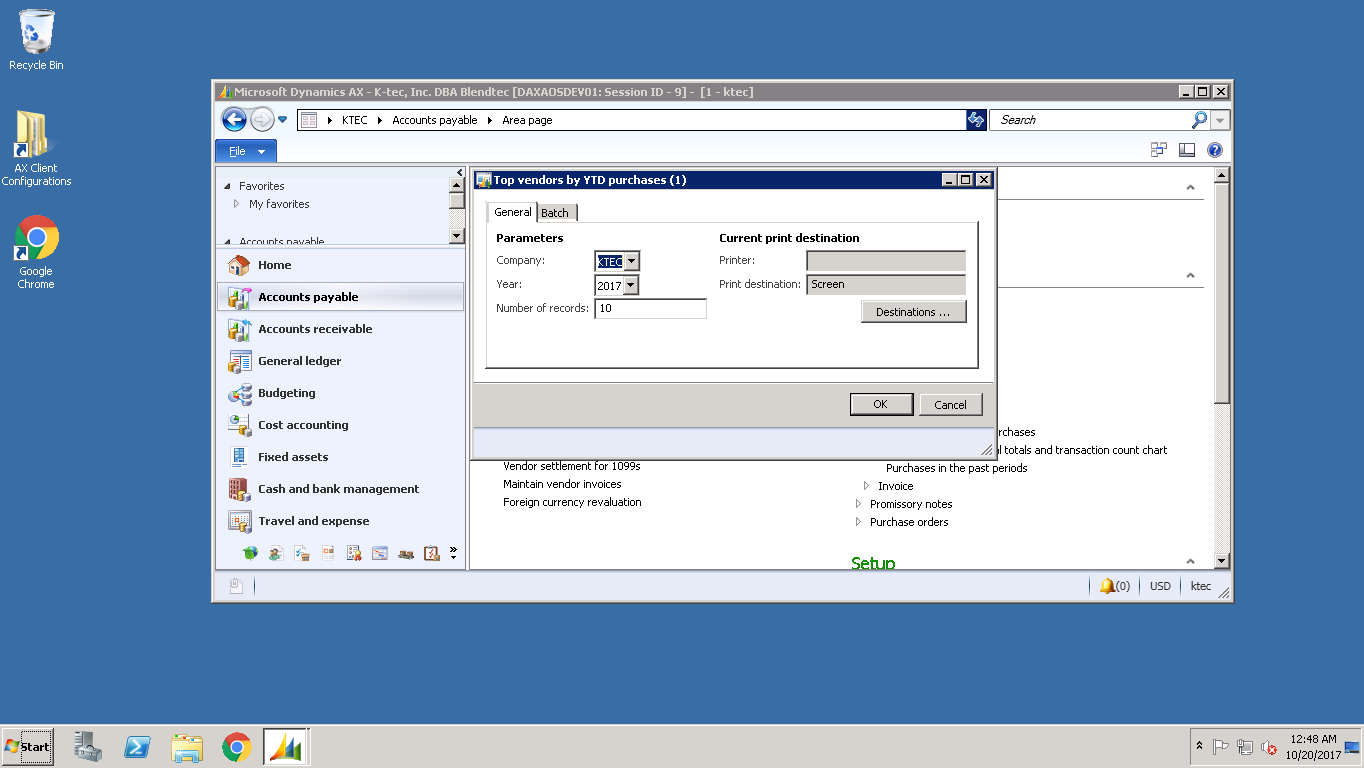
- To Run the Report:
- Click on Accounts Payable>Reports>Statistics>Vendor>Top Vendors by YTD Purchase