Importing Notes in Dynamics 365 correctly
Preparing an Excel Template for Notes entity is a little tricky. Doesn’t work when you just Export directly as a Template from the Templates Wizard and try to include all columns and import as is. Why? Because there’s no Regarding field exported when you export/import that template.

Here’s what you can do as a workaround.
Scenario
Now, let’s assume you want to Export a standard Excel Template for import so that you can re-import into Dynamics for Notes entity for a regarding entity.
Exporting Excel Template
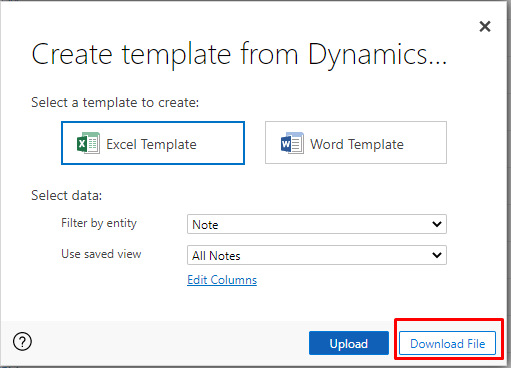
Your Document Templates are where all your Excel Templates can be exported from –
Now, follow the below –
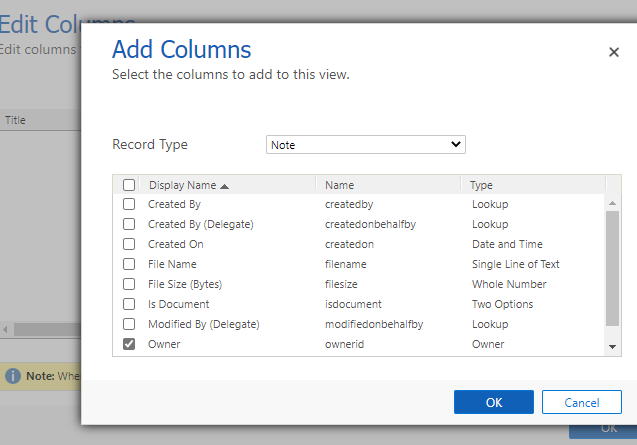
- Select Notes entity and Edit Columns you need to Export the Excel with your required columns

- Select the columns you need. Observe that you don’t get Regarding column to export
- Then Download the file.
Modifying the Excel
Now, since you don’t have the Regarding field in the Excel you exported from Templates, here’s what you need to do –
- Add a column yourself, give it a proper name based on what the Notes’ Parent entity should be. In this example, I’m importing Notes for Account. So, I’m adding a column called ‘Account Name’
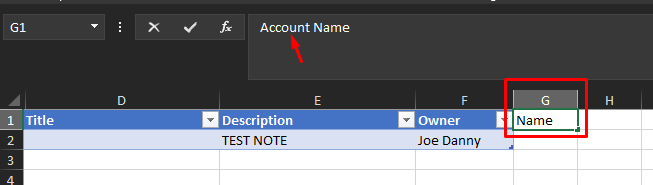
- A new column will be created as below

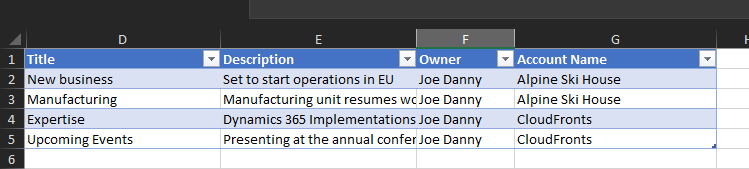
- Now, populate your data based on how the Notes should be imported and tagged to which records.
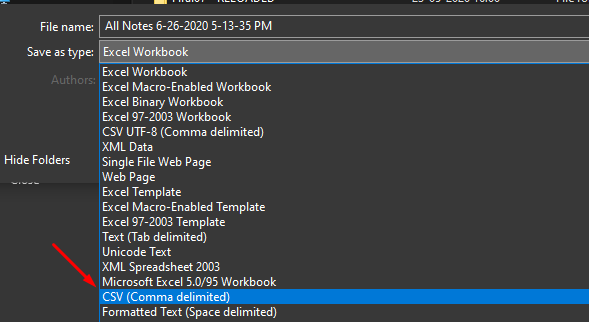
- Now, by default, this template is exported in Microsoft Excel Worksheet (xlsx) format. You’ll need to Save As in CSV format
Re-Importing
Up until above, your Excel is ready to be imported. Let’s begin –
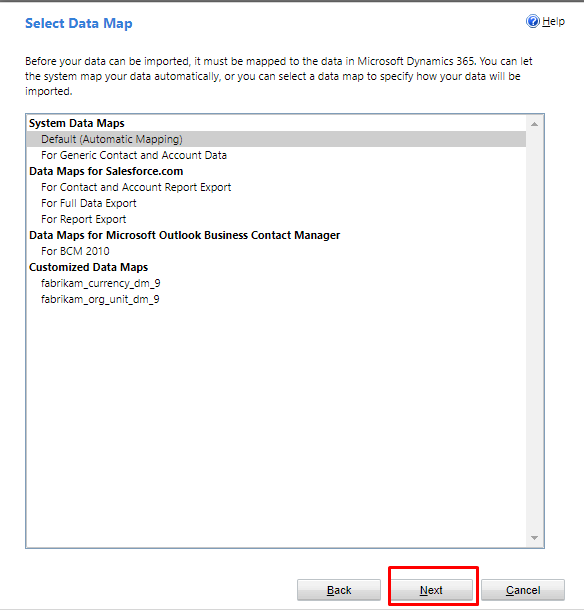
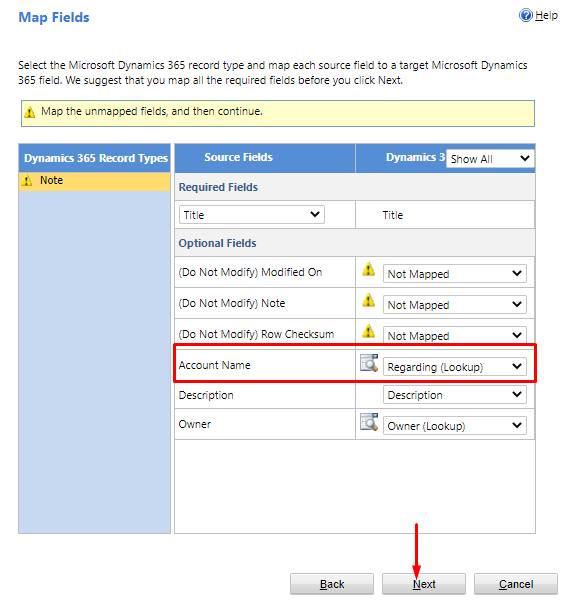
- Import the file as a usual Excel Import in Dynamics 365 CRM. Since this is not a direct Template importing as is, but a CSV, you’ll get to map this file manually.
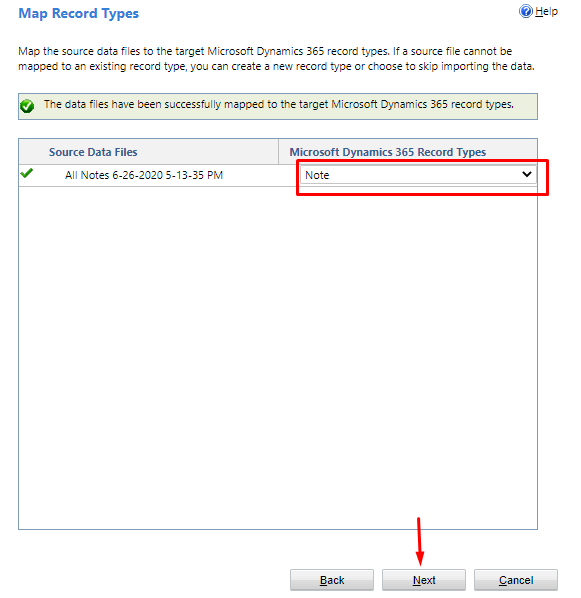
- Then, you’ll need to manually select the Note entity from the drop-down and then proceed
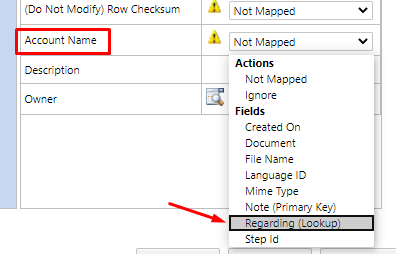
- Now, whatever is mapped automatically will be mapped. For the newly created Account Name field, you’ll need to expand the Not Mapped dropdown and select Regarding (Lookup)
- Now, you’ll need to select the entity you want the Notes to appear under. In my case, this is Accounts, so I have it right there
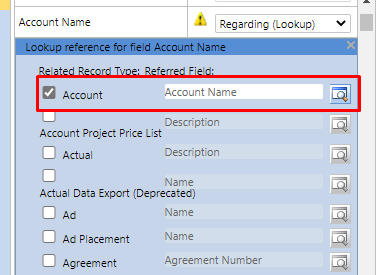
- Since this Regarding fields supports several entities, scroll all the way down to Confirm your selection
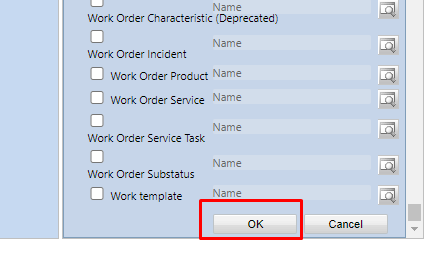
- Now, your Regarding field is set and you are ready to confirm and Import
- Now, my Import here is completed. (You’ll need to take care the Import is successful)

Imported Notes
If you look at the records now, the Notes will be attached to the respective Regarding records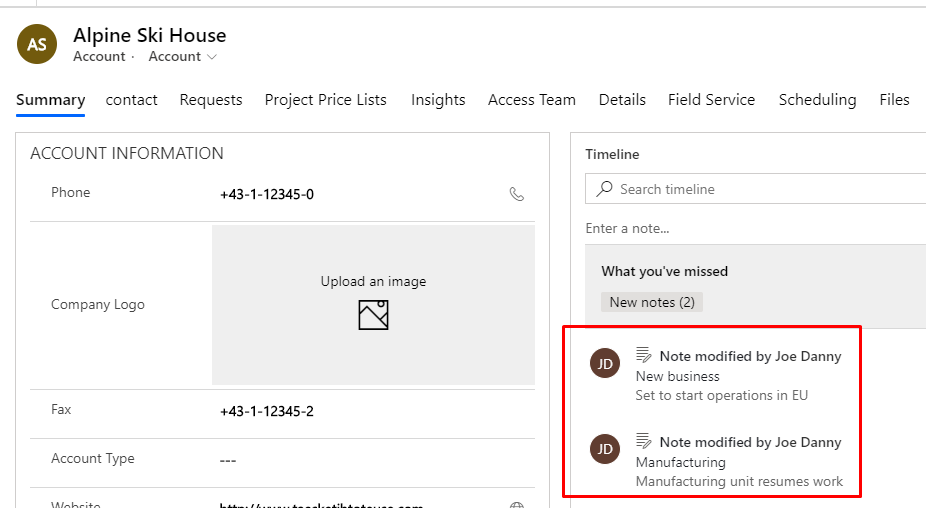
Hope this helps!!
