Send Custom Emails using SendGrids API
Introduction:
In this blog we will demonstrate how to send custom emails using SendGrids API.
Scenario:
If we want to send custom emails to customers stored in Dynamics 365 with different email body for every customer based on their data stored in CRM, it is not possible to do so by using the normal Email Editor as it has some limitations while displaying dynamic content. One way of doing this is by creating a console app which will use SendGrids API to send out custom emails for every customer.
Pre-Requisites:
- Visual Studio
- SendGrid Account
Implementation:
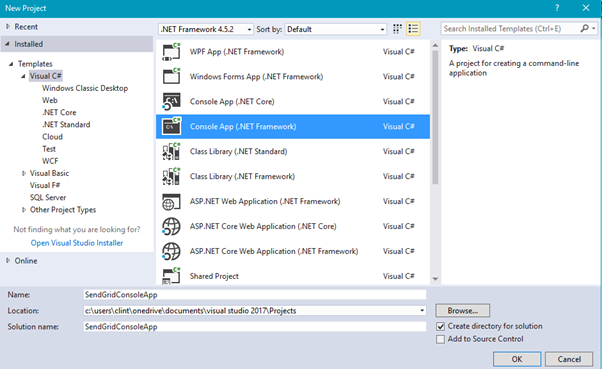
Step 1: For this demonstration we will see how to send out a mail to a single email. First we create a Console App in Visual Studio

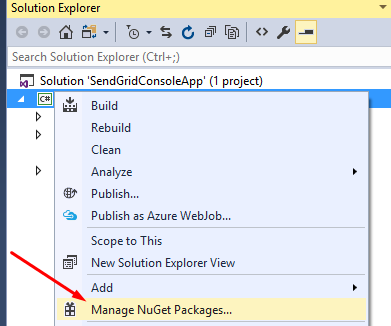
Step 2: Once the Project is created Right Click on the Project and select Manage Nuget Packages

Browse to the latest Nuget packages and install SendGrid package

Step 3: Next we have to create an API Key in SendGrid. Just give a name for a key and Click on Create Key which will generate a unique key. Store this key which will be used in the Code


Step 4: Below is the Code to send email:
using SendGrid;
using SendGrid.Helpers.Mail;
using System.Threading.Tasks;
namespace SendGridConsoleApp
{
class Program
{
static void Main(string[] args)
{
string sendGridAPIKey = "EnterKeyHere";
Execute(sendGridAPIKey).Wait();
}
static async Task Execute(string _apiKey)
{
var client = new SendGridClient(_apiKey);
var from = new EmailAddress("[email protected]", "From UserName");
var subject = "MAIL Send Through SendGrid";
var to = new EmailAddress("[email protected]", "To UserName");
var plainTextContent = "Example PlainText";
var htmlContent = @"<!DOCTYPE html><html><head><style>
table {
border-collapse: collapse;
width: 100%;
}
th, td {
text-align: left;
padding: 8px;
}
tr:nth-child(even){background-color: #f2f2f2
}
th {
background-color: #4CAF50;
color: white;
}
</style></head><body><h2>Important Details</h2>
<table><tr>
<th>Firstname</th>
<th>Lastname</th>
<th>Email Address</th></tr>
<tr><td>Peter</td><td>Griffin</td><td>[email protected]</td></tr>
<tr><td>Lois</td><td>Griffin</td><td>[email protected]</td></tr><tr>
<td>Joe</td><td>Swanson</td><td>[email protected]</td>
</tr><tr><td>Cleveland</td><td>Brown</td>
<td>[email protected]</td></tr></table></body></html>";
var msg = MailHelper.CreateSingleEmail(from, to, subject, plainTextContent, htmlContent);
var response = await client.SendEmailAsync(msg);
}}}
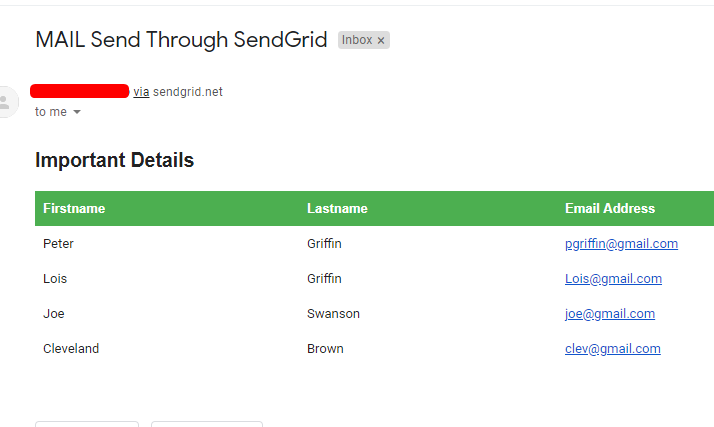
Step 5: Once the Console App is run the email is send below shown is the sample of the Email sent

While running this for multiple customers we can create different HTML body content for each customer and pass it to the CreateSingleEmail function.This approach can also be used to send bulk emails to customers.
