Using the Power BI Report Builder to create and publish paginated reports.
Power BI Report Builder is a great tool to create paginated reports which can be easily printed in a proper page layout. If you used to work in SSRS Report Builder, the whole environment will look familiar. Plus Power BI report builder is a very light tool and has additional features such as directly importing a data source from an existing PowerBI report from any workspace, publishing these RDL reports to existing PowerBI workspace and embedding existing paginated reports into PowerBI dashboards. In this blog we will see how to create a report using the Power BI Report Builder.
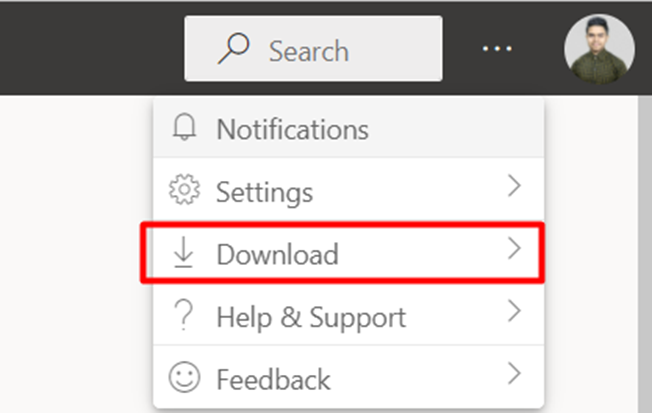
- You need to download the Power BI Report Builder first, for that go to app.powerbi.com and click on the ellipses beside your profile
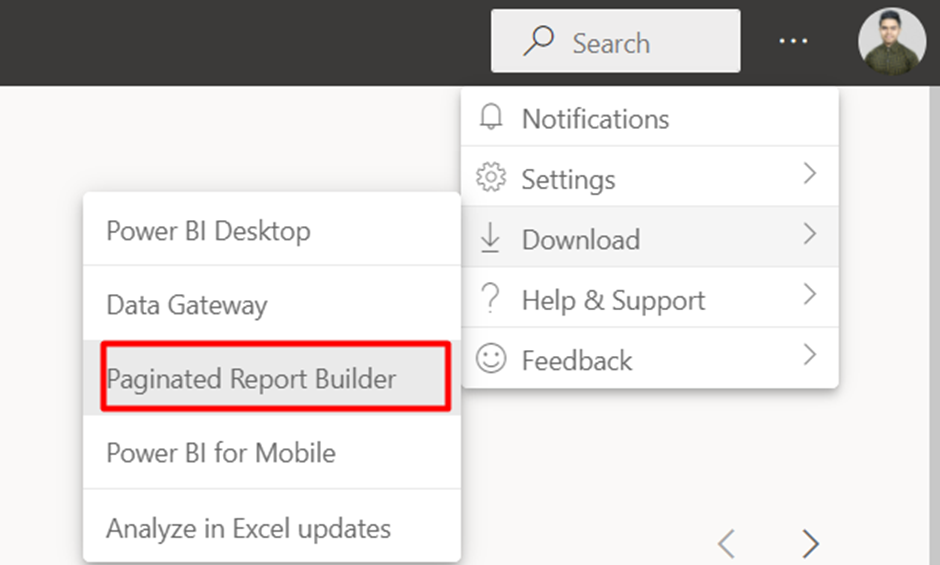
- After clicking on the Download option select the Paginated Report builder option.
- Install the downloaded setup file.
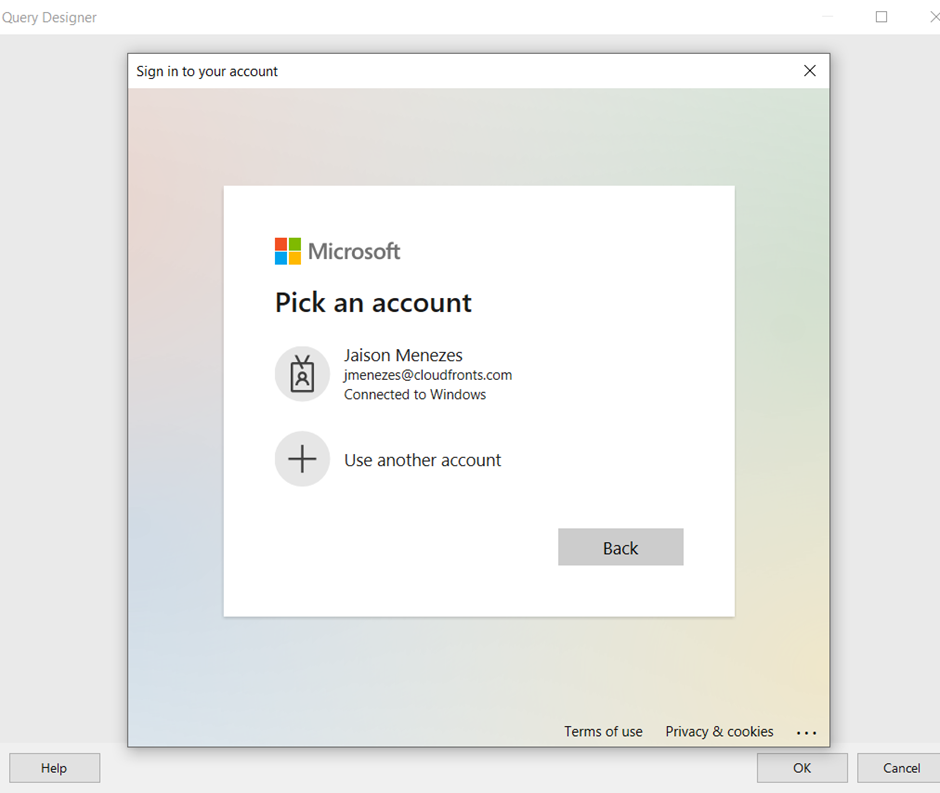
- Sign into the report builder.
- You can open the tool from Start Menu and right away start creating reports by adding data from the following data sources.
- For this blog I am using a dataset of existing PowerBI report.
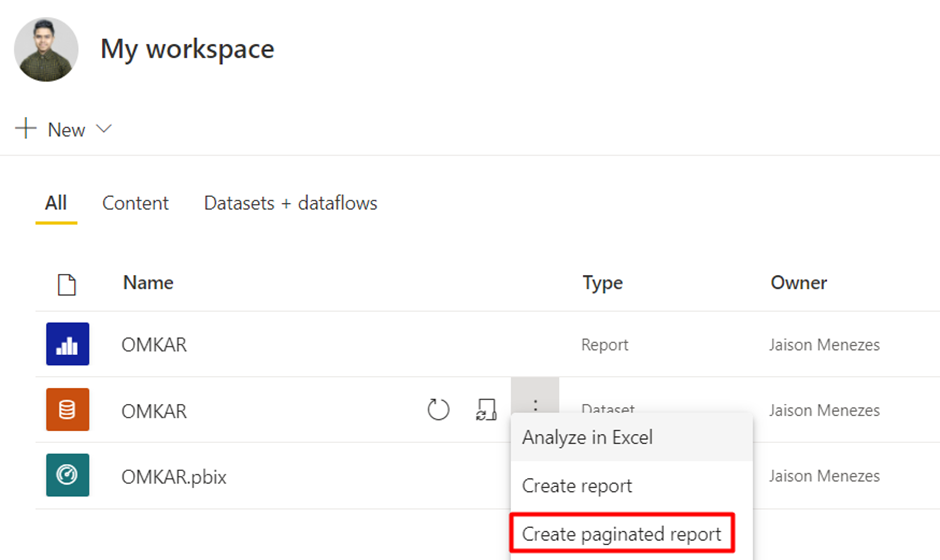
- Navigate to the dataset of desired report in PowerBI service, click on the ellipses sign and select Create Paginated Report.
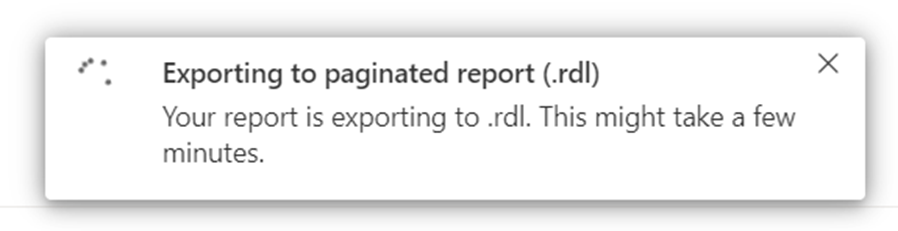
- Wait for the report to get processed.
- Open the downloaded RDL file.

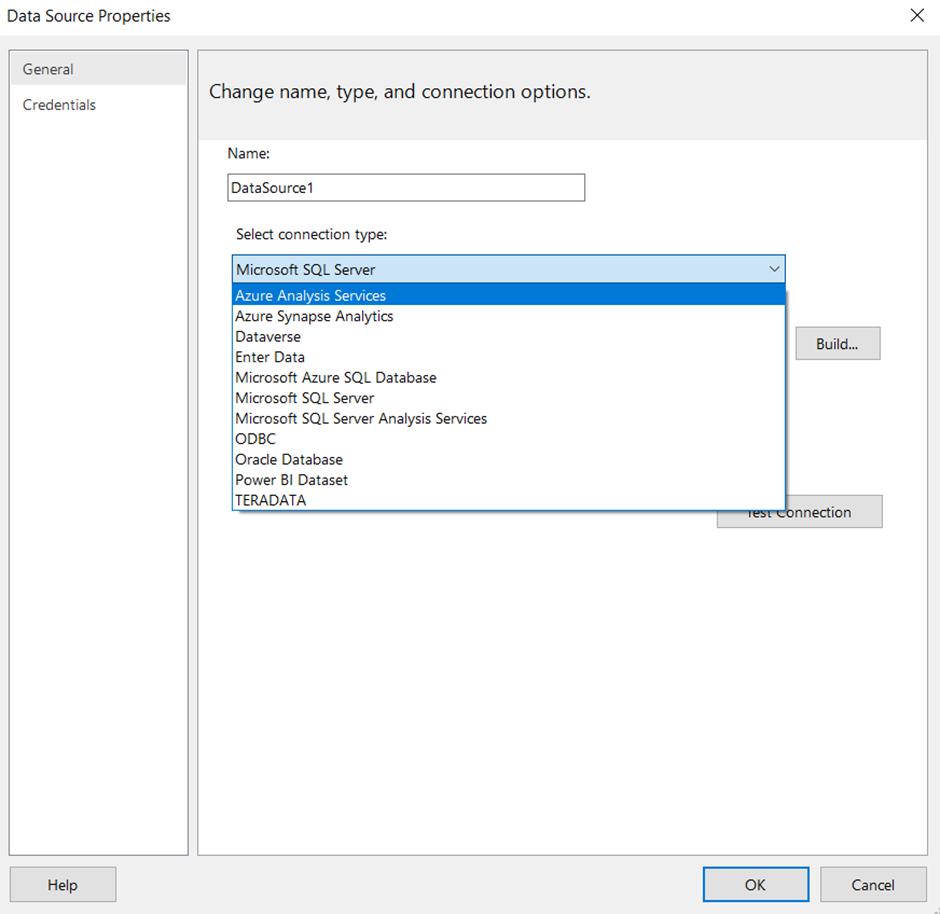
- Since we directly imported our data source from an existing PowerBi report we don’t have to add a data source again.
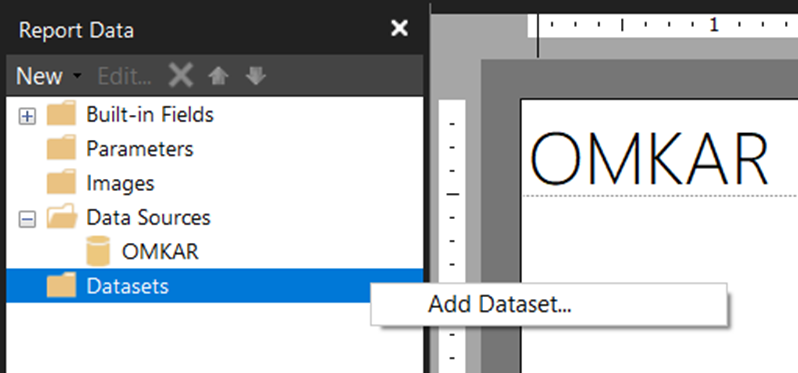
- However we have to configure the dataset table.
- Right click on Datasets and select Add Dataset
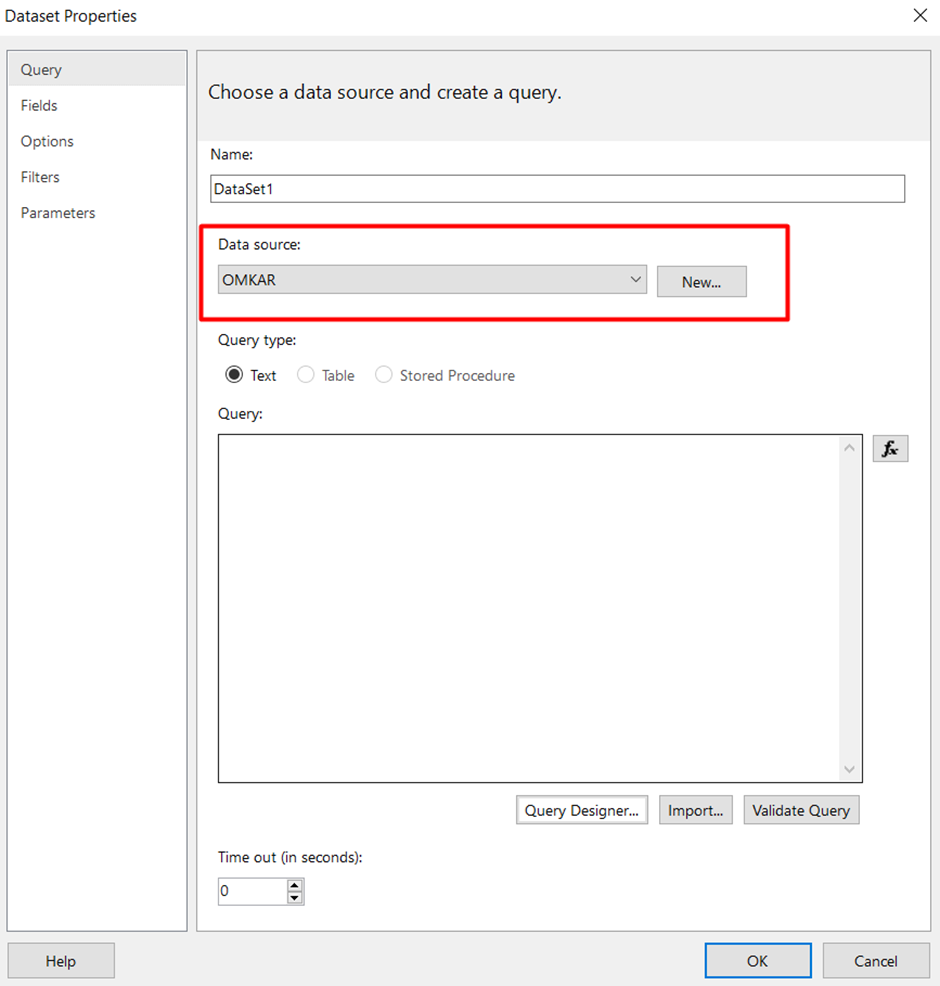
- Choose the Data source from which the dataset should get its Data.
- Click on the Query Designer and wait for it to load.
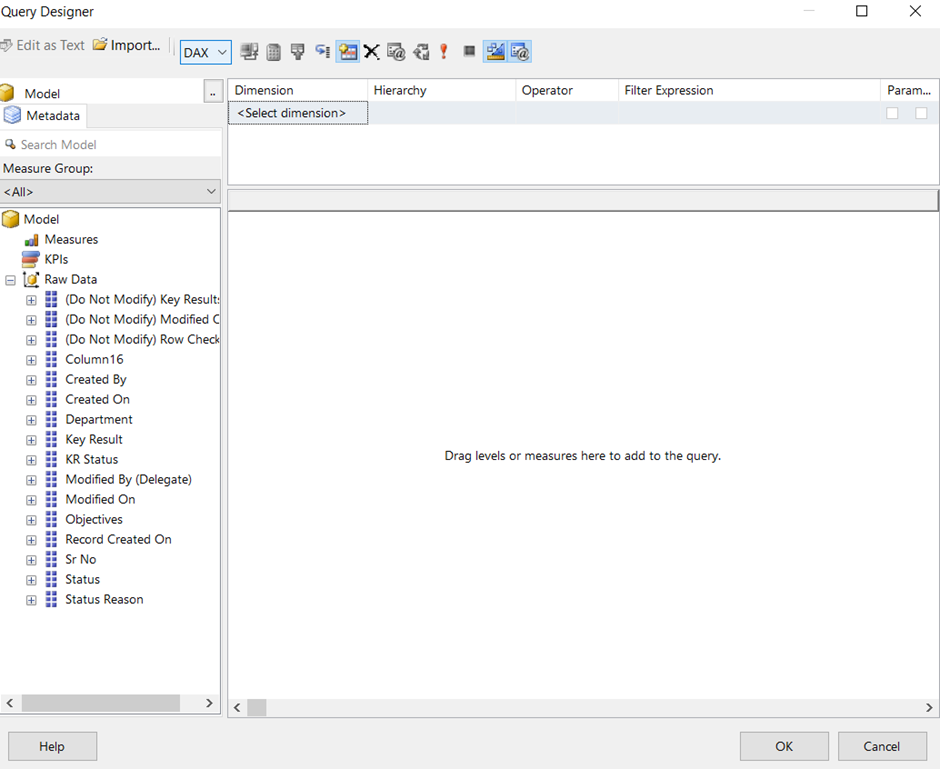
- On the left pane you can see all the fields from the Data source.
- Drag the fields that you’ll be using in the report and execute the query.
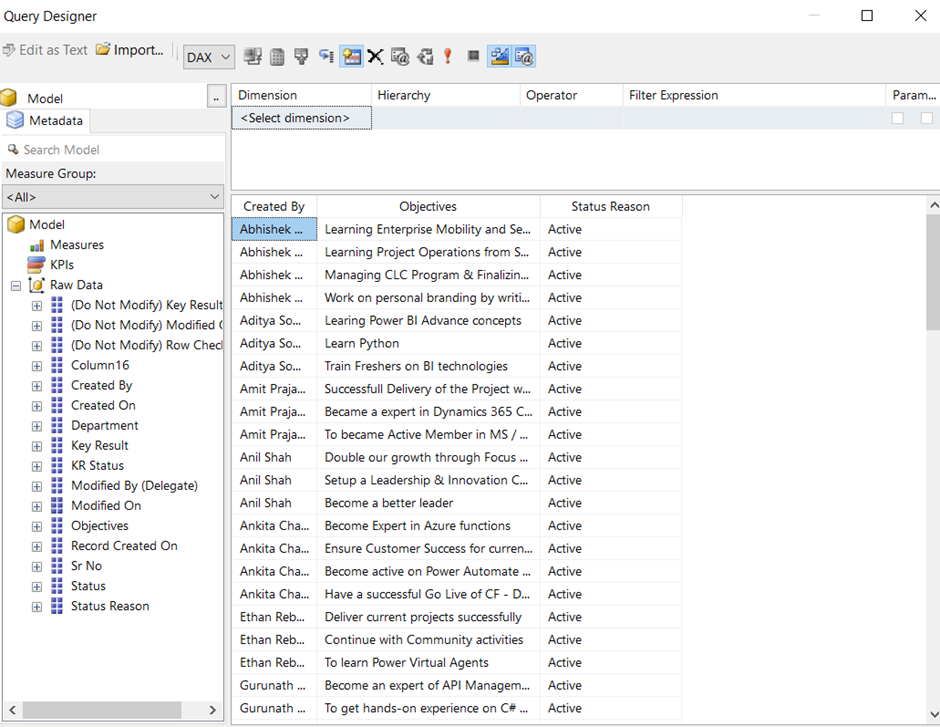
- After previewing the dataset, click on OK
- You can view the dataset and its fields now in the left pane.
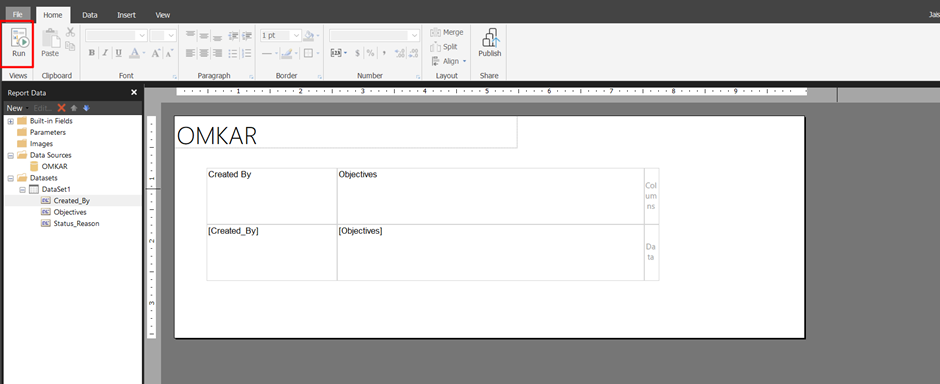
- You can insert various visuals from the Insert tab on the ribbon and populate them with fields from the dataset.

- After finalizing the design and features of the report, you can preview it by clicking on the Run button in the top left corner of the window.
- You’ll now see your paginated report, to exit this view click on Design button on the top left corner.

- You can also publish this report in your PowerBI Service Workspaces, However publishing requires a PowerBI Premium License.
Thank you for reading, Hope this blog helped
