Transform Document Management in Dynamics 365: Automate, Organize, and Scale Across All Entities with Custom Pages for Streamlined Document Handling
Introduction
Document management is a critical aspect of any organization using Dynamics 365 CRM, and finding a simple, scalable solution can often be a challenge.
In this blog, I’ll show you how PowerApps Custom Pages can transform your document handling experience. By leveraging model-driven capabilities, I’ve built a solution from scratch that allows you to handle multiple document templates at once without the complexity and clutter of traditional methods.
Using Custom Pages, you can generate and organize documents across different entities directly within the Dynamics 365 environment, making it easy to scale your solution for any table or scenario.
Let’s take a closer look at how Custom Pages can streamline and simplify document management for your organization.
The Use-Case: Document Management Application
- Imagine a scenario where your team needs to create documents tied to specific records in Dynamics 365. The process often involves repetitive steps, potential errors, and time lost navigating between systems. Here’s how our Custom Page simplifies it:
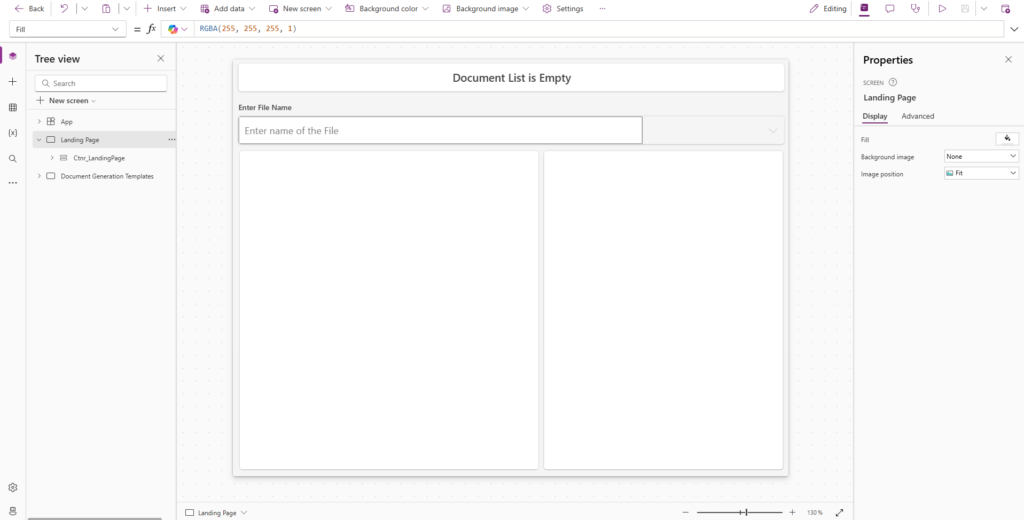
- a) Custom Page is opened within the Model-Driven App.
- b) The page displays a list of available document templates.
- C) Users select a template to generate, and the system generates document automatically in the respective record’s SharePoint location.
- d) Once the page is closed, it automatically navigates to the Document Tab on the record form, ensuring a seamless workflow.
Key Components of the Solution which I have chosen for this use-case and blog
-
- PowerApps Custom Page [I’ll be focusing on Custom Page for this blog]
The Custom Page serves as a user-friendly interface for selecting document templates. Key features include:
-
- a) A gallery control displaying all available templates, sourced dynamically from Dataverse.
-
- b) Select a document to generate document using Automation.
-
- PowerApps Custom Page [I’ll be focusing on Custom Page for this blog]
-
- Power Automate Flow
-
- a) Receives the selected templates and record context as input.
-
- b) Retrieves the corresponding data for each template.
-
- c) Generates documents using the template data.
-
- d) Saves the documents in the record’s associated SharePoint folder in Dynamics 365.
-
- Power Automate Flow
Step-by-Step Process
Step 1: Create the Custom Page (refer to my previous blog if needed)
Create a solution, create custom Page and then embed it into Model-Driven App. I’ve made a sample example below:
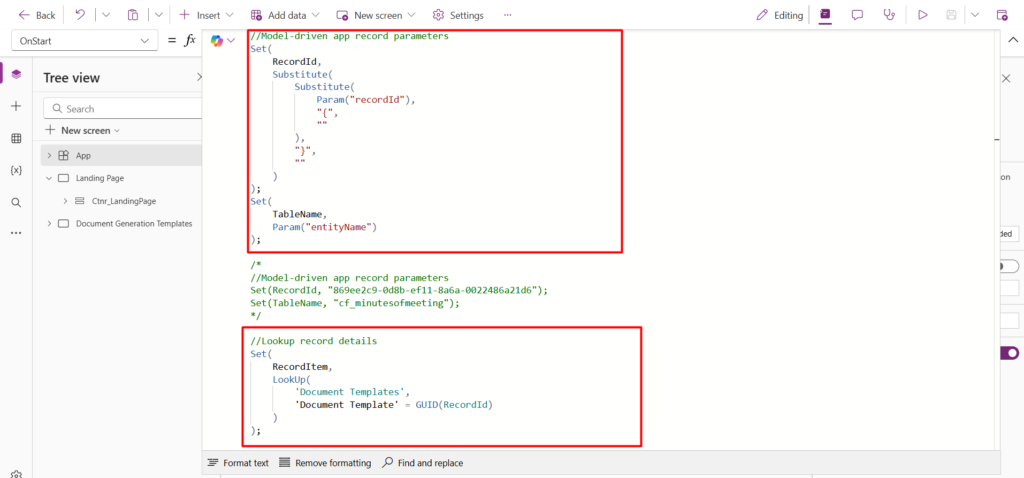
Step 2: How to retrieve parameters when App is opened.
For the App’s ‘OnStart’ property, enter the following code
Step 3: Trigger Document Generation App (I have used a ribbon button to trigger using JS)
You will need to write a JavaScript in order to trigger and display the Custom Page.
var triggerCustomDocumentAutomationPage =
{
    primaryControl:null,
    showPage: (pageContext) =>
    {
        triggerCustomDocumentAutomationPage.primaryControl = pageContext;
        Xrm.Navigation.navigateTo({
            pageType: "custom",
            name: "<<YourCustomPageName>>",
            entityName: pageContext.data.entity.getEntityName(),
            recordId: pageContext.data.entity.getId()
         }, {
         target:2,
         width: 700,
         height:600}
         )
         .then(function(){
            triggerCustomDocumentAutomationPage.primaryControl.data.refresh();
            var formContext = triggerCustomDocumentAutomationPage.primaryControl;
            if(formContext.ui.tabs.get("documents_sharepoint")){
                var documentTab = formContext.ui.tabs.get("documents_sharepoint");
                documentTab.setFocus();
            }
         });
    }
}
Where to find the app name, you will find in the solution. My example is below

Step 3: Trigger Document Generation Page
-
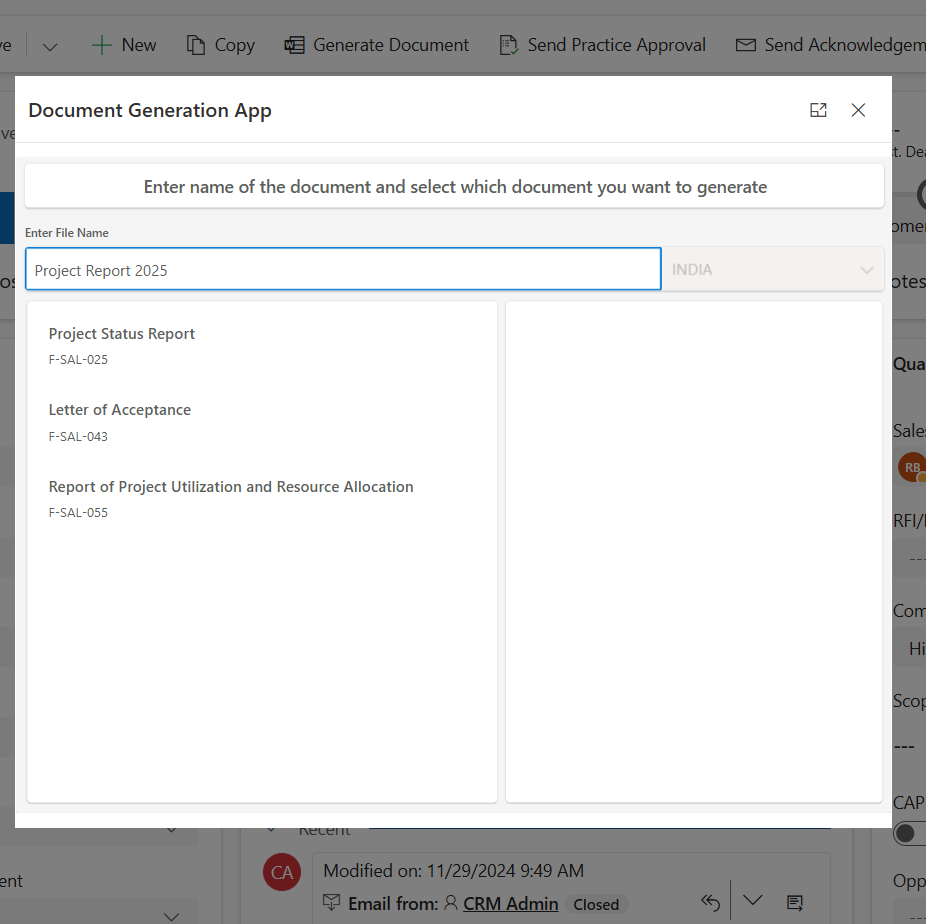
- When the code runs then the Page will appear. I have kept some documents which will be helpful showing how this works.
-
- A “Generate Documents” record ‘OnSelect’ sends the selected template IDs and record ID to a Power Automate Flow.
-
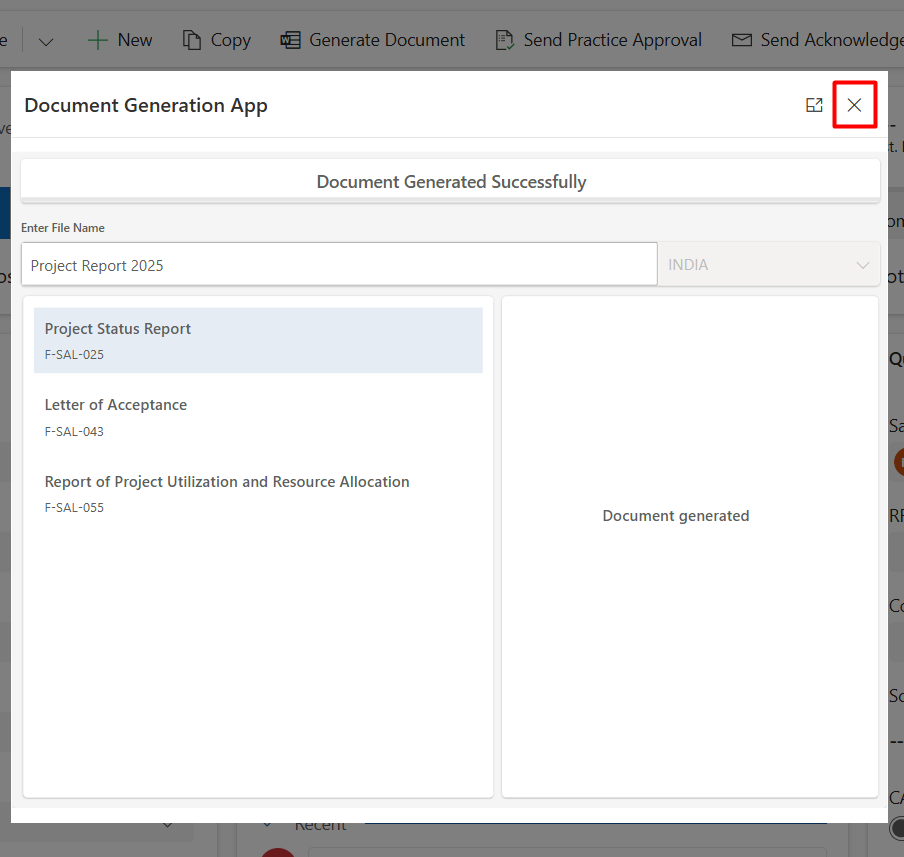
- The Flow retrieves template data, merges it with record-specific details, and creates the document then saves to record’s SharePoint folder.
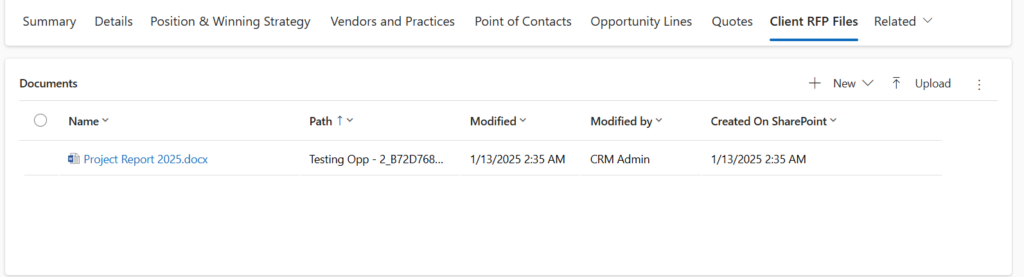
Once the document is created, you can close the Page using X button. As per JS code, our code will navigate to Document Tab. Ensure the name of Document Tab is correct.
Step 4: Automation to SharePoint
Use PowerApps Connector and add your input parameters to it. In the Custom Page, do insert the newly created Power Automate flow and pass the input values respectively
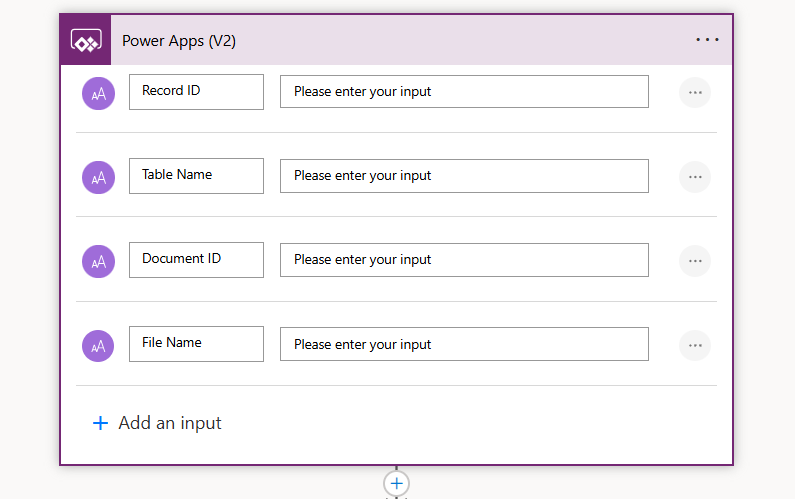
Also, once the flow is completed, you can send a response back to Custom Page using same connector but of different action ‘Respond to PowerApp or Flow’.
Conclusion
Conclusion This Custom Page use-case demonstrates how a thoughtfully designed solution can enhance productivity and user experience in Dynamics 365. By streamlining document creation and navigation, it reduces friction in day-to-day operations, empowering teams to focus on higher-value tasks. Whether you’re a technical developer or a functional consultant, this approach provides actionable insights for building powerful and efficient solutions.
References
We hope you found this blog useful, and if you would like to discuss anything, you can reach out to us at transform@cloudfonts.com.
