Setting up a static IP address to Virtual Machine in Microsoft Azure – Part 1
The blog post will show you how we can assign a static IP address to one of the Microsoft Azure Virtual Machines, using Microsoft Azure Powershell.
Assumptions: Create Virtual Machine and Virtual Network in Microsoft Azure.
Steps in Microsoft Azure
Steps:
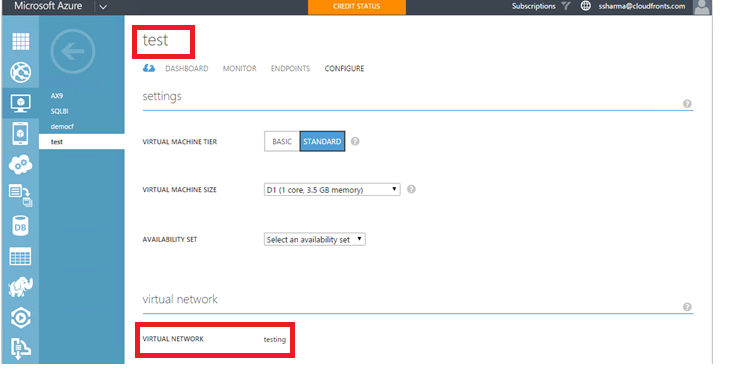
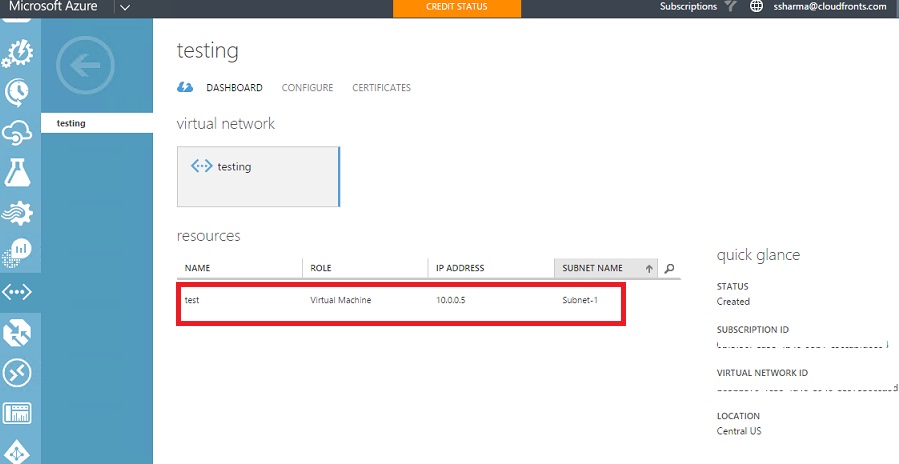
- Create a Virtual Machine named test and Virtual Network testing as shown below, where Internal IP Address of test is 10.0.0.5
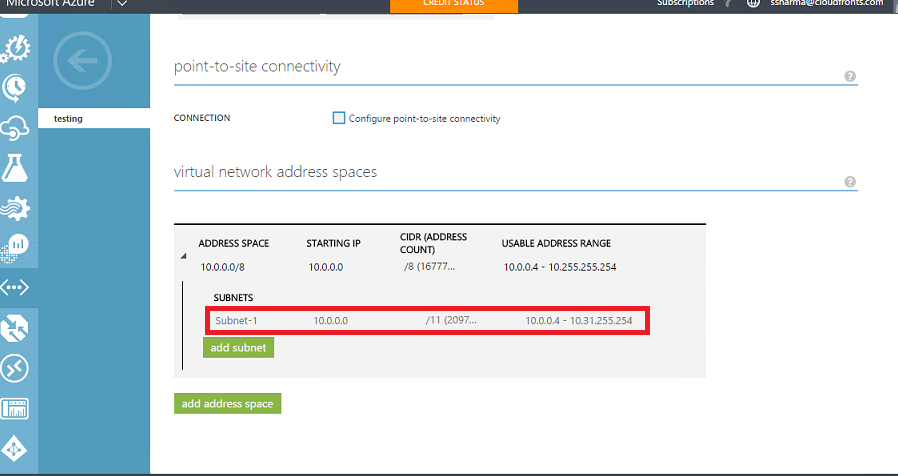
- Subnet-1 usable address rangeof 10.0.0.4 – 10.31.255.254 . The new static IP Address to be provided should fall in the usable range of address space.
Steps in Microsoft Azure Powershell
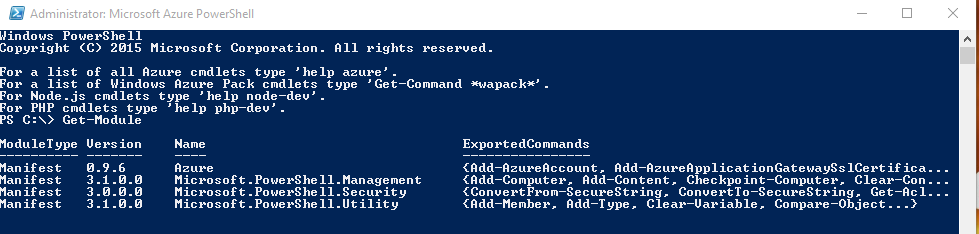
Step 1: Run Microsoft Azure Powershell as Administration.
Step 2: Add your Microsoft Azure Account using the command Add-AzureAccount in Powershell.
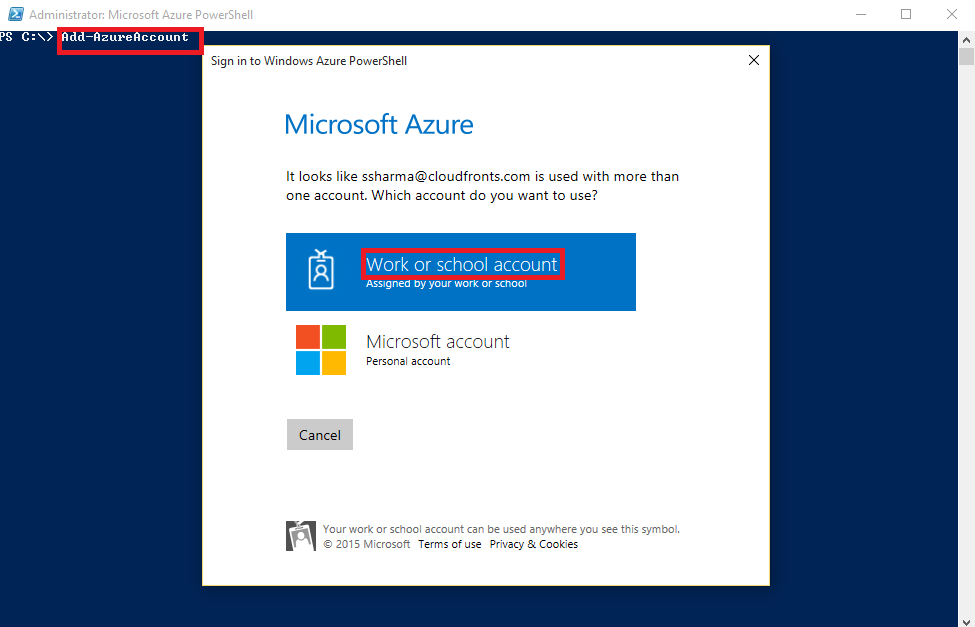
As shown in figure above it will ask the account details, I have selected my work account.
Note: If at all this login control redirects to your personal account while doing in Work account, type Remove-AzureAccount in Powershell and enter and confirm the details.
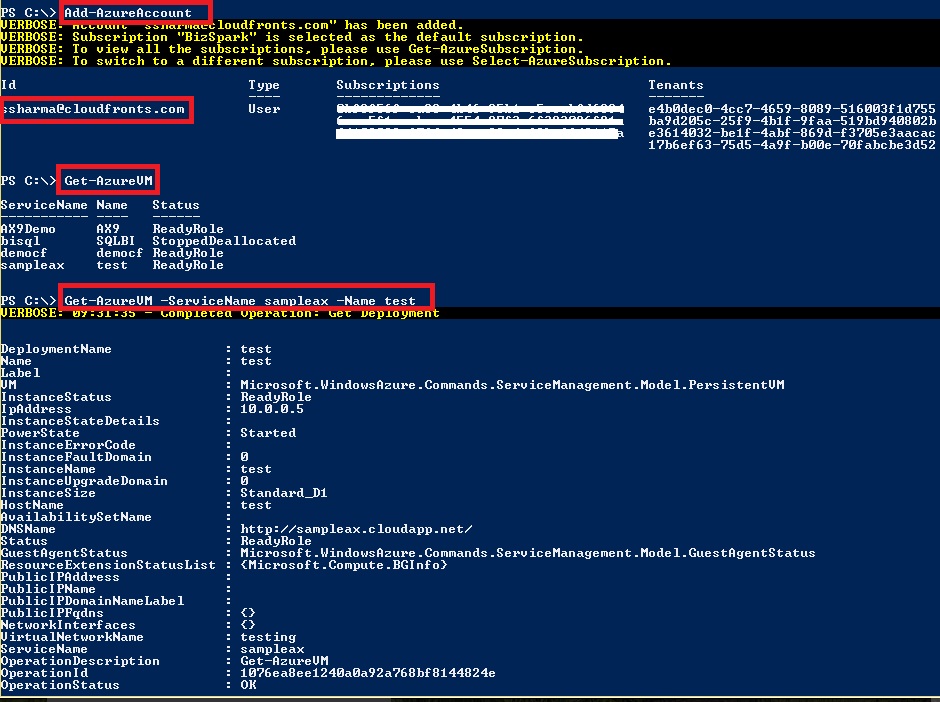
- Once the account is added you can see that your account is added with the subscriptions present in your account. By the commands like Get-AzureVM you can see all the VM’s that are present in your account.
- Since I want to set a static IP Address to my test VM which is present in the testing virtual network with Internal IP Address of 10.0.0.5, I will get that VM in Powershell by the command
- Get-AzureVM –ServiceName sampleax –Name test, by this command we can view all the details associated with that particular VM with corresponding service name and VM name.
All these details are shown in the diagram below.
Step 3: Set IP Address to Test VM
Here by the command
Get-AzureVM –ServiceName sampleax –Name test | AzureStaticVNetIP –IPAddress 10.0.0.6 | Update-AzureVM

As shown in figure above you can see the Succeeded message, this tells us that the corresponding IP is been set to the IP Address Provided in the command, here as 10.0.0.6.
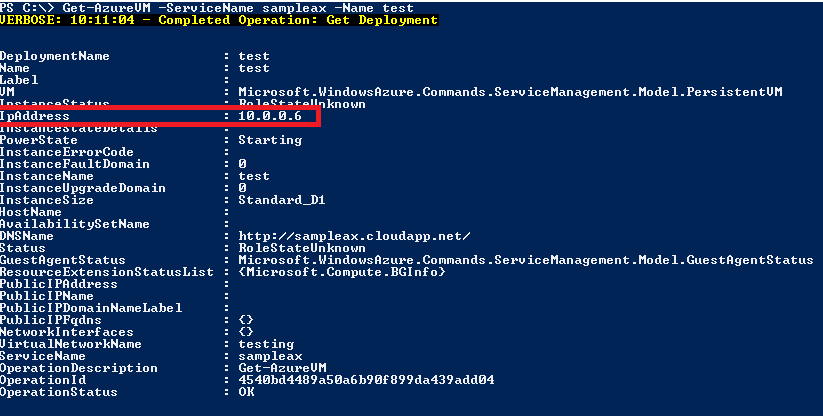
Step 4: To check the changed IP Address
Now to see whether the IP Address is been set type the command
Get-AzureVM –ServiceName sampleax – Name test
This command will show the details with related VM as shown below.
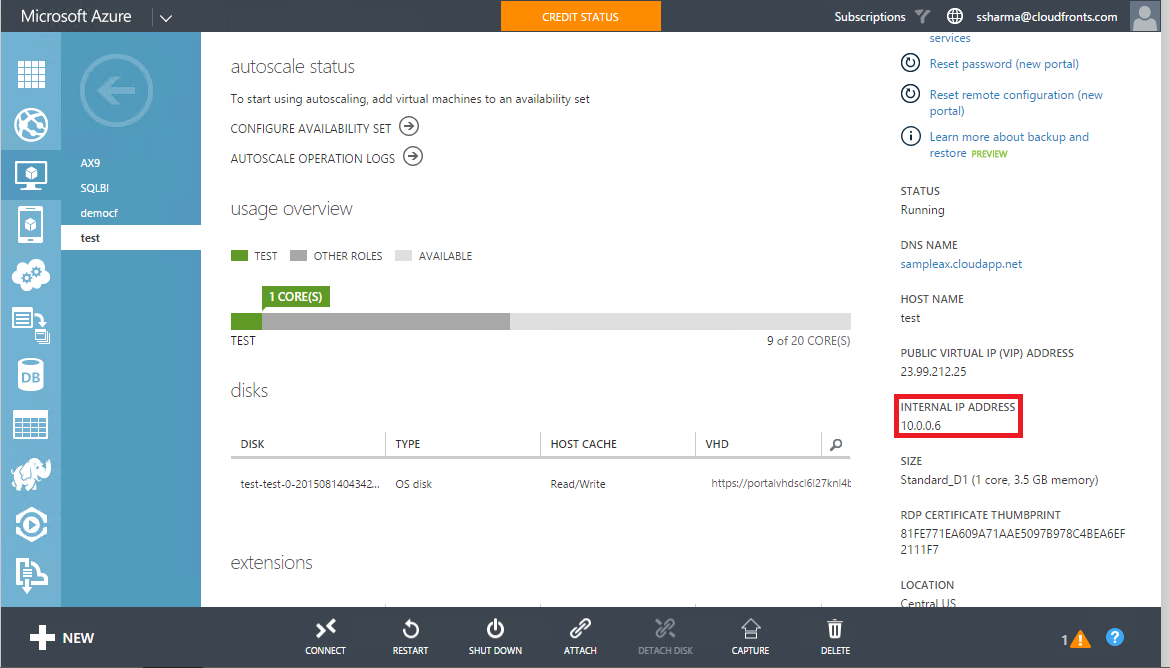
In the highlighted box we can see the IP is been set.
We can also check the updated IP Address in Microsoft Azure as shown below that Internal IP is been now updated.