Setup Email Router for Microsoft Dynamics CRM 2015 Online and Exchange Online
Email Router is a service that runs continuously to synchronize only emails between CRM and specified Email system. Tasks, Appointments and Contacts are not synchronized using Email Router.
Email Router is a separate component available for download and needs to be installed.
Note: Only one instance of Email Router should be setup for an Organization.
Settings in Dynamics CRM Online
In Dynamics CRM Online, make sure the following settings are in place:
The Process Email using in the Email Configuration Settings under Settings > Email Configuration should be: Microsoft Dynamics CRM 2015 Email Router. Also make sure, Incoming and Outgoing Email are set to Email Router as shown below.
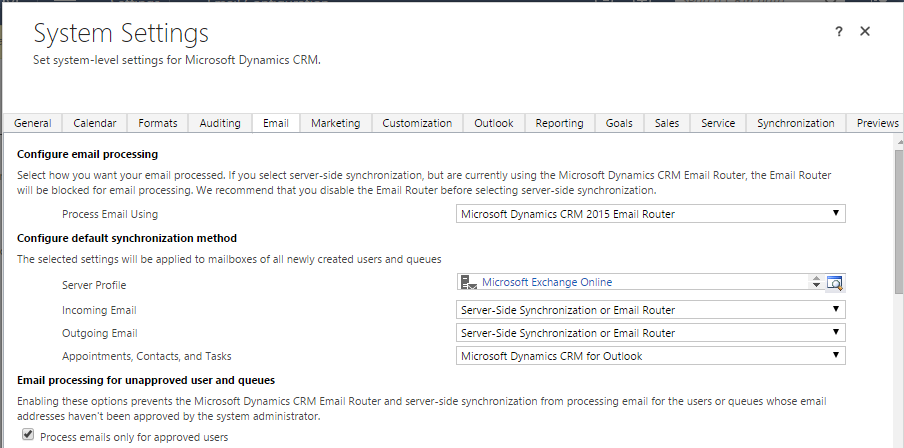
Additionally, set the user’s mailbox and the Incoming and Outgoing Emails should be Server-Side Synchronization or Email Router marked as Success when a mailbox is approved for Email and is Test & Enabled as well.
Download & Install Email Router
You’ll need to download the Email Router so that you can install it on your server. Here’s where you can get to download the Email Router:
https://www.microsoft.com/en-us/download/details.aspx?id=45017
Run the setup and let the wizard install Microsoft Dynamics CRM Email Router Service.
Configuration Profiles
Configuration Profiles hold information about the server and authentication methods to the same to which the Email Router will connect to.
You’ll need to create one or more Incoming configuration profiles and one or more Outgoing configuration profiles.
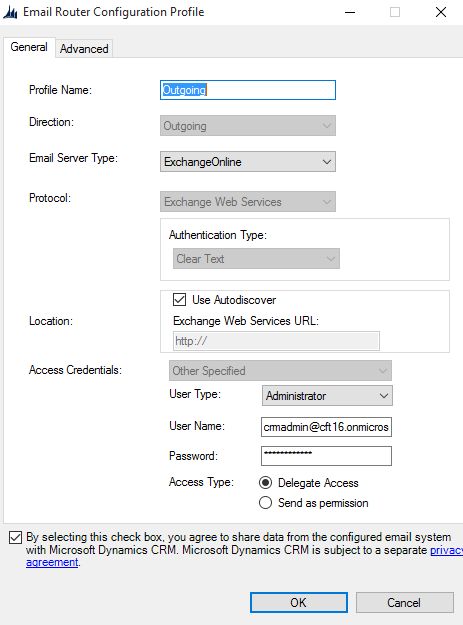
- First, I’ll create a configuration profile for Outgoing email.
Enter a suitable Profile Name for the configuration profile you are creating. - Chose the direction between Incoming and Outgoing. For this configuration, I’ll choose Outgoing.
- Since I’m configuring for Exchange Online server, I’ll choose Email Server Type as ExchangeOnline.
- The Authentication Type will remain Clear Text since this is the only Authentication Type for ExchangeOnline.
- Check mark the Use Autodiscover as it is a way to obtain the Exchange Web Services URL. This option is available when you select ExchangeOnline.
- In Access Credentials, I’ll select Other Specified since I want Email Router to authenticate by using the credentials of a specified user.
Note: The specified user must have full access to mailboxes. Ideally, an Administrator should be selected. - For User Type – When ExchangeOnline server type is selected and Other Specified as the Access Credentials is chosen, options available are Administrator or User. I’ll chose Administrator since I want to enter only 1 credential to authenticate mailboxes.
- Enter Username and Password in username@fulldomain
- For Access Type – Use either Delegate Access or Send As access. I chose Delegate Access in this case where I want email to be sent as ‘Send on behalf of’.
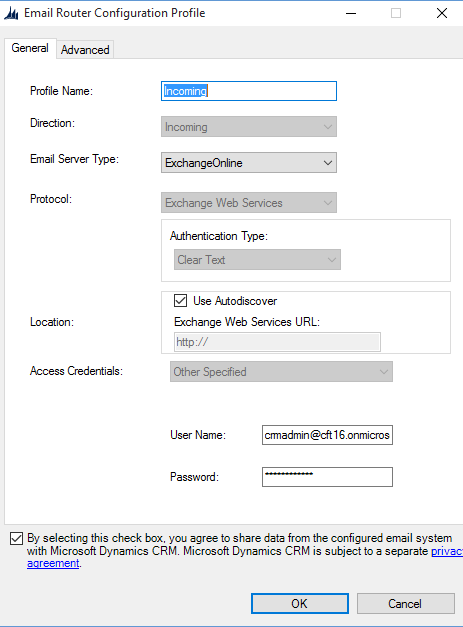
Similarly, I’d configure the following for Incoming configuration for CRM Admin user, which is as follows:
Deployments
At least 1 deployment needs to be configured. Deployments hold the information to connect to your Dynamics CRM environment.
- Create a New deployment in the Deployments
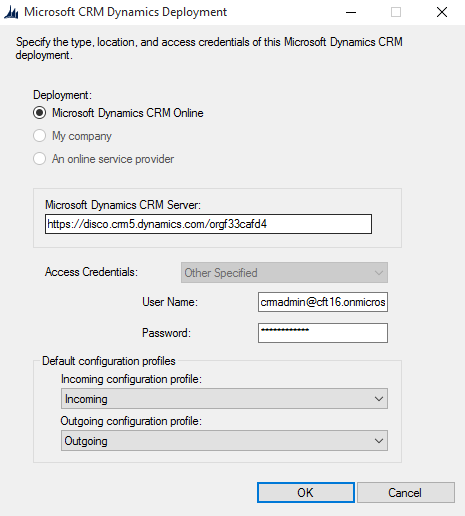
- I’ll chose the Deployment as Microsoft Dynamics CRM Online since I’m connecting to an Online deployment of my Dynamics CRM.
- Microsoft Dynamics CRM Server: You’ll need to use ; where, Organization Name can be found in Settings > Customizations > Developer Resources.
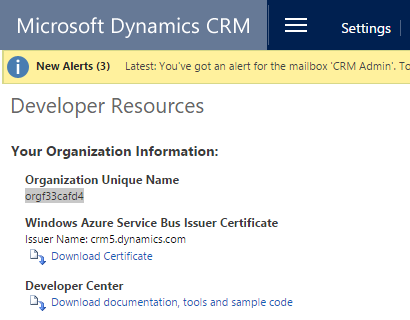
Note: I’ll be using disco.crm5.dynamics.com/ since my organization is in Microsoft Office 365.
- Provide Access Credentials of the Administrator mailbox which you want the Email Router to connect to Dynamics CRM Online deployment.
- Select the default Configuration Profiles that the current deployment will use. Chose from the Incoming and Outgoing profiles created in the Configuration Profiles in the Email Router.
Users, Queues and Forward Mailboxes
Users, Queues and Forward Mailboxes of a CRM deployment can be managed under this tab in the Email Router application.
- Select the Deployment created in the Email Router and click Load Data. This will show a list of all the mailboxes for that organization.
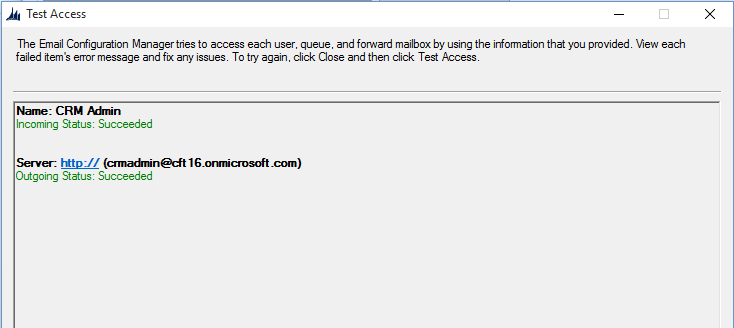
- You can chose any once / all mailboxes and click on Test Access to verify the connection was successful or not.
- Once you get a success as shown below, your mailbox is now functional.

Forward Mailbox
A Forward Mailbox is a centralized mailbox which reduced administrative efforts for a mailbox and diverts messages to respective users.
Here, your Email Router is set to send and receive Email from and to CRM using the Email Router.
