Configuring Scheduled Jobs – Part II
Introduction:
In the previous Blog, we saw how to configure the Schedule Job Header, this time we will configure the Sub-jobs.
In Sub-jobs, we can define the Table structures to be followed, Tables the Data is supposed to be sent to, filters, replication counter fields and so on.
References:
- Repl. Counter Interval, Scheduler Subjob (lsretail.com)
- From-Location Design, Scheduler Subjob (lsretail.com)
- Replication Method, Scheduler Subjob (lsretail.com)
- http://www.apanko.ru/showthread.php?t=3517
Pre-requisites:
- Microsoft Dynamics 365 Business Central
- LS Central
Configuration:
General:-
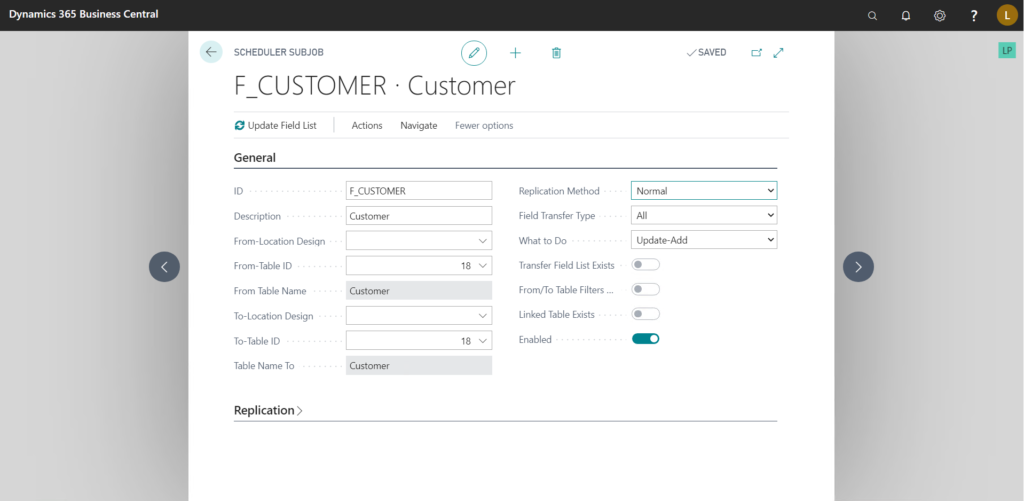
- ID:- Unique Identifier for the Sub-job.
- From-Location Design/To-Location Design:- These fields specify the structure of the tables. If the table structures are same in both sending and receiving locations, then you do not need to set this field.
- From-Table ID/To Table ID:- These fields specify the IDs of the tables. In most cases, these will be same only exception would be when you want to send data to custom Tables from BC/LS Tables.
- Replication Method:- It has two options-
- Normal :- In this method the entire table is transferred but as this is an expensive operation and unsustainable if the data in the table is growing constantly, there is another field “Replication Counter” which resides on the table which is to be transferred, it must be an integer field and every operation which modifies/inserts a record in the table, this replication counter field must be updated. Majority of tables provided by LS have a “Replication Counter” field in them.
- By Actions:- Every operation we perform on every table is logged into a “Preactions” table by LS. Then these Preactions are converted into “Actions” which are then used to transfer data.
- Field Transfer Type:- It specifies how to handle the fields of the table. It has three options-
- All:- All the fields from the “From Table” are transferred in the “To Table”.
- Include List:- Only the fields specified are transferred.
- Exclude:- All field except the ones specified are transferred.
- What to do:- It specifies the operations the transfer can perform. There are the basic operations Add, Update & Delete and then building on them there are combinations of these operations.
Note:- Please use the delete operations carefully as it may cause unintended data deletion. For most uses, Update-Add is sufficient.
Replication:–
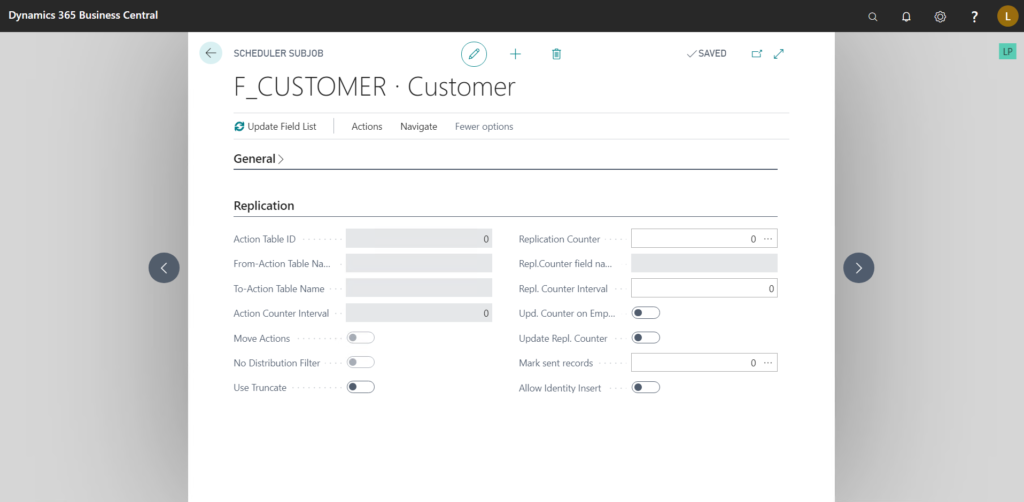
- Action Table ID:- This field is automatically updated when “Replication Method” is set to “By Actions.”
- Move Actions:- Specifies whether “Actions” should be transferred along with Data.
- Use Truncate:- When using “Normal” replication method, if this is set to true, then the destination table is cleared and then new data is inserted in it from the source table. If you are using “Update-Add-Delete” as “What to do” then this is more efficient.
- Replication Counter:- Specifies which “Integer” field is to be used as the “Replication Counter.”
- Repl. Counter Interval:- If this value is set then the data to be transferred is divided into blocks. The size of the block is as defined in the field.
For instance, as per the replication counter, 1000 records are to be transferred. But since sending a huge amount of data at once may burden the replicator we can specify the “Repl. Counter Interval” at 100, after which the “Sub-job” will run 10 times, replicating 100 records at a time. - Update Repl. Counter:- Specifies whether the “Replication Counter” field in the destination table should be updated or not.
- Mark Sent Records:- In this field we can set a boolean field of the “Source Table” which will automatically be set to true, when the record is set.
Please do note that none of the fields mentioned in the “Replication” tab are compulsory but creating a sub-job without using the available replication options may become slower and network intensive as entire tables are transferred.
Transfer Field List:
Go to Navigate > Sub-job > Transfer Field List
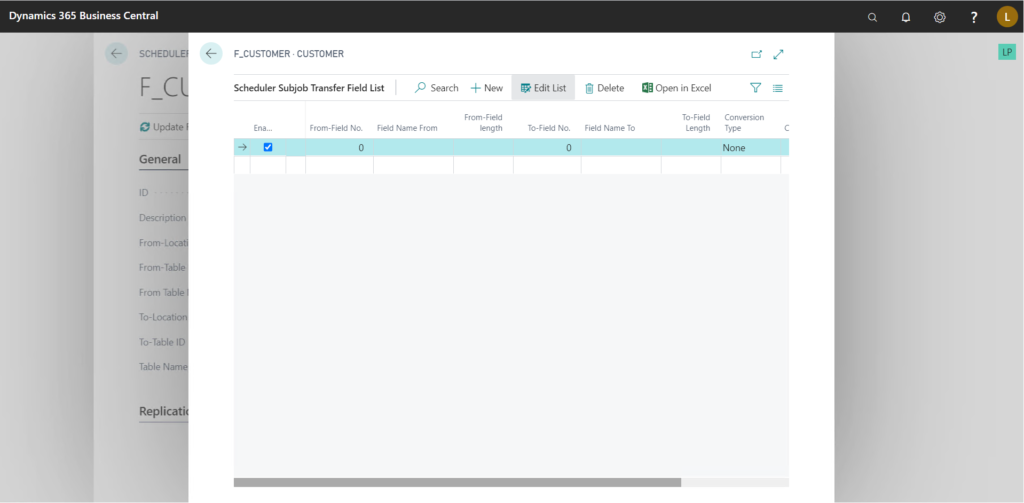
Here we specify the field mapping between the source and destination tables.
It also allows for some degree of Conversion in transferring, for instance,
Set “Conversion Type” to “Constant” and set a value in the “Conversion String” field, then after transferring, the value specified in the “Conversion String” is set on all the records in the specified field. Make sure the field is of type “Text” or “Code” before using this.
Another practical example would be, When transferring “User” table, if we simply send the password directly then the proper values are not transferred. This can be resolved by using “Skip Text Conv.” on the “Password” field before transferring.
From-Table Filters:
Go to Navigate > Sub-job > From-Table Filters
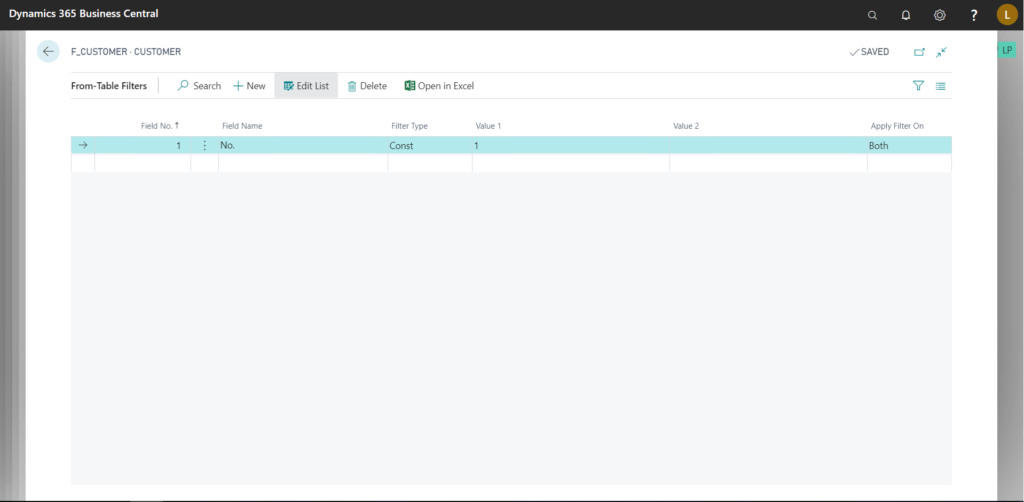
Here we can specify filters to be applied to the source table.
Linked Tables:
Go to Navigate > Linked Data > Linked Tables
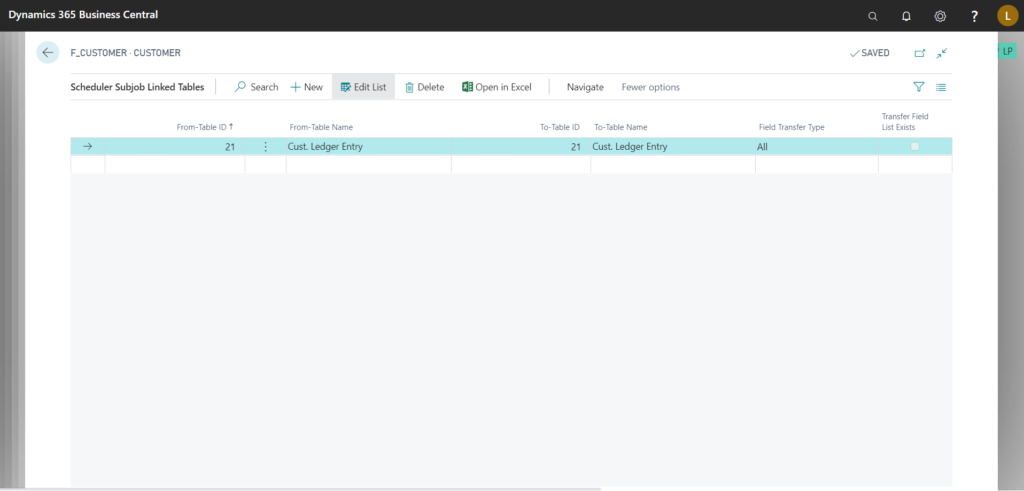
Here we can specify data from which other tables has to be pulled along the main table, in the above example, as the sub-job is using data from “Customer” table, we have defined that along with that we also want data from “Customer Ledger Entry” table.
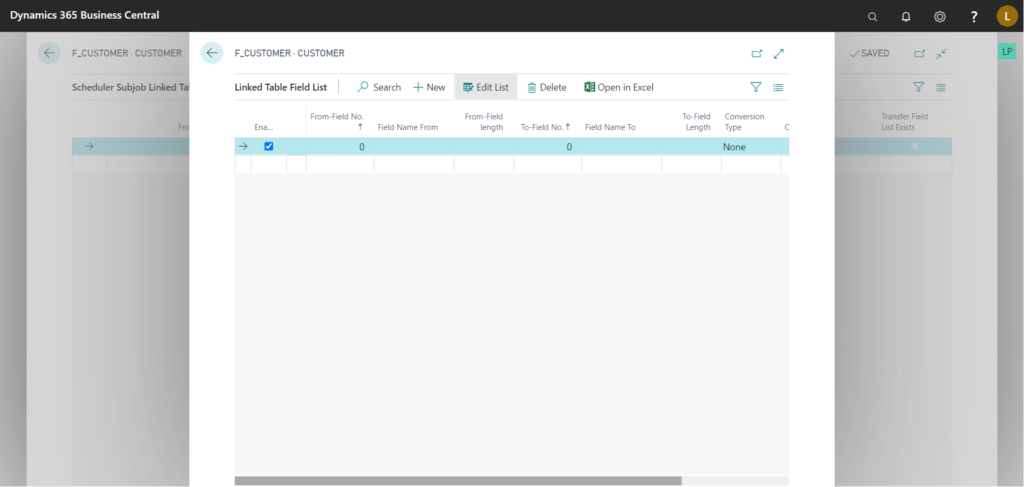
We can also define field mapping for these tables by going to Navigate > Linked Table> Field List.
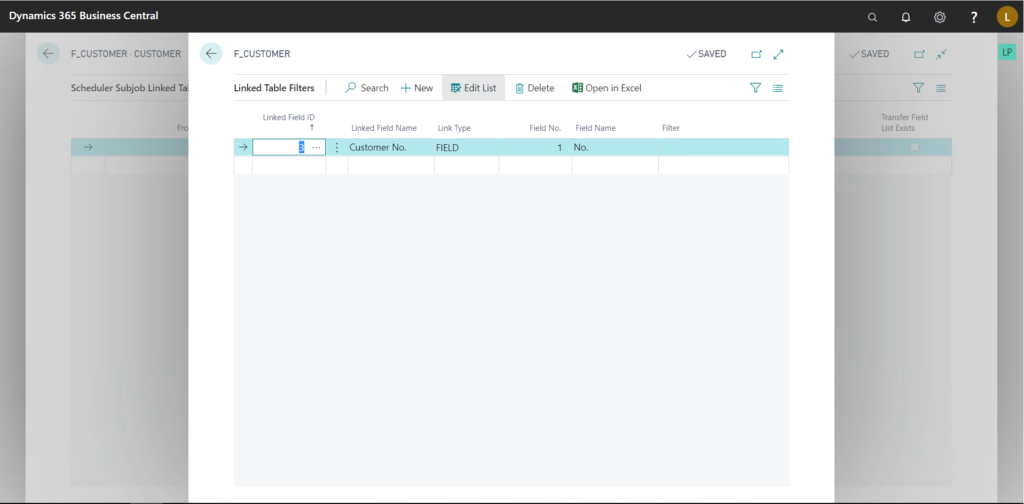
To define the link and/or filters on this table, go to Navigate > Linked Table > Filters and Links.
Conclusion:
Thus, we saw how to configure Sub-jobs and a brief overview of the features it offers.
Thanks for reading!
