Upgradation of Application Code in Microsoft Dynamics NAV
ERP stands for Enterprise Resource Planning. So many companies are developing ERP software to streamline the processes. Dynamics 365 is one of the ERPs that will help the companies scale up high swiftly. You need to work with the best ERP system providers like CloudFronts if you want this software to make a difference in the lives of people.
Microsoft Dynamics Nav is an ERP app that is developed by Microsoft. It is very much part of the popular Microsoft Dynamics family. Companies that use this product can streamline departments such as manufacturing, electronic commerce, supply chains, customer relationship management and so forth. Small and medium-sized companies are going to benefit greatly when they use this software.
Here is a segment that you should know in this ERP application.
Introduction:
Upgradation of objects/data in NAV have to be done after the application has been upgraded to the latest version. Code from different versions of NAV application have to be merged to upgrade the data. This process of merging objects in NAV between different versions is known as code/data upgradation.
Pre-requisite:
- Microsoft Dynamics NAV
- Windows PowerShell ISE
- The following objects have to be exported and saved:
- All Standard objects of the previous version of Microsoft Dynamics NAV in .txt format.
- All objects of the modified database of Microsoft Dynamics NAV in .txt format.
- All Standard objects of the higher version of Microsoft Dynamics NAV to which the objects have to be migrated in .txt format.
After all these steps are performed, install the latest version of Microsoft Dynamics NAV to which objects need to be migrated.
Purpose:
The main purpose of Data Upgradation is to move customizations done in any previous version of Microsoft Dynamics NAV to the new Higher version of Microsoft Dynamics NAV database.
Steps:
-
- Create 4 folders i.e. Original, Modified, Result and Target in the system.
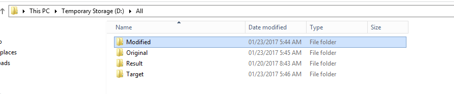
Fig 1: Create four folders as specified above
-
- Save the backup of ‘All Standard objects of the previous version of Microsoft Dynamics NAV in .txt format’ in the Original
- Save the backup of ‘All objects of the modified database of Microsoft Dynamics NAV in .txt format’ in the Result
- Save the backup of ‘All Standard objects of the higher version of Microsoft Dynamics NAV to which the objects have to be migrated in .txt format’ in the Target
- Open Windows PowerShell ISE as administrator. Run the following commands in it and refresh PowerShell.
Import-Module "C:\Program Files\Microsoft Dynamics NAV\100\Service\NavAdminTool.ps1"

Import-Module "C:\Program Files (x86)\Microsoft Dynamics NAV\100\RoleTailored Client\NavModelTools.ps1"
These commands help to load Dynamics NAV Cmdlets into the runspace.
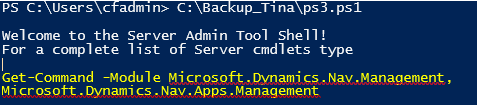
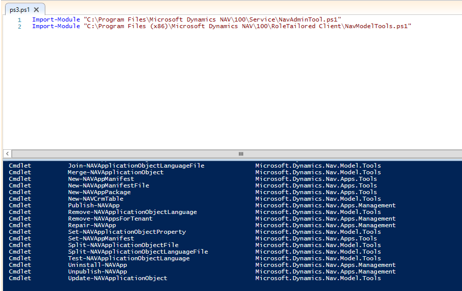
Fig 2: Windows Powershell ISE commands to load Microsoft Dynamics NAV Cmdlets
-
- In Windows Powershell ISE, go to Merge-NAVApplicationObject Cmdlet and enter the path of the four folders created initially i.e. Original, Modified, Result and Target folder.
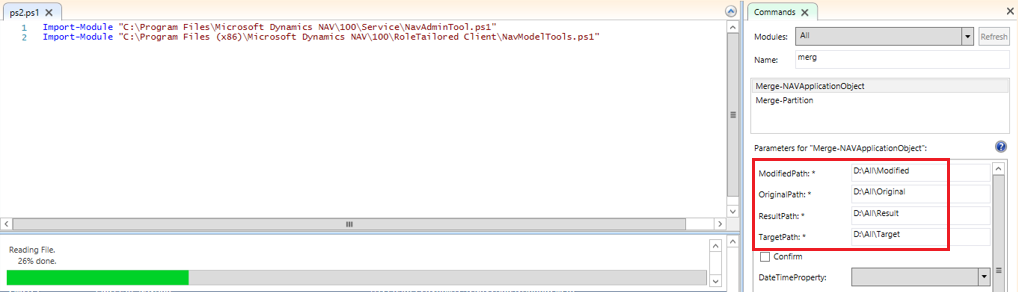
Fig 3: Merge-NAVApplicationObject Cmdlet
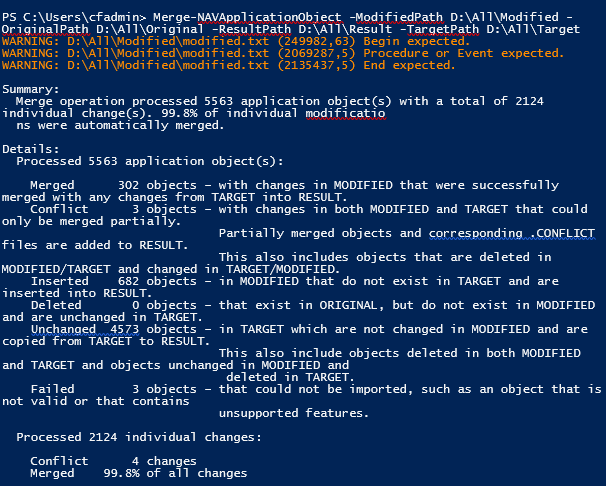
Fig 4: Merge-NAVApplicationObject Cmdlet gives details of the merge process
-
- After running the Merge-NAVApplicationObject Cmdlet the Result folder will automatically be filled with all objects in .txt format. Each object file will be stored separately.
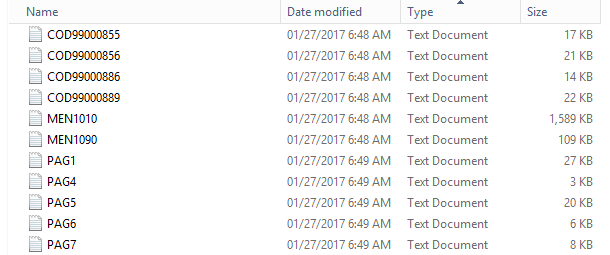
Fig 5: Result folder contents
-
- Now, in order to create one .txt file by joining all the .txt files present in the Result folder, navigate to Join-NAVApplicationObjectFile Cmdlet in Windows PowerShell ISE. Enter the path of the Result folder as the Source and enter a name of the Destination as ‘Merge.txt’
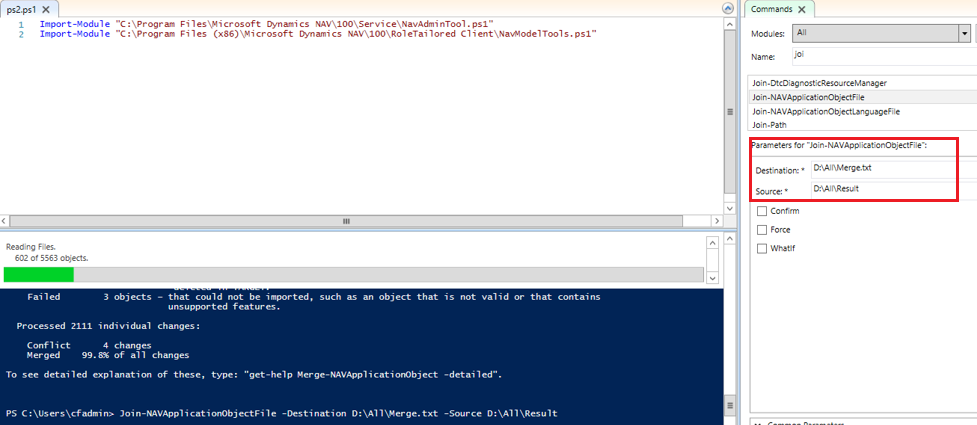
Fig 6: Join-NAVApplicationObjectFile Cmdlet
This will create Merge.txt file in the specified location.

Fig 7: Merge.txt file created
- Now import the txt file into the new database of the Higher version of Microsoft Dynamics NAV. Errors if existing will be displayed during the import process and the import process will stop there. The errors have to then be rectified and the Upgradation process has to be repeated again from step 6. After all errors are rectified and conflicts are resolved, the Merge.txt will be successfully imported.
- Now, compile all the objects of the new database. You will have a new database with a fully application and data/code including all the modifications and customizations.
Conclusion:
Using the above process, modifications and customizations done in the previous version of Microsoft Dynamics NAV can be successfully migrated to the Higher version of Microsoft Dynamics NAV.
