Regression suite automation tool (RSAT) for D365 Finance and Operations, Commerce
The Regression suite automation tool (RSAT) is used to reduce the time and cost of UAT (user acceptance testing) of finance and operations.
UAT is typically required before you take a Microsoft application update, or before you apply custom code and configurations to your production environment.
RSAT lets functional power users record business tasks by using a Task recorder and then convert the recordings into a suite of automated tests, without having to write source code.
RSAT is fully integrated with Microsoft Azure DevOps for test execution, reporting, and investigation. Test parameters are decoupled from test steps and stored in Microsoft Excel files.
Configuration:
1. Open RSAT application.
2. Select the Settings button in the upper right to configure RSAT. And next steps will help you to find those required fields input
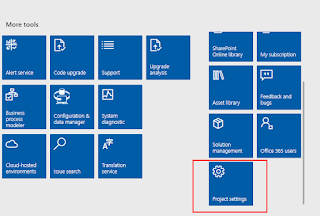
3. Go to project settings of Lcs for your projects
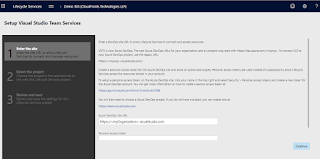
Go to Visual Studio Team Services. Here you need to mention the Azure DevOps project in the Azure DevOps site URL field. In order to do that, click on
4. Open Azure DevOps and create a new organization if there is no existing one.
5. Now create a new project as shown below

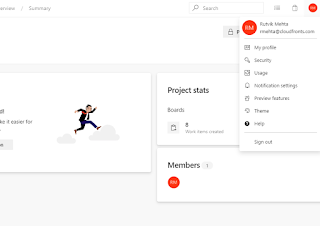
6. Now you need to set up a security token by clicking on account info>security
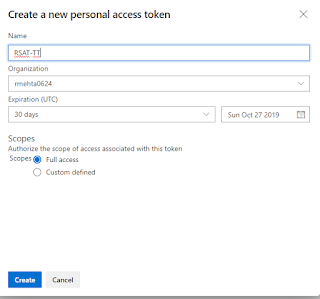
7. Once you create the token, save it as you will not be able to access it again when you want to use it.
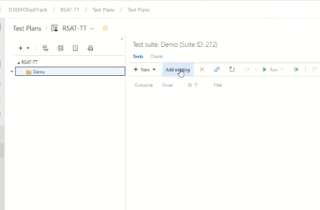
8. Once that is done, go back to the main page and create a new test plan. Name it as RSAT-TT (or you can use any name)
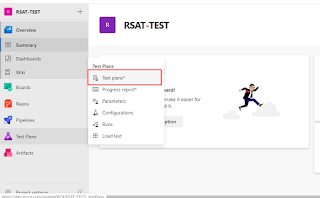
9. Now right-click on RSAT-TT and create a new suite you can name it ‘Demo’. Azure DevOps setup is done.

10. In the Azure DevOps site URL mention the Organization name that you setup in Azure DevOps. And in the Personal access token field paste the token that you had earlier saved.
11. Click on continue to select the project and continue, Save.
12. Now you need to deploy it to the environment
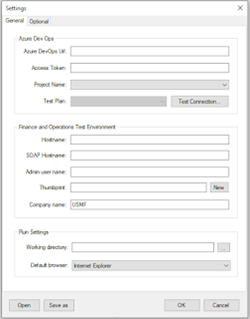
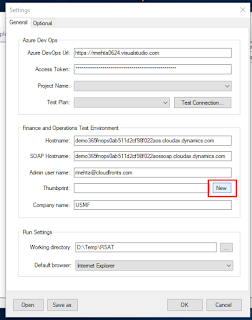
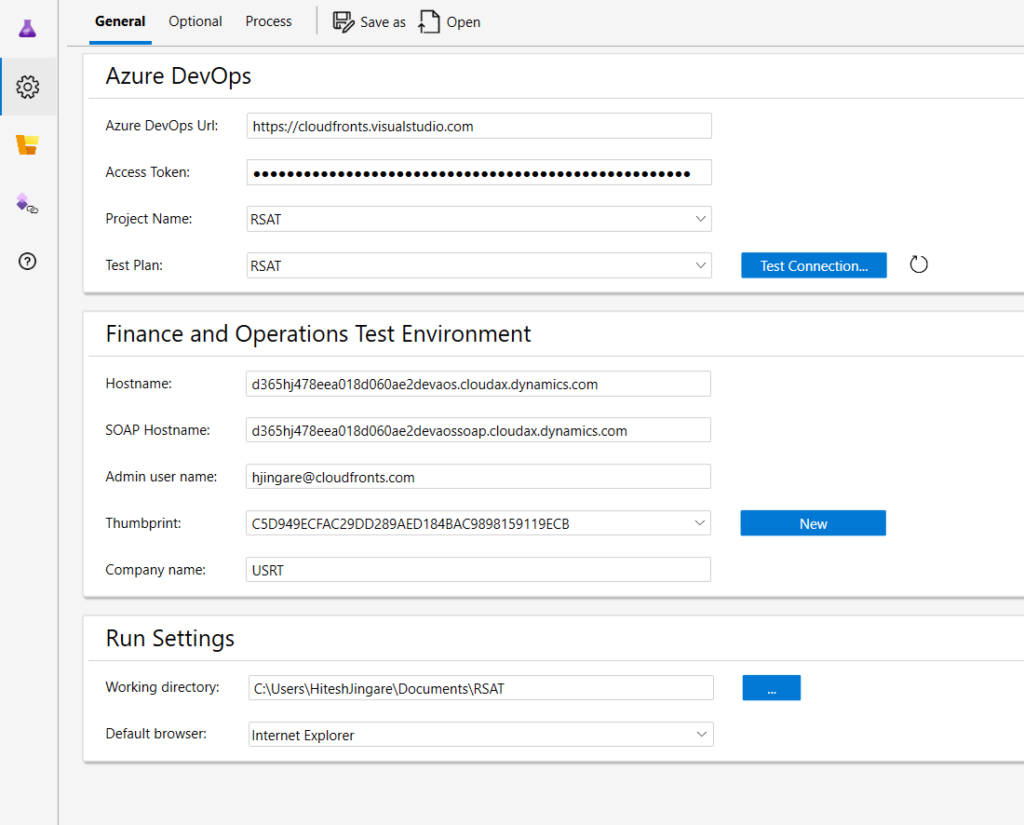
13. Next, open the Regression Suite Automation Tool, Go to settings
In the Azure Dev Ops Url field copy it from the LCS Access token should be the security token you had copied. Click on Test connection so the Project name and Test plan will populate.
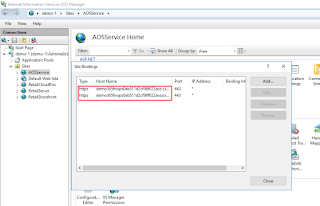
14. Now run VM. You will find Hostname and SOAP Hostname by going to IIS and then right-clicking on AOSService>Edit bindings. Copy both the Hostname and in Hostname and SOAP Hostname fields paste these values in step 16
15. Admin username should be the username you use to login to your environment.
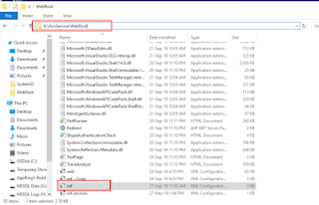
16. To generate Thumbprint click on New and save at any location and then copy the generated certificate to the VM
17. Open the copied certificate and install it on the local machine at personal and Trusted Root Certification Authorities locations.
Now Open the wif file in admin mode in notepad from the given location of VM
In the wif file find whether CN name=127.0.0.1 exists or not.
If not, copy the selected portion and paste it below the same authority block.
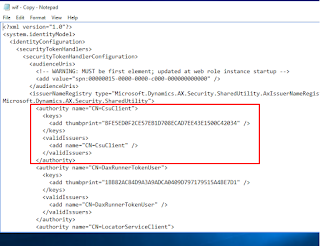
Now add modify those lines as follows:-
<authority name=”CN=127.0.0.1″>
<keys>
<add thumbprint=”F46D2F16C0FA0EEB5FD414AEC43962AF939BD89A”/>
</keys>
<validIssuers>
<add name=”127.0.0.1″ />
</validIssuers>
</authority>
( Note: Add thumbprint of installed Certificate in wif as shown)
Final steps include
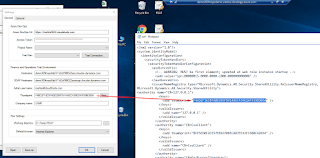
- Copy the thumbprint from RSAT settings (which was generated when you click on New) and paste it in wif file in your VM
- Then Mention the company name
- And Working directory
- Set the default browser as internet explorer
- Save as and ok
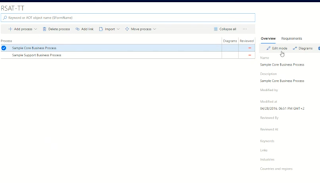
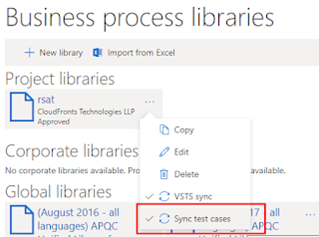
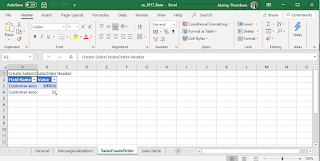
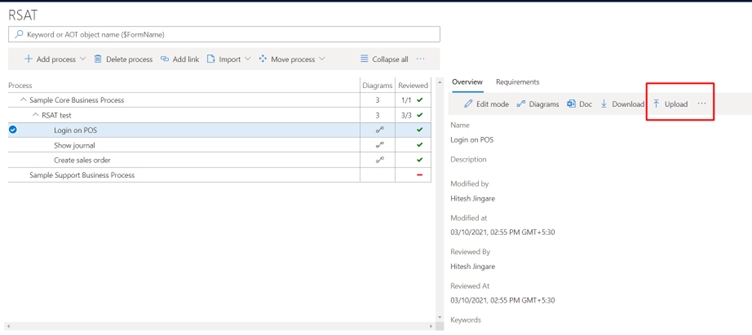
18. Next, Go to LCS open business process modeler and create a new Library

19. Name it as RSAT, go to edit and rename the process as required and you may add a child node to it by clicking on Add process.
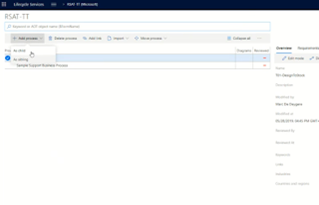
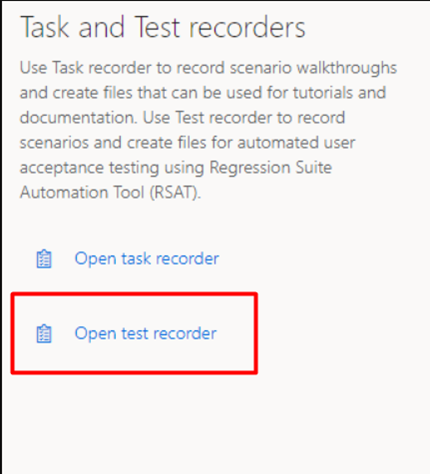
20. Now go to Finance and operations, go to test recorder
21. Create a recording by clicking on create a recording and perform the operation and then click on the stop button. Name it as per your need then Save it to Lifecycle services or Save this to PC option. Click ok
22. Now go back to LCS in the project library and click on the requirement, tab check it’s syncing
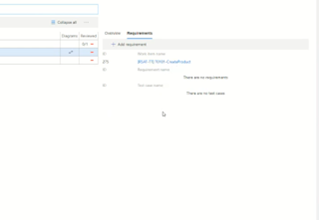
23. Now Sync test cases and VSTS sync
24. Next go to Visual studio DevOps, test cases, click on Add existing
25. Then click on the run query and click on Add test case
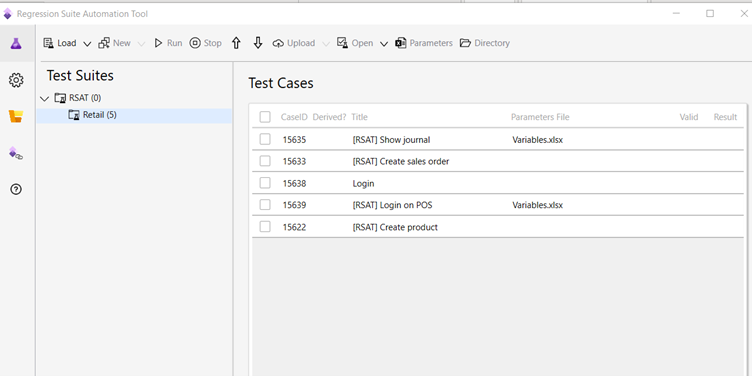
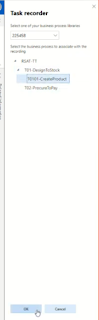
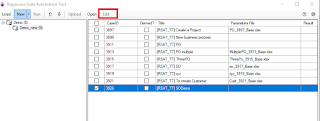
26. Now go to regression suite automation and load the test and download test cases. select test and click on new and generate test execution parameter files
27. Then click on the edit option for the older version to edit values in excel
For older version
For newer version

Now edit metadata for test in an excel file and save and close
Now Run the test
after this step, the automatic session for the test is handled by selenium where the browser will perform steps as test cases
28. Then run the test and after it’s completed successfully click on upload (Note the result as passed)
POS RSAT
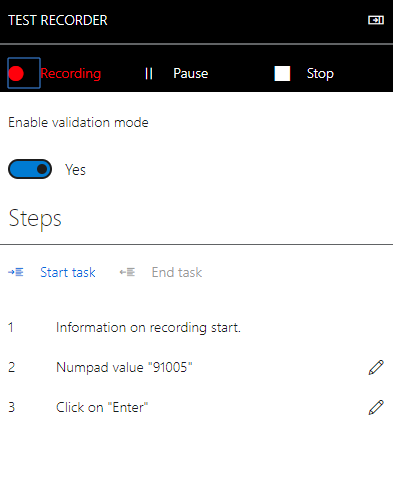
Follow these steps to create a new recording by using the test recorder:
- Launch Cloud POS.
- Select the hamburger icon on the left pane and select Settings. Don’t sign in to Cloud POS. The sign in step must be recorded as part of the test recording flow, so you need to launch the recorder before sign in.)
- On the Settings page, in the Task and Test recorders section, select Open test recorder.
- Select Create a new recording.
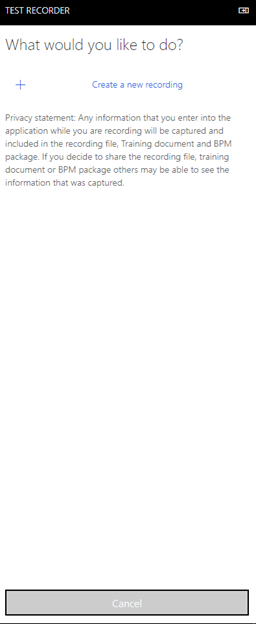
4. Enter a name and description for the recording, and then select Start.
The test recorder enters recording mode, and the recording session begins. The test recorder pane shows information and controls that are related to the recording session.
Perform the needed actions in the POS user interface.
Download options
After you end a recording session, you can download the recording by selecting Save to this PC.
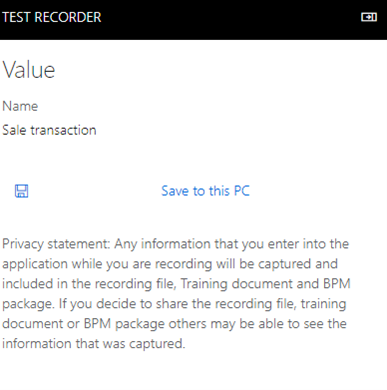
Upload that .axtr file in the business library.
The .axtr file is saved to the local file system. You must manually upload this file to LCS or Azure DevOps and then either delete it from the file system or secure it.
To upload to Azure DevOps directly:
- Change the .axtr file extension to .zip.
- Open the .zip package.
- Inside the package there will be file with name Recording.xml. Upload the Recording.xml to the test case in Azure DevOps. Don’t upload the entire .zip or .axtr package.