Creating Learning Path for Dynamics 365
Introduction:
This blog explains how to add learning path to your solution.
Prerequisites:
Dynamics 365 (online – latest version, or Dec 2016 update installed).
Steps to be followed:
- Steps for enabling learning path
- Steps for adding users to Learning Path Authors
- Creating Learning Path content
- Stpes to create Guided Task
- Steps to create Sidebar
1. Steps for enabling learning path:
- Opt-in to Learning path by going to Settings->Administration->System settings (under General tab).
- Select Yes for Enable Learning Path and Enable Learning Path Authoring. Confirm that Use Custom Help for customizable entities and Append parameters to URL are set to No.
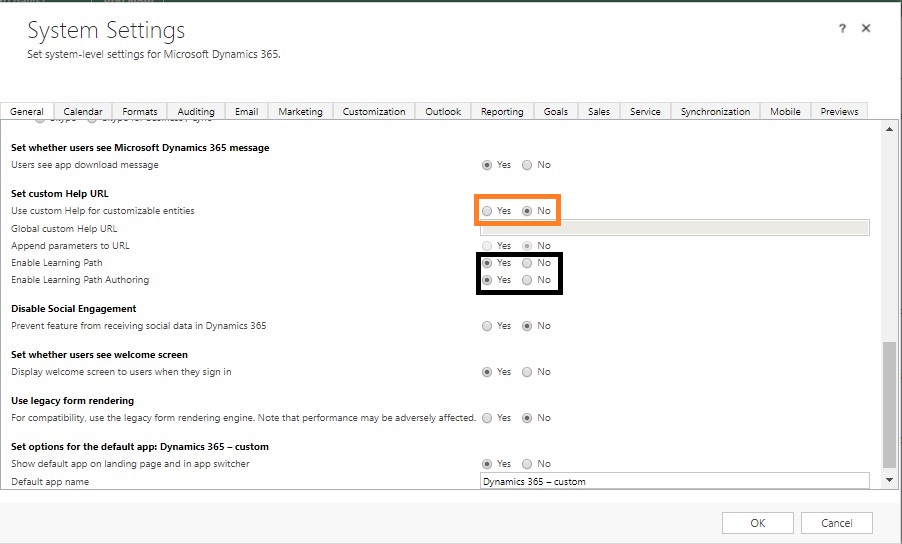
- OK.
2. Steps for adding users to Learning Path Authors:
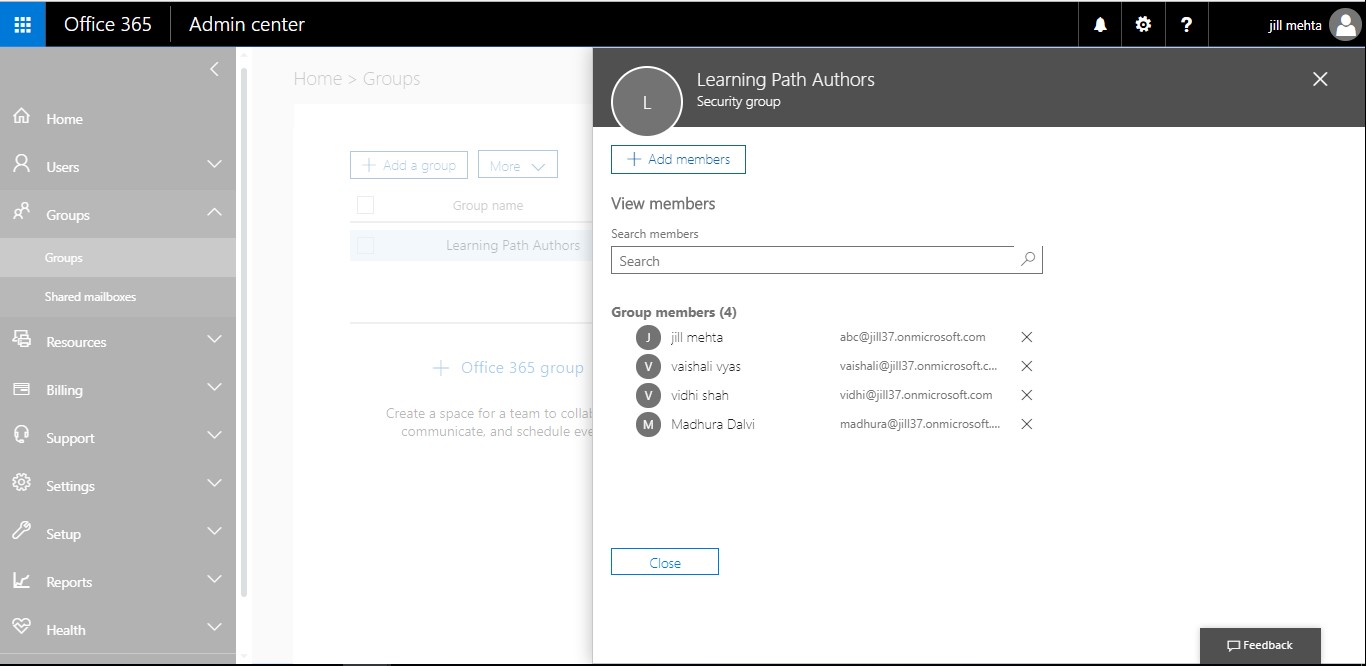
- Go to Admin Portal.
- In Admin center Groups->Learning Path Authors security group.
- Click Edit in the Owner row to add owner of the group.
- Click + Add Owner, and then select the user from list or search for the user(s).
- Click Edit in the Members row to add users to the group.
- Click + Add members, and then select the user from list or search for the user(s) you want to add to the group.
- Save and close.
3. Steps for Creating Learning Path content:
- Go to help.
- Click on content library button
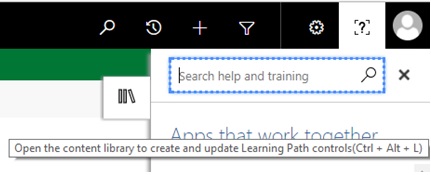
- Content Library will open.
- There are two types of learning path content:
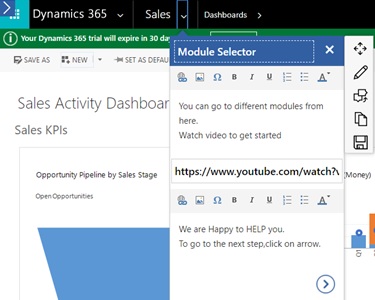
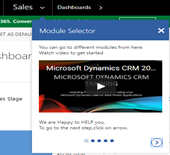
- Guided Task: Interactive “bubbles” which form a sequence to provide help or guide users on specific tasks.
- Sidebar: Vertically formatted help content, which is initially shown as a “table of content” with items that the user can expand, revealing relevant webpages, videos, or links to existing guided paths content in Dynamics 365.

4. Steps to create Guided Task:
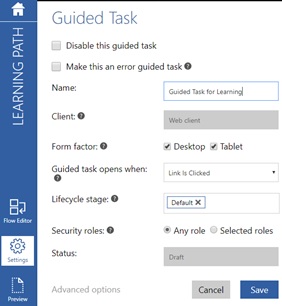
- Click on + Guided Task to create a new Guided Task.
- Fill Details.
- Save.
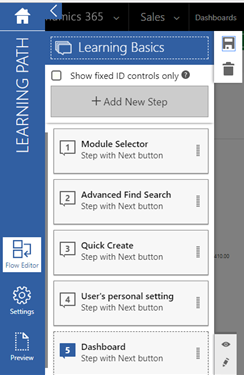
- Click on + Add New Steps to add steps to your Guided Task.
- Step with Next Button: This step has a Next button that can be used to navigate to the next step in the flow.
- Step with User action: This step does not have a Next button. The user is prompted to click the UI element on which the step is pinned.
- User action with Next Button: This step does have a Next button. Clicking the Next button has the same effect as clicking the UI element on which the step is pinned.
- Learning Step: This step can only be at the end of a guided task flow.
- Drag and drop the step where you want.
- Give step title.
- Click on content type to add content it can be text or video.
- Save.
- Repeat step number 5 until all steps are added.
- Click on Preview to see how it will work before publishing.
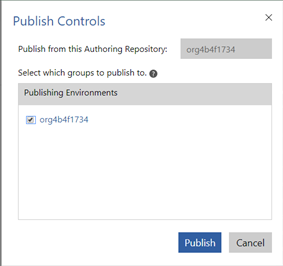
- Click on publish select your publishing environment.
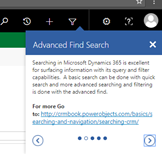
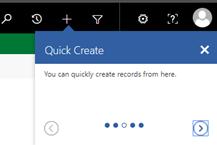
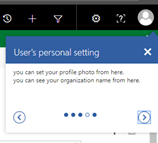
Output of Guided Task:
5. Steps to create Sidebar
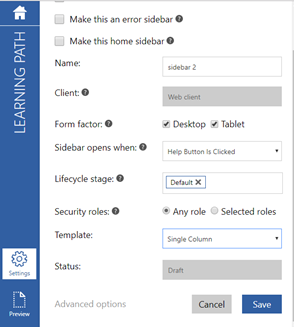
- Click on + Sidebar to create a new Sidebar.
- Fill Details.
- Save.
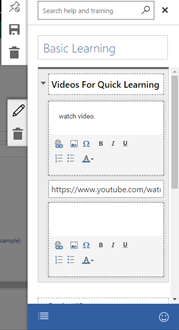
- Select the section and add what type of content you want to add in that.
- Repeat step number 4 to add more sections to sidebar.
- Click on Preview to see how it will look.
- Click on publish select your publishing environment.

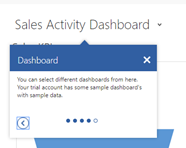
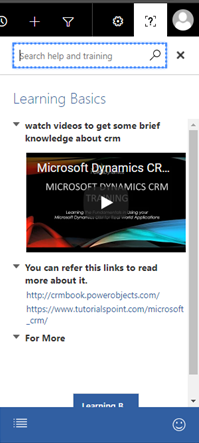
Output of Sidebar:
Conclusion:
Using learning path newly created users can easily navigate through the system with ease. It provides basic guidance to the users.
