Creating Content Packs in Power BI
What are content packs?
Content packs let users package up and share your own dashboard, reports, and datasets with your co-workers. It can be useful where a user needs to regularly distribute reports to team instead of sending email request repeatedly.
Content packs are easy to find as they are all in one location, the content gallery. And since they’re part of Power BI, they leverage all the great features of Power BI including interactive data exploration, new visualizations, Q&A, integration with other data sources, data refresh, and more.
Difference Between content packs and sharing dashboard
Content packs are different from dashboard sharing which gives your co-workers read-only access to your dashboard and any associated reports.
Steps for creating content packs
Here we have two Pro Power BI user account. One with name as Kailas where we will be creating content pack and publishing to another Pro Power BI user account Ashish. Ashish can view the content pack and personalize/customize to create his own local copy. Steps for doing the same is as given below:
Step 1:
Log in to your Power BI account and on top right corner click on ‘Create Content Pack’ as shown below

Step 2:
Here you can specify email address to share your content pack with either specific members or group. Also select dashboard that needs to be shared via content pack. Automatically it will select related reports and dataset. Click on ‘Publish’


Step 3:
On another Power BI user account click ‘Get Data’ and under ‘My Organization’ click ‘Get’

Step 4:
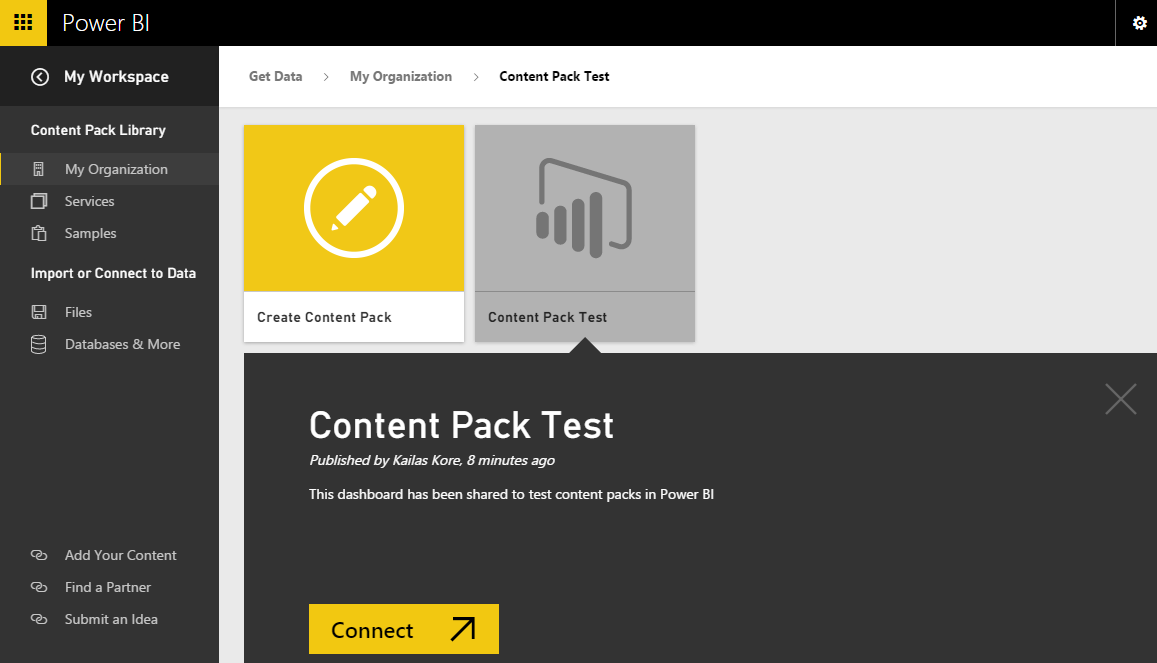
Here you can see the name of the content pack shared. Here in this case it is ‘Content Pack Test’. Later click connect

Step 5:
You can see dashboard, reports and dataset shared here with * marked

Step 6:
Once you click on dataset, it will prompt you with the below message. Click save and it will personalize to create a local copy so that user can play around and save any work done.


You can also check content packs created by clicking on ‘View Content Pack’ as shown below

For more details you can also refer the link given below:
