How to read files from SharePoint and store in Azure Blob Storage
Introduction:
After reading about the Integration from SharePoint à Azure Blob storage from different blogs on the net (most giving a similar approach) I came across a common error which most following these blogs might face. This is well explained as follows.
Problem:
SharePoint sometimes by default creates a Temporary Folders in our Library Structure. This can hamper our simple logic of SharePoint to Azure blob Integration. In gives an error with status code 404 and error message “File not Found”. This problem mainly occurs due to the logic app not being able to traverse though your SharePoint Library Properly. How to solve this?
Solution:
The best approach that one can follow is – Get a List of Folders from your SharePoint and filter this Array and Pass the details from this filtered array to get file contents from SharePoint and later Integrate them to Blob. This is well explained in the steps below.
Step 1: Create a new Azure Logic App.
Step 2: After it’s done deploying, click the Logic app designer from the left pane.
Step 3: Click the + New step button.
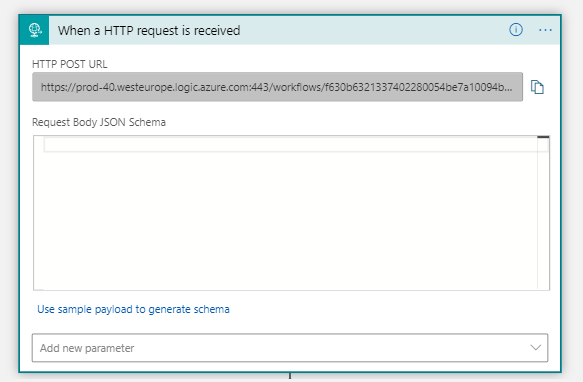
Step 4: Select ‘When an HTTP request is received’ block. The URL will automatically be generated once you save the logic app.
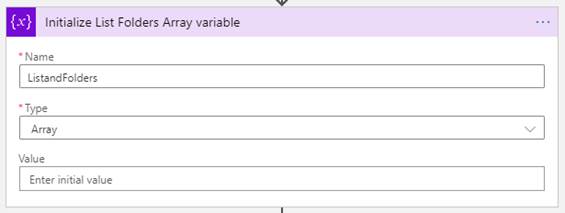
Step 5: Add an ‘initialize variable’ block and configure it as follows to initialize an array variable.
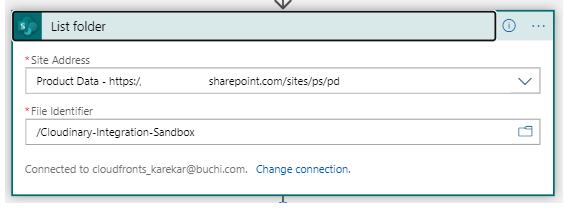
Step 6: Add a SharePoint block called ‘List folder’. This activity will return a listing of all items in the specified folder. Add the block with your required Site Address and File Identifier.
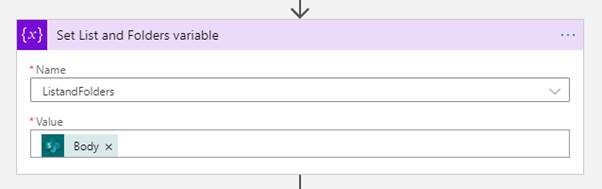
Step 7: Assign the Body of output of List Folder block to ‘ListandFolders’ variable using ‘Set Variable Block’.
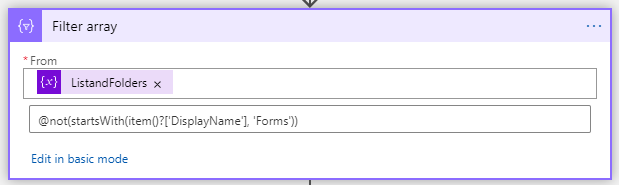
Step 8: Add a Filter Array Block to filter files from that library and avoid navigation to the hidden folder (In my case there is a ‘Forms’ hidden folder in my Cloudinary Integration Sandbox Library which I don’t want to read). Here I have used doesn’t start with condition.
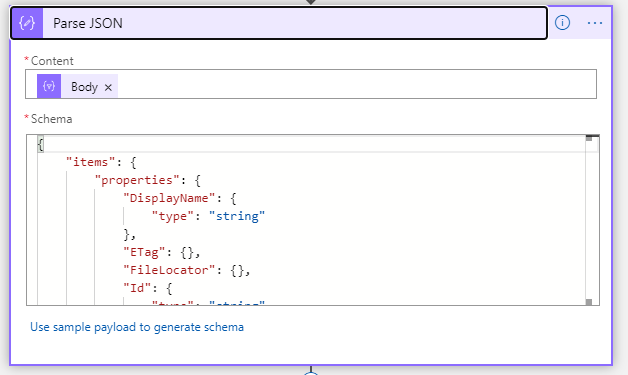
Step 9: Add a ‘Parse JSON’ block with output body of Filter array block passed in Content and required json schema generated with help of output of previous block.
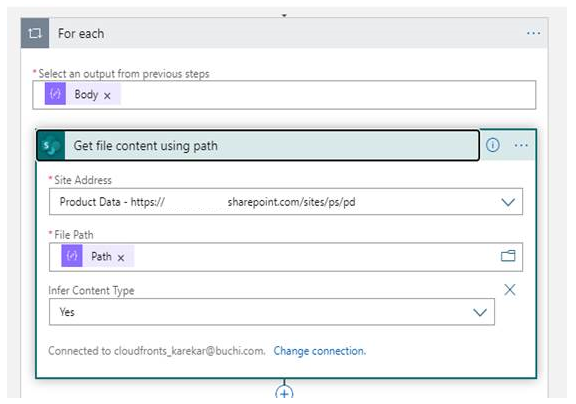
Step 10: We will need a For each activity to handle each file listed in the previous step. Pass the Body in ‘Select an output from previous steps’. The easiest way to do this is to add a new SharePoint step called ‘Get file content using Path’. Provide the site address and use the ‘Path’ from output from ‘Parse JSON’ for the File Path.
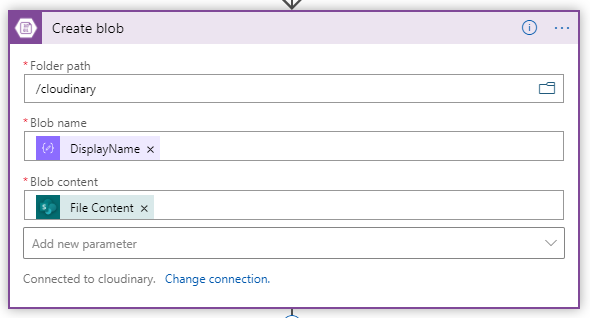
Step 11: Add the ‘Create blob’ block. Provide the Folder path, which in this case is “/cloudinary”. Additionally, the Blob name should be the DisplayName from the Parse JSON activity and the Blob content should be the File Content from the Get file content step.
Step 12: After final configuration the Logic app looks like following.

Conclusion:
Thus, we have created a Logic App for transfer of files from SharePoint to Azure Blob Storage, without writing a single line of code. Also, we have resolved the errors which one might encounter following a blog Post like the following:
Or
Or
