Clienteling in Dynamics 365 Retail (Commerce)
Many retailers, especially high-end specialty retailers, want their sales associates to form long-term relationships with their key customers.
The associates are expected to know about these customers’ likes and dislikes, purchase history, product preferences, and important dates, such as anniversaries and birthdays. Associates need a place where they can capture this information and easily find it when it’s required.
If this information is available in a ‘single view, the associates can easily target customers who meet specific criteria.
For example, they can find all customers who prefer to shop for handbags, or customers who have an important event approaching, such as a birthday or anniversary. Or if a customer had bought a gift for her husband then the cashier/associate can ask the customer if her husband liked the gift.
In a nutshell, this will allow the stores to create a relationship with customers on a personal level.
This is bound to make customers happy as they will begin to think that they matter and they are being looked after. Such practice will directly impact the sales Here is how you can set up Clienteling in d365 Commerce.
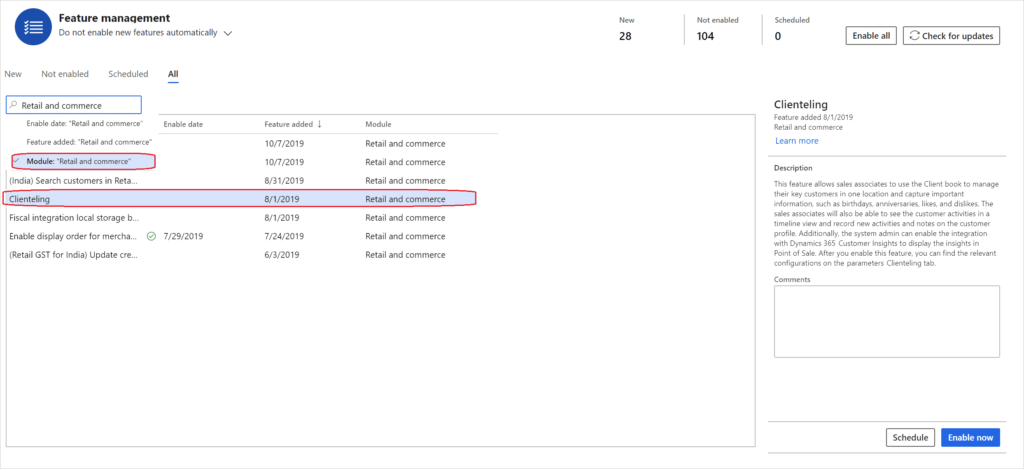
- In the Feature management turn on the clienteling functionality in your environment
- Turn on the Clienteling feature by selecting Enable now.
- On the Commerce Parameters page, on the Number sequence tab, select the Client book identifier row. Then, in the Number sequence code field, select a number sequence. The system will use this number sequence to assign an ID to client books.
- Create a new attribute group that contains the attributes that you want to capture for customers who are managed in client books.
- Define the required attributes as Can be refined. Sales associates can then use these attributes to filter their client book.
- On the Commerce parameters page, on the Clienteling tab, in the Client book attribute group field, select the attribute group that you just created.
- To capture activities that occur at the POS, define the activity types on the Activity types page (Retail and Commerce > Customers > Activity types).
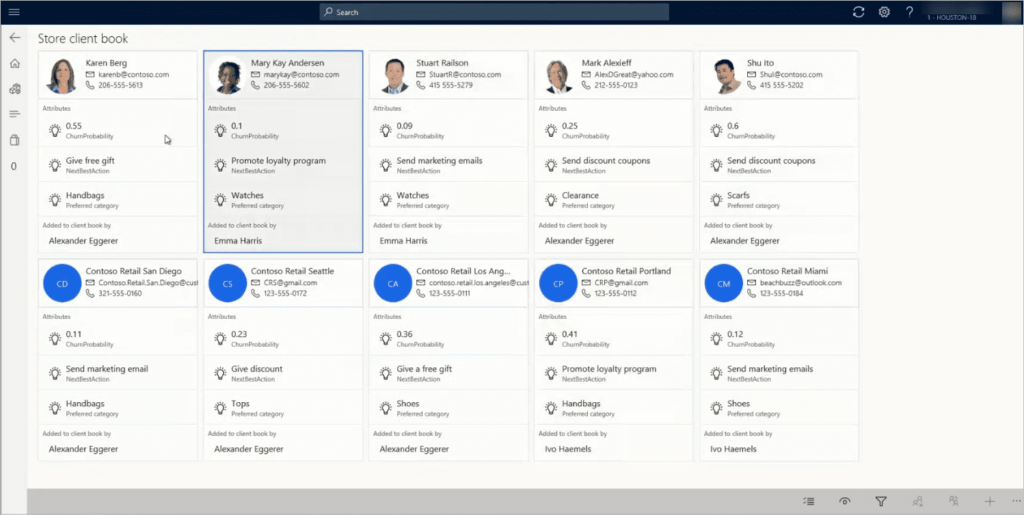
- Add two buttons to the appropriate POS screen layout, so that sales associates can view their own client book and the store client book. (Store client books include clients from all client books of all associates who share an address book with the store.) The corresponding operations are named View customers in client book and View customers from store client books, respectively. Three additional operations that are related to client books are available. These operations determine which associates can add, remove, and reassign customers from the client book. They are named Add customer to client book, Remove customers from client book, and Reassign customers to a client book, respectively.
- Run the following distribution schedule jobs: 999.
- After you’ve completed this procedure, sales associates can open the customer details page at the POS, and add customers to their client book, view and capture activities and notes for customers, and target customers by using customer and client book attributes to filter the client book.
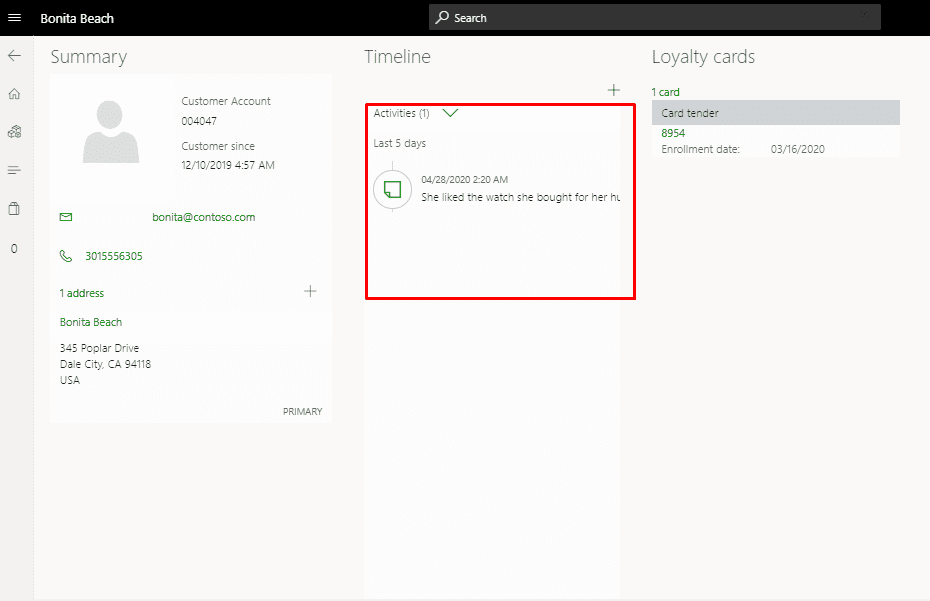
Cashier can search for a customer and he would be able to see and add notes of customer account which will allow the store person to offer a more personalized experience to the customer
Hope this helps!
