Category Archives: Others
What do you do when your NAV 2017 Job is not triggering through Job Queue Entries
Microsoft Dynamics Nav Integration is one of the most popular ERP solutions that most of the medium and large enterprises use today. It is an ERP solution that is not only easy to learn but is easy to learn and implement. Your staff is going to become a lot more efficient when they use this ERP solution. Microsoft is one of the best companies in the world for all the right reasons. This software contains some of the best and unique features that will not only raise the productivity of the staff but will also improve your performance. But, if enterprises want to enjoy the benefits that come from this ERP solution, they need to plan on upgrading Dynamics NAV to a cloud-based environment. Introduction: Working with failed Scheduled Jobs can be a tiresome process. This is exactly the case where one of my clients has an Invoicing & Payment Jobs which run once a day and Job Queue Entries fail to trigger these Jobs. No Errors in the Logs, No Execution Entry, Simply No Way of Figuring it out as to why Job didn’t trigger. Contacting Microsoft Support, they are asking to simply Upgrade the Application to the latest version. Which is not a preferred option as the database size is around 200GB. Let’s see how to resolve this in a smarter way. Pre-requisites: Microsoft Windows Task Scheduler Microsoft Windows Powershell Microsoft Dynamics NAV(Administration Module for PowerShell & Development Environment) Books & References: https://docs.microsoft.com/en-us/powershell/module/microsoft.dynamics.nav.management/?view=businesscentral-ps Demonstration: 1. Building Objects to Run through a Codeunit: As you know that Job Queue Entries support Reports and Codeunits and NAV Administration Module only supports Codeunit. So, in order to make it work, create a Codeunit to execute all the Reports and code units. 2. Creation of PowerShell Script: This PowerShell Script executes with the help of NAV Administration to Run the Codeunit. Prior to running the script, you need to set the Execution Policy. Syntax: Invoke-NAVCodeunit <Codeunit No.> – ServerIntance <ServerInstanceName> -CompanyName <Company Name> -Force 3. Setting Up Task Scheduler Triggers: By Setting up the Triggers, you can decide recurrence to execute the Codeunit. It can be Hours, Daily, Weekly, Monthly, One-Time or Infinite. You can also set the time for precise execution. 4. Setting Up Task Scheduler Commands: Whenever we execute the PowerShell Script through CMD, we run the commands as follows. Command: PowerShell.exe <PS Script File Path> Here, we pass the PowerShell.exe into the script and PS Script File Path as a Parameter. Conclusion: Thus, using NAV Administration Module, Power-Shell and Task Scheduler I was about to replicate Job Queue Entries functionality. Although this works perfectly for NAV and Business Central – On-Premise, it works for Business Central on SaaS. In my upcoming blog, I’ll also show we can achieve this. Hope you guys find this blog useful 😇
Share Story :
How to Run Jobs manually in Microsoft Dynamics 365 Retail
“Run Jobs” – as the name suggests is a process between Retail Channels and Retail essentials through which we transfer data between channels and database. Please Note: Jobs Run at a specified time which may be different for every Retail Scheduler. Be aware of what the time is set for jobs to run automatically. Running jobs at a specific time requires setting to be done so that we can schedule a specific job to run at specific time. It can be easily done manually. You’ll have to follow the below steps: Step 1: Go to distribution schedule or Channel database in Retail Dynamics 365. If the job doesn’t run from distribution schedule run it through channel database. Step 2: Go to download sessions and make sure your Job is available or in applied state. If it is in available state, go to “Batch Jobs“. Step 3: Now you will have to find the same batch job that you were searching and need to run it at a specified time. Step 4: Here, since the Job is in waiting state, you need to change it’s scheduled date and time to current time. This change must be according to the time at which you want your job needs to be run. The specified time will make your job run immediately. Step 5: You can check if Job is being applied in “Download sessions” whenever required. Step 6: You can also change how often the job should run from going to Recurrence. Step 7: Only things highlighted in Red boxes should be checked. Hope this helps!!! Thank you! Please feel free to post any doubts you have.
Share Story :
Creating Custom Error Log Table in SSIS for OLEDB Block And Kingswaysoft Dynamics CRM Block
Introduction This log error will help us to understand and fix an issue as quickly. There are three main phases in an SSIS ETL execution life-cycle to catch errors: When data is being extracted from source systems When data is being transformed When data is loaded to the target systems Customized Error Handling also avoids the failure of Package during Runtime. It allows the package to be executed successfully and the Errors can be checked later from the Customized Error Log Table which you create to know what problem exactly occurred. Our Scenario For demonstration purpose, we will consider a Units Integration Map for Integration of Units from SQL to Dynamics CRM. In this Blog, we will Create a Customized Error Log Table in SQL and Catch the Errors from SQL (Source Block) and Dynamics CRM (Destination block). The Map for Unit Integration is as follows: Customized Error Handling in SSIS Execute the following query and create a customized Error Log Table in SSIS: CREATE TABLE [dbo].[ErrorLog]( [ErrorID][uniqueidentifier] NOT NULL default newid() primary key, [Entity] [varchar](250) NULL, [Record_Id] [int] NULL, [RecordName] [varchar](250) NULL, [ErrorDescription] [varchar](500) NULL, [DateTime] [datetime] NULL ) ON [PRIMARY] The structure of Table is as follows: ErrorID Entity Record_Id Record Name ErrorDescription DateTime Primary Key of Error Log Table. (System Generated) Unit UnitId Unit Name Error Message Error Log Date Error Handling at OLEDB Source Block: Step 1: Add a Script Component to catch the Error Description, Error Log Date and Entity. Select Transformation and click on Ok. Step 2: Connect the Error Output (Red Arrow) from OLDEB Source to the Script Component. Select “Redirect row” for all columns in the Error and Truncation Columns to redirect Error Output to Script Component. Step 3: Configure the Script Component as following: In Input Columns section Select Error Code and Error Column. In Inputs and Outputs section Add following Columns Column Name Data Type Length ErrorDescription Unicode string [DT_WSTR] 500 ErrorLogDate database timestamp [DT_DBTIMESTAMP] —- Entity string [DT_STR] 50 In the Connection Managers Section add a new connection and select your SQL connection In the Script Section click on Edit Script. After a minute a New Editor Window will Open. Here you have to copy and paste the following Script inside the “public override void Input0_ProcessInputRow(Input0Buffer Row)” section. Code Snippet: try { Row.Entity = “Unit”; Row.ErrorDescription = this.ComponentMetaData.GetErrorDescription(Row.ErrorCode); Row.ErrorLogDate = DateTime.Now; //If an error occurred due to Check Constraint, the ErrorColumn would be 0, and that error affects the entire row. Hence there is no specific column for that error if (Row.ErrorColumn == 0) { Row.ErrorDescription = “An error that affects the entire row”; } //If an error occurred due to Data type, then errorcolumn name would be updated. else { var componentMetaData130 = this.ComponentMetaData as IDTSComponentMetaData130; if (componentMetaData130 != null) { Row.ErrorDescription = componentMetaData130.GetIdentificationStringByID(Row.ErrorColumn).Replace (“Customer Target.Inputs[OLE DB Destination Input].Columns[“, “”).Replace(“]”, “”); } } } catch (Exception ex) { Row.ErrorDescription = “Unable to get Error Column Name”; } Click on Save and then Close the Window. Step 4: Add a Data Conversion Block to avoid any Truncation Errors because of Data Type Conversion between NVarchar and Varchar Data Types of the Error Description Column. Select ErrorDecription Column and select Data Type as String. Click on OK. Step 5: Add an OLEDB destination block. Configure your OLEDB Connection Manager and Select the Error Log Table which you had created in SQL Server. In the Mapping section do the following Mappings and click on Ok. Error Handling at Dynamics Destination Block: Step 1: Perform the Steps 1 and 2 as specified above in Error Handling at OLEDB Source Block. Step 2: Configure the Script Component as following: In Input Columns section Select Error Code, Error Column and CrmErrorMessage. In Inputs and Outputs section Add following Columns Column Name Data Type Length ErrorLogDate database timestamp [DT_DBTIMESTAMP] —- Entity string [DT_STR] 50 In the Connection Managers Section add a new connection and select your CRM connection: In the Script Section click on Edit Script. You have to copy and paste the following Script inside the “public override void Input0_ProcessInputRow(Input0Buffer Row)” section. Code Snippet: Row.Entity = “Unit”; Row.ErrorLogDate = DateTime.Now;\ Click on Save and then Close the Window. Step 3: Add a Data Conversion Block to avoid any Truncation Errors because of Data Type Conversion between NVarchar and Varchar Data Types of the Error Description Column. Select CrmErrorMessage Column and select Data Type as String and length as 500 i.e. according to the length of columns SQL. Click on OK. Step 4: Add an OLEDB destination block. Configure your OLEDB Connection Manager and Select the Error Log Table which you had created in SQL Server. In the Mapping section do the following Mappings and click on Ok. Checking the Error Occurred during Integration You can see the Error rows passing through the Error Output and being logged in our Error Log Table. Open the Error Log Table to check the Errors Occurred. Now you can easily identify the errors occurred during Integration process from your Custom Error Log Table and solve them to have successful Integration results.
Share Story :
Windows could not start Scribe Service [Solution]
Error: You may face an issue in Scribe where the Scribe Services are not starting or are stuck in the Start state and an error pops up after a while as follows: Without the Scribe Services we cannot use either the Console or the Workbench to develop integration maps. Following is the Solution to resolve the above issue. Solution: Right click on the Scribe AdminServer service and select Properties. Select the Log On Tab and click on This account. Browse and select that Windows account which has been setup as the Scribe Service Account. This is generally the same account with which Scribe has been installed on your machine. Follow steps 1, 2 and 3 for the remaining Scribe services as well. Restart your machine. Conclusion: After restarting you should be able to start your services. Make sure you start your Scribe services in a sequential order and you should be able to open your Scribe Console now.
Share Story :
Generating Image dynamically in SSRS Report from CRM
Introduction: It is possible to Fetch images from CRM’s entity records using Fetch XML. This can be done using Notes attachment in CRM and the steps to display the Image in your report are pretty simple as well. Steps: Attach your image to a note under your respective entity in CRM In your Visual Studio copy paste the following code in your Query Designer <fetch mapping=”logical” output-format=”xml-platform” version=”1.0″> <entity name=”annotation”> <attribute name=”subject”/> <attribute name=”notetext”/> <attribute name=”filename”/> <attribute name=”filesize”/> <attribute name=”documentbody”/> <attribute name=”annotationid”/> <attribute name=”mimetype”/> <attribute name=”objectid”/> <filter type=”and”> <condition attribute=”mimetype” value=”%image%” operator=”like”/> </filter> <order descending=”false” attribute=”subject”/> </entity> </fetch> Add an Image Control in your Report. If you want to generate multiple images then you can add the Image Control under a Table Go to Image properties and select the image source as Database. Under field select documentbody and select your MIME type to whichever image format you want it to be Click on preview and your image should be rendered in your report Conclusion: Thus you can store images in your CRM and generate dynamic SSRS reports with these images easily.
Share Story :
Salesforce field not visible in Scribe Insight Integration
Introduction: There may arise a scenario where after creating a connection to Salesforce, a field that exists in Salesforce isn’t visible in your Scribe Insight DTS. This can happen because of multiple reasons. In this article I have listed down 3 of the most likely reasons why your SFDC field is not visible in Scribe Insight. Three Probable Reasons: Reason 1 The first reason can be that a custom field was created in your SFDC after you had created your SFDC connection in Scribe Insight. To fix this follow the steps mentioned below: Go to Connections in your DTS Select your SFDC connection Select Edit -> DTS Connection Settings -> Adapter Settings and click on Refresh Metadata. Your custom field should now be visible. Reason 2 The second reason can be that the field-level security has the visibility disabled for that field. To fix this follow the steps mentioned below: Log into SFDC classic and select Setup Go to Build -> Customize -> Object (Eg. Accounts, Asset) -> Fields Click on the field that isn’t visible in Scribe Insight and select Set Field-Level Security Make sure the field is visible for your Profile Reason 3 The third reason can be that you are just using an old API of Salesforce and that field did not exist for that version of SFDC. For example the Asset RecordTypeId field was added in the later versions of Salesforce. To fix this follow the steps mentioned below: Go to Connections Select your SFDC connection and click on Edit Select Change Connection Update the version of the Salesforce URL to the latest version that your SFDC supports
Share Story :
IT and Business Systems for a Small and Medium Business in India
In this article, we highlight the key cloud-based IT and business systems that a Small and Medium Enterprise in India could use to improve efficiency while keeping costs low. These are also systems that we use to run our day to day operations. 1. Office 365 Business Premium – Email, Microsoft Office, Document Management, Security and Microsoft Teams. 2. QuickBooks Online Accounting Platform 3. PayBooks – India Payroll with integration to QuickBooks Online and optional biometric attendance integration. 4. Zoho Recruit – Recruitment Platform 5. Zoho People – HR Management Platform 6. Exotel – Cloud EPBAX business phone system 7. QuickHeal firewall for our network. Additional systems (once you grow to a certain size and need more processes and reporting. We use all of the below systems)– 1. Microsoft Dynamics 365 – Dynamics 365 Sales with lead integration with your website (typically WordPress). Dynamics 365 for Customer Support. Dynamics 365 Customer Support Portal for customer self service. Dynamics 365 Project Service Automation for Project Management. MailChimp for Marketing Automation or ClickDimensions. 2. PowerBI Analytics Platform. 3. GoToMeeting and GoToWebinar for Meetings and Webinars. Connect with us!
Share Story :
Enable IIS to deploy Web Service
Introduction: In this blog, we will have a look on how IIS can be enabled for Web Service Deployment Steps to be followed: 1) Search for Windows features in your PC. 2) Check the box for Internet Information Services and click OK. A confirmation screen appears. Sometimes there are cases after the above procedure that it does not works. At such times, check all the options in windows features under IIS.
Share Story :
Markdown Language use in Postman Documentation- Part 2
Introduction: In previous blog, we discussed some formatting for Markdown language. Some more display of text-stuff will be discussed in this blog. Blockquotes: A blockquote is a sentence or paragraph that’s been specially formatted to draw attention to the reader. To create a block quote, all you have to do is preface a line with the “greater than” caret (>). For example: Input: >Blockquote (You can mention your code here) Output: If your quote spans multiple paragraph, then you need to add caret on each line. Input: >Blockquote (You can mention your code here). >Multiple quotes added Output: Lists: There are two types of lists, ordered and unordered To create an unordered list, you’ll want to preface each item in the list with an asterisk ( * ). Each list item also gets its own line. For example, a grocery list in Markdown might look like this: Input: * Milk * Eggs * Salmon * Butter Output: An ordered list is prefaced with numbers, instead of asterisks Input: 1. Milk2. Eggs3. Salmon4. Butter Output: List with one more depth: All you have to do is to remember to indent each asterisk one space more than the preceding item. Input: * Milk products * paneer * cheese * Barfi * Butter * Buttermilk Output: Paragraphs: We can forcefully insert a new line by clinking enter. You can accomplish soft breaking of lines by inserting two spaces after each new line. Sometimes there is need for formatting paragraphs in lists. This can be achieved as below Input: 1. Crack three eggs over a bowl. Now, you’re going to want to crack the eggs in such a way that you don’t make a mess. If you _do_ make a mess, use a towel to clean it up! 2. Pour a gallon of milk into the bowl. Basically, take the same guidance as above: don’t be messy, but if you are, clean it up! Output: Tables: Input: | Left align | Right align | Center align | |:———– |————:|:————:| | left | right| center | Output: Blocks: Blocks can be added by adding 2 spaces before line starts. Input: POST/GetOrderStatus Output: Highlighted text: Input: `renders` Output: Some online Markdown editor links listed below where you can try all the styling. http://markdownlivepreview.com/ https://dillinger.io/ Hope you find this helpful!
Share Story :
Markdown Language use in Postman Documentation- Part 1
Introduction: Formatting text in Markdown has a very gentle learning curve. It doesn’t do anything fancy like change the font size, colour, or type. All you have control over is the display of the text—stuff like making things bold, creating headers, and organizing lists. Styling: Bold and Italic: 1) To make a phrase italic in Markdown, you can surround words with an underscore (_ ). For example, _this_ word would become this 2) To make phrase bold in Markdown, you can surround words with two asterisks ( ** ). For example, **really** word would become really Headers: To make headers in Markdown, you preface the phrase with a hash mark (#). You place the same number of hash marks as the size of the header you want. For example, for a header one, you’d use one hash mark (# Header One), while for a header three, you’d use three (### Header Three). Input: #Header one ##Header two ###Header three ####Header four #####Header five ######Header six Output: Header one Header two Header three Header four Header five Header six Making links: There are two different link types in Markdown, but both render the exact same way. The first link style is called an inline link. To create an inline link, you wrap the link text in brackets ( [ ] ), and then you wrap the link in parenthesis ( ( ) ). For example, to create a hyperlink to www.github.com, with a link text that says, Visit GitHub!, you’d write this in Markdown: [Visit GitHub!](www.github.com). The other link type is called a reference link. As the name implies, the link is a reference to another place in the document. Here’s an example of what we mean: Input: Here’s [a link to something else][another place]. [another place]: www.github.com Output: Images: Images also have two styles, just like links, and both render the exact same way. The difference between links and images is that images are prefaced with an exclamation point ( ! ). The first image style is called an inline image link. To create an inline image link, enter an exclamation point ( ! ), wrap the alt text in brackets ( [ ] ), and then wrap the link in parenthesis ( ( ) ). (Alt text is a phrase or sentence that describes the image for the visually impaired.) For example, to create an inline image link to https://www.cloudfronts.com/wp-content/uploads/2018/03/PostmanDocumentation.png, with an alt text that says, Postman Documentation, you’d write this in Markdown: 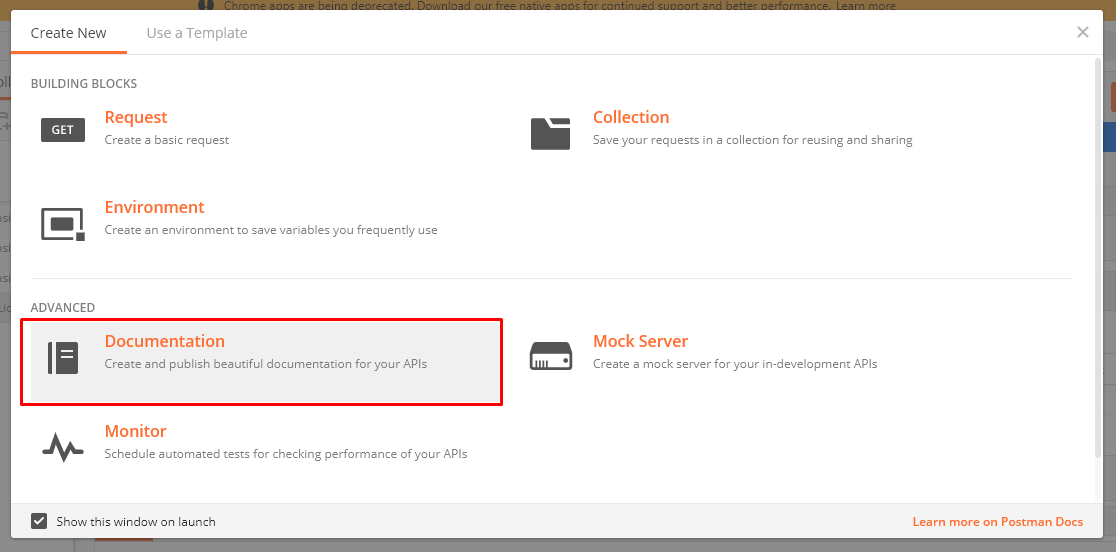. For a reference image, you’ll follow the same pattern as a reference link. You’ll precede the Markdown with an exclamation point, then provide two brackets for the alt text, and then two more for the image tag. At the bottom of your Markdown page, you’ll define an image for the tag. Input: [Reference Link][Postman Documentation] [Postman Documentation]:https://www.cloudfronts.com/wp-content/uploads/2018/03/PostmanDocumentation.png Output: Reference Link In the next blog, we will discuss some more styling related to MarkDown Language.
Share Story :
SEARCH BLOGS:

Anil Shah, CEO
Lorem ipsum dolor sit amet, consectetur adipiscing elit. Ut elit tellus, luctus nec ullamcorper mattis, pulvinar dapibus leo.